Showing posts with label Battle Report. Show all posts

Saturday, May 14, 2011

4k Warriors of Chaos versus 4k Skaven

As always, click on the pictures to expand them (and also let you see the stuff cut off by being to the right of what shows)

Lately I have been doing a lot of experimenting. After dozens of games with the Warriors of Chaos, I pretty much know their ins and outs. I like the way they play. I like playing with that army. But I also like to switch it up so I have had a couple games using dwarfs, a couple using High Elfs and even my debut appearance with the Beastmen.

Kev and I wanted to play a big game, and the only army I could do that large without proxying was back to the one I love best, the WoC. I do not mind proxying within reason...frankly, with our groups financial resources and time commitments, it is pretty much a must to keep the game going. But if I can play with or without it, I will go the one route almost every time.

This is mostly for me...so I can keep straight in my own mind which models are where as that determines my tactical options.I tend to forget stuff sometimes and it becomes problematic when I make key mistakes because I forgot which of my units I meant to do something with.

Well, the first time I put the list together, I centered it around Galrauch. I love dragons, but seldom used them in 7th edition as they tended to be pretty over powered. In 8th, I feel fine about using them as they are not nearly as strong (?).

Unfortunately, one of my old bugaboos came back to strike that plan down; modeling. I hate metal models with a passion. Almost impossible to glue together without pinning...which I have yet to successfully do. So I tried to magnetize the wing...and it fell off this morning. So I had to retool the list.

Changing it around to keep a dragon in cost me my beloved Dragon Ogres. On the other hand, I think it came up with a build much stronger than the one with Galrauch.

I knew kev would bring either the Ogres or Skaven. If the Ogres, then I would basically just keep everything within 6" of my BSB and try to keep him from getting impact hits on the charge. If he brought Skaven I would try to get my unit of Chaos Warriors into his H-pit Abomination along with the Shaggoth and hope, and try to stay away from the Doomwheel and Plague Furnace.

He brought the Skaven. then we rolled a classic; the Battle line. I have not played this set-up in 8th yet, so even though it is "old", it is kind of new, too...

I feinted with my set-up, planting some Marauder Horsemen on my extreme right flank. With their Vanguard move and their role as Fast Cavalry, they could get where I needed them when I needed them. Their entire job was to go after anything he had like the Warp Lightning Cannon (present), Jezzails (present), or miscellaneous weapon teams I did not want hitting my knight (present, present, present, present).


By the time we were done setting up he had the Doom Wheel on my extreme left, Jezzails on the right, and kind of spread across the field. I packed in the center. The plan was drive up the middle and, depending on how the battle was going, use a block of tzeentch-marked, hand weapon and shield Chaos Warriors to hold him up while my Knights did the heavy lifting.

Warriors of Chaos....ASSEMBLE
I won the role for first turn. This made me happy.

Warriors of Chaos Turn 1
Perception matters when playing Warhammer. For example, in my various games I have;
1) thrown everything I had at the Abomination, had it kill my character designed specifically to kill the HPA, finally killed it by focusing over 1k points on it...only to have it come back and kill my Shaggoth and a few other things. I fear the HPA
2) Had weapon team after weapon team remove my armor saves. I fear them.
3) Had Queek single-handed wreck a 10-man unit of Knights. I fear him,
4) Had the plague furnace wipe out everything it touches. I fear it.
5) Had the Doomwheel  do mass carnage and only be stopped by a lucky charge with my Knights. I fear it.

So my perception of the Skaven is their specials are unkillable, they do not let me have armor saves, and they are good at putting down the WoC.

So my goals were to keep him from shooting as much as possible, take every shot I could at his tough stuff with magic, and keep as much as possible stubborn.

My Marauder Horsemen thundered forward, one unit planting itself in front of the Jezzails, the other in front of his Warpfire Cannon. I then rolled 12 for power dice.

Usually first turn magic is not so helpful. In this case I had flown my dragon riding General/Lord Wizard up close to him hoping to get lucky and Infernal Gateway his Plague Furnace away. But then I remember the damage Queek has done...Infernal on his Storm Vermin.

I roll 6 dice, do not get irresistible, and he chooses to feedback scroll it. I get 11 hits,  strength 7. Oh, I wish those were reversed...anyhow, I put down 9 Storm Vermin. This is already one of the 2 or 3 best magic phases I have ever had. 

I then get off Pandemonium, his attempt to Dispel fails. I then use my last dice for Flickering Fire at the Warp Lightning Cannon, he again rolls low and I wound it 3 times. Wow. I got everything off. That is the best magic phase I have ever had. And it will only get better.

Time for shooting. I often forget about my throwing axes. I prefer them to javelins because, though their range is shorter, their strength is higher. When I hit I want to wound. And hit I do. All 5 hit the Warp Lightning cannon. Only 1 wound sticks....but that, combined with the Flickering Fire, is enough to get rid of the Warp Lightning Cannon. I do a happy dance.

On the right my shooting is equally good as I hit the Jezzails 4 times, do 2 wounds and he flees. Lots of shooting I will NOT be facing in turn one. I do not even care when the H-cannon scatters wide of anyone.

We both agree this was a tremendously successful turn for me.

Skaven Turn 1
His doom wheel careens towards me a whopping 14". Feeling jealous, the HPA manages a 13" move which crashes into my Marauder Horsemen. Some Storm Vermin come along for fun.

Queek charges my Marauder Horsemen. I am about 4" from him. I can flee, be within range of my BSB, recover and shoot next turn. For one of the few times I can recall, instead of standing, I flee. And my plan falls apart when I flee 7", he charges 11". Oops.

Oh, well, they cost 71 points, they got rid of his deadly 90 point Warp Fire Cannon. I will take that trade. And now Queek is where I want him...not charging me.

His Weapon team with the giant propeller tries to charge the Shaggoth. I am not familiar with that weapon...I thought it was another shooter, but I guess it would have done massive damage. Failed charge is good for me. the jezzails rally. He makes a general advance, time for magic.

He tries wither. I dither about it for a while, counting and recounting his power dice and my dispel dice. With a Dispel Scroll in my back pocket, I stop it.

He attempts Cracks Call...doubles! Miscast! I use Infernal Puppet to modify it to a dimensional cascade, his level 4 disappears, and to add insult to injury...I dispel the spell.

His doomwheel then mis-fires and rolls 15". That takes it off the table. We cannot find rule and decide to make it same as pursuing off table. He is having horrific luck so far...though the 14", 13" and 15" moves on 3d6 kind of tell you he is rolling high...just at the wrong times.

So as you can tell, we were uncertain about one rule. I was dead wrong about another. I had in the back of my head you could not shoot on the turn you garrison a building. You can. His Globadiers unleashed on my Dragon-riding Wizard. Fortunately, of his 13 globes, only 1 wound got through, and that to my Dragon. But it was an unexpected, terrifying wound.

My T6 meant nothing, the ward on my rider was pointless. His globes could put me down with ease.

In close combat, his HPA impact kills 1 Marauder Horsemen, his Assassin another, then he rolls Avalanche of fists, gets 12 hits, 9 actually hit (needing 4s), 6 wound, bye-bye all my fast cavalry in one turn. He is actually winning at this point, 142 points to 90.

Warriors of Chaos Turn 2
I have lots of choices. I am the Warriors of Chaos...there is really only one answer. Charge! This turn I remember to test leadership for my cannon. He fails. And rampages....3". Triple ones. I roll an unbelievable number of those.

I also manage just 3 power dice.I channel another.

As I charge, he chooses to flee with his weapon teams. My Knights fly through and redirect onto his storm vermin. I combo-charge his Queek unit and am uncertain what to do with the dragon. I had declared a charge on that unit, but by choosing a different order kept him out of the combat, I should have flown him away from the globes. I erred.

I get Infernal off with irresistible on the Globadiers. I again roll 11 hits, this time at S8.; 9 Globadiers are no longer with us. I feel better.

My knights in his clan rats on the left do what Knights do, he dies in droves, though he does kill one Knight. He flees, I chase. He runs 6", I chase....5". Grr.

My other Knights and Chaos Warriors also do well. I challenge with my unit champ; Queek fails to kill him when I parry save, everyone else dies, Queek flees, I pursue, and a feared model is no longer with us.

At this point I am feeling pretty good. He is down his general, his BSB, rats are fleeing, and I control the center of the field.

Then again, he still has the Plague Furnace, Doom Wheel, and HPA...all of which I struggle to wound.

Skaven turn 2
I knew I had given my flank with the Chaos Warriors. I hoped to run further. Then again...with a 3+ armors, 5+ ward, I should last a while. I just want to keep his Furnace busy while I wipe out everything else.

His fleeing rats leave the table, the Furnace charges into the Warriors, slaves combo charge me, the Doomwheel moves a more modest amount.

He gets a big number for Withering on the Warriors. I do not dare chance it, I burn my scroll. He then mis-casts with the seer thanks to Pandemonium, I modify it to reduce levels, he is now a level 0. Magic is ruling for me.

The Doomwheel fires and I lose a Chaos Warrior. Well, that is not a terrible outcome. It could have been much worse. For two turns I have lost just one Chaos Warrior total to his Doomwheel.


Well, he gets 6 Impact hits, 5 wound, and my vaunted armor save/ward save combo saves....zero. Zip. Nada.

*Sigh*. I finally get saves...good saves...and whiff on them all. Then his shroud attack wounds 6 more, this time I save....1. 10 Warriors down before I have lifted a weapon.

But the Warriors step up to the plate. I kill 8 of his slaves. None of his plague monks. His slaves get 1 wound through, but this time I save it. then his wrecker ball of doom gets 10 S5 hits off, 7 of them wound, and I save just 3.

Well now. I had 21 Warriors about 30 seconds ago. Now I have 3. That 3+/5+ combo is not so good, is it then?

My BSB being right there lets me stay, being stubborn and all. So, uh...some good news, I guess.

Meanwhile, he had also charged my knights with his rats. I allocate one attack to his unit champ, kill it. Then I do 8 more wounds. The horses kill 4 more. His 20 attacks hit 13 times, wound 7, and I save 5. So yeah...3 knights dead already. Out of 5. He flees, I overrun.

Warriors of Chaos Turn 3
I had about as good of turn one as could be believed, beginning to end. Then his plague furnace and clan rats turned it around. I have a badly damaged unit of knights, an all but dead unit of warriors...who I had counted on holding him up for three or four turns...I was reeling.

It gets even worse when the H-cannon fails his test again and pounds forward about 6". I just have not had good success with that thing.

My Knights, being frenzied, and my Warriors, being dead, combined to now give me a path to attack his Plague Furnace. I had really mixed emotions about this. The furnace is unbreakable, does massive casualties throughout combat, and I have no faith in my ability to take it down no matter how much I throw at it.

Ah, smurf...charge. In go the knights. Shaggoth flanks the slaves. Chaos Warriors flank the slaves. They are going down. The dragon rider charges his last globadier. Might as well.

I remember to roll Wulfrik and his 47 marauders on, they come behind his recovered jezzails.


I roll 3 for power dice again. I whiff on Infernal. I cast Purple Sun towards his Doomwheel but it falls short by 24". Well...it was a long shot, but I had little else to do.

My Sorcerer lord takes care of business and the Globadier heads for the bone pile.

His shroud attack does what it does...kills 2 knights, a chaos warrior and a slave. My BSB kills the Seer on the bell. I am happy.

The knights do 7 wounds. The Chaos Warriors, with little left to attack, swing at the Furnace and manage a wound. Those facing the slaves then kill 4. His Plague monks manage 7 wounds and this time my armor works great, saving 6 of them and my ward the 7th.

The furnace then whacks the warriors thrice, I save none, many more dead.

His slaves explode, killing one of the fresh block of warriors and 2 plague monks.

Skaven turn 3
He charges the Shaggoth with some warlord guy. His clan rats charge the H-cannon. His HPA slams into my general on a dragon.  And then his feared shooting phase opens up.

His doomwheel is out of range, but the jezzails kill a Chaos Warrior. then his weapons teams with the templates each kill 9 Marauders. 18 guys killed in a heartbeat. *GULP*

I am really not liking this right now. His bell could kill my knights, warriors, and other warriors on its own. A 2 or 300 point model is tying up well over 1000. His 230ish point A-bomb is something I expect to kill my 700 point Dragon/Wizard in a couple of turns. I am unsure how the rats/cannon combat will go. And I have nothing left to deal with his doomwheel. I cannot withstand another turn of that lethal shooting with my Marauders.

On the other hand, I have a clear lead at this point. I have the situations I try to set up; I have vastly more force involved in 2 of the 3 combats from a points standpoint. I have an unbreakable unit hopefully holding up another unit for a while. And I have a clear magic advantage.

Close combat is a little better. His assassin and clan rats cannot wound the h-cannon. The cannon kills a couple rats.

His HPA only gets 2 impact hits, 1 wounds, and I ward save that. The Talisman of Preservation/mark of tzeentch combination to give me a 3+ ward is going to be HUGE. I get a wound through with my wizard, even though I get just 1 hit. Wow.

He then gets the flailing fist result, and rolls a whopping 13 attacks. 5 wound....and I ward save all of them. The Dragon hits all 6 times, 4 of them wound, he regenerates two. In just one turn I put 3 wounds on him. I start to feel hope.

The plague furnace kills another knight and warrior with its shroud attack. His Warlord wounds the Shaggoth 3 times, but I somehow save 2. Saves aplenty.

My BSB then wounds the Furnace 2 more times, the knights kill 11 plague monks, my Chaos Warriors kill the last 4 0plague monks, the Shaggoth wounds the Bell, and then I thunderstomp his warlord, but he saves one of the two wounds. The Furnace then hits the big block of warriors 8 times, I take 6 wounds and save just 3.

Warriors of Chaos Turn 4
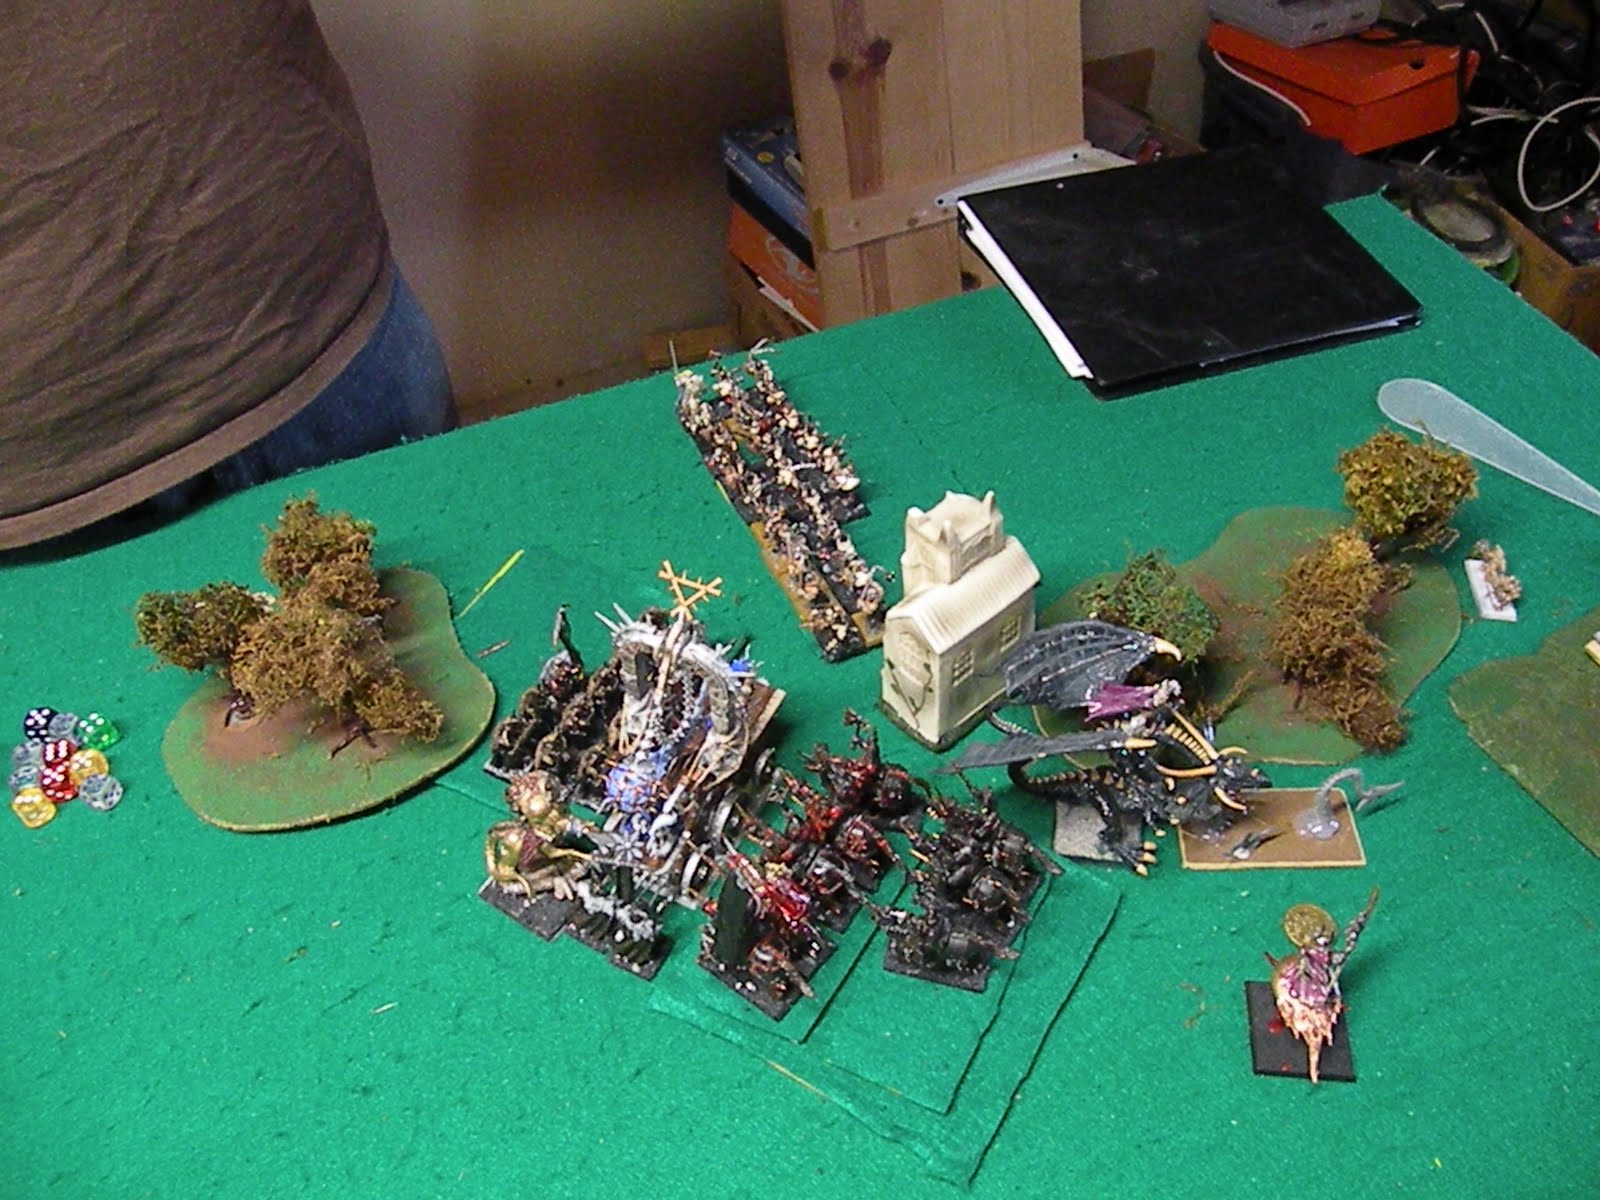
I move my Sorcerer on disc towards the HPA. I have a vague idea of using the flaming attack on the HPA to stop the regeneration.

My Marauders charge the jezzails who flee but are over-run and I hit his rat ogre thing which dies easily.

I then get Infernal off with irresistible. I do 10 S10 hits. I wound him 9 times. This will be it for the HPA...until he regens 7 of them! He still has 1 wound left. I just...can...not...kill...that...stupid...thing.

The great part is I modify the mis-cast to a 7. He is hit by the template. He is wounded by the template. Do I even need to mention he regenerates it? Stupid unbreakable, unkillable beast.

Meanwhile, the H-cannon decides to get rid of his annoying assassin but can only wound it once, losing a crewman in return.

The Sorcerer then wounds the HPA twice and...wonder of wonders...IT DIES! YES! Victory is mine! There is n stopping me now. It is gone and...what? He rolled a 6? It comes back...with 2 wounds...an inch away and ready to get more impact hits since he gets next turn...NOOOOOOOOOOOOOOOOOOOOOO

There is no stopping that stupid thing.

The bell wounds my Shaggoth. He has no plague monks left. My BSB wounds the Bell twice and the Knights finish it off. Shaggy kills his warlord.

Take that, Skaven rats!

Skaven turn 4
Skaven turn 4
The HPA charges back at my wizard on the dragon. His Doomwheel kills the last Chaos Warrior of my big block with its shooting.

I save his only impact hit. I which at him. He gets the "Avalanche of flesh" attack. Does the HPA ever do a reasonable number of attacks? I fail the I roll but ward it. He hits 7 more times, 6 of which wound, 5 of which I save. The Dragon then puts him down again, doing the 2 necessary wounds.

And he...comes back. As Rat Swarms, this time. Much better.

His Assassin kills another crewman. The Cannon kills the assassin.


Warriors of Chaos Turn 5

Okay,  at this point I am feeling pretty good. His doom wheel is not as tough as the Furnace, which I took down. Sure, I had to use 10 knights, an exalted hero, a shaggoth, some magic, and 31 Chaos Warriors...but I took it down.

I mean, sure, I was throwing as many as 23 S5, 49 S4, and 5 S8 attacks at it for multiple turns...but I took it down. Sure, I lost over 20 chaos warriors and a handful of knights...but I took it down. Sure, I....ah, smurf, who am I kidding. I am not confident in my ability to take down the Doomwheel in the next 2 turns.

At the same time...he cannot do near enough damage. I have wiped out almost his entire army.

The Dragon decided to leave the swarms for the knights, flew over them at his weapon team...which fled. I redirected onto his clan rats. The Knights charge the swarm.

And here comes the whiff factor. The BSB puts 4 wounds on the swarms...but the knights under perform. Completely. Four wounds. Wow, really? Fortunately, the horses do just as much, 4 more wounds, the swarm melts.

The cannon kills another storm vermin after he saves half the wounds.

Now we will see what a Chaos Sorcerer on a Chaos Dragon can do against ranked up Clan Rats. This is the type of situation I typically avoid...I like to combo charge and bring overwhelming force. I do not like things that might be close combats or risking 695 point models without being pretty sure I have the advantage.

However, the game kind of got out of hand a bit. He has done a lot of damage, but it has been spread out. So he has very few points at this juncture. So even if I get hammered, it makes it arguably a better game...and if not, it does not really matter a lot.

Well, all three of the Wizards attacks kill. He strikes before the dragon, but only wounds 1 time, which I duly save. Then the Dragon kills 5 with his breath, 3 with base attacks and 4 with his thunderstomp.

Totally epic. I did a whopping 14 casualties in one round...he cannot stand, I pursue off table, his non-fleeing weapon team breaks. I am duly impressed by the power of the dragon.

Skaven Turn 5
He fails to rally anything, his weapon teams flee off the field.

Shooting will be bad; Shaggy is the closest to his doomwheel, and is immune to the effects,. He tries to restrain. Fails. He fires...or rather, mis-fires. He takes 6 S6 hits. His doomwheel blows itself up.

His last weapon team mis-fires...blows up.

He does manage to put a wound on the H-cannon, though, so at least that went right.

Warriors of Chaos Turn 6
My Knights, being frenzied, must charge. The Scree slope forces dangerous terrain tests. My BSB duly rolls a 1, I do not ward save it. The others all pass.

He kills a Storm Vermin, in a challenge my champ kills his, my other knights kill 2 more, he kill the last Chaos Dwarf, then the cannon kills 4 more. He breaks, runs, flees table.

Skaven Turn 6


Conclusion
Well then. On the one hand, I am really not fond of tabling my opponent. On the other hand, I think Kev takes it better than anyone. And he thought it was an enjoyable game, so I am not going to dwell on that aspect too much.

What went right?

 Well, first off, my plan worked beautifully. His force ended up being split into distinct elements whereas mine was almost all centered and working in concert. As a result, I had 2-1/2 - 1 points advantages at almost every point of contact. This spread my casualties out very well to where I lost just three units despite taking dozens of casualties. Meanwhile, I got rid of some dangerous guys without taking much damage. Queek, I am looking at you here.

Second, I played very well. I can count on one hand the number of mistakes I made: forgot to use the warshrine on turn 1 (minor, not really relevant), forgot to roll LD test for the Cannon on turn one and to roll for Wulfrik on turn 3. I was able to minimize his shooting which let me get into hand to hand before he could whittle me down to manageable sizes.

Third, I had a fair amount of good fortune with lots of irresistible without being harmed by mis-casts, whereas his mis-casts cost him his level 4 and level 2 wizards. I also made a pretty fair number of saves. Of course, that meant he had a lot of attempts to wound me...but that is kind of the point of playing an army based around good saves. To make them. I am often disappointed when I either do not get to attempt saves or fail abnormally large amounts. This game I made a lot of saves and I enjoy that.

Fourth, he had some timely very bad fortune...like his low impact hits, his weapons teams mis-firing on command and his being struck repeatedly by miscasts that were devastating.

Regardless, this was an extremely entertaining game. In retrospect, it was a demolition beginning to end...but for about 4 turns it felt like I was fighting uphill. We had epic, grinding combats that lasted multiple turns. We had crushing charges and stellar defenses.

One great moment was when I smurf-slapped his HPA with 10 S10 hits and laughingly said, "You only need to regen 7 to survive" only to see him do just that. What a great, memorable moment.

Or seeing said A-bomb come back with wounds once and then again as a swarm. It began to feel like I would never be rid of that thing. I just did not know how weak swarms are.

Which leads me to another point. I often point out that person x or y is a better player than I am. Part of that has to do with research.

I don't.

I cannot tell you how many times in the game I had to ask wounds, strength, abilities, etc. of the various Skaven rats. I had no idea they even had a close combat weapon team. As he pointed out, the team had a giant propeller blade...I just thought it was another gun of some sort.

I also had no comprehension of the sheer destructive power of the template guys who nearly wrecked my Marauder horde.

Yet some guys in the group know the 'enemy army" nearly as well as they know their own. This is a valuable skill as it allows you to dictate who you want to fight against who, and when you want them to do so.

Looking back, I should have had everyone attacking the Bell, not the Monks (or Furnace...I actually think it was a screaming bell, not a plague furnace...) from turn one. But thinking I could not touch it, I let it live much too long. Once I got around to attacking it, I killed it in relatively short order. Not knowing the Skaven book very well altered in-game decisions.

So studying the opponent is a valuable tool for improving play. Not knowing them is a handicap. Though not necessarily a game-breaking one. It just makes it a bit tougher.


Overall, this was a very, very entertaining game. I was on pins and needles for 4+ turns....which in a 4k game means for about 5 hours. Great game, great time, thanks for the match, Kev.

Only one thing left to do; Survivor group photo

Saturday, October 24, 2009

Warriors of Chaos verus Lizardmen


Brought in my 2250 point no Special Character, no Dragon list. First up (and ultimately only up) I would face the mighty Lizardmen.

Our field had a tower in one corner and forest in the other in one deployment zone. In the right center of the field (from the side I would eventually get to choose) was some very difficult ground protected by some hedges. Meanwhile, in what would be my deployment zone were a hill on the right and shallow stream on the left.

This would ensure a compact deployment in the center of the field for me. With 6 units, some would be deployed behind others due to the crippling nature of the stream on one flank and rough ground on the other.

Ultimately, I decided to anchor one flank with Shaggy (my Dragon ogre Shaggoth, who has developed the unfortunate habit of dying every single game) and the other with 3 Dragon Ogres, a unit I was trying out for the first time. This gave me M7, S7 or S8 models on each flank, so monsters held no fear for me. Then I had to decide; the infantry blocks I desperately wanted to get into battle in front and the mounted troops behind or the Marauder Horsemen and Knights in front and the Marauders and Chaos Warriors behind. I honestly did not know which I would choose until I dropped the Horsemen in the left front of my line.


This basically locked me in to putting cavalry in front. Lizardmen armies essentially have to fight battles from 12" in due to their short range in firepower. So I could charge after they shot.

Meanwhile, Fullur spread a skink skirmish screen across his front, temple guard with Slann in the middle flanked by big Saurus blocks on each side, backed up by an Engine of the Gods and a unit of Terradons. Finally, he put a Skink Priest and small unit of Chameleon Skinks by the tower on my left flank.


By the way, about this point I wished I had gone with an early permutation of the list involving 3 blocks of infantry, 2 Marauders and 1 Warriors that I discarded for need to include a scroll caddy. I would love to have a game where Marauders go against Saurus and Warriors against Temple Guard. Oh, well.

He won the roll and elected to go first.


Lizardman Turn 1

He advanced the skinks a rather interesting 5", the 3 infantry blocks moving up 4". The Chameleon Skinks marched into the rough ground and his Skink Priest showed he could fly, heading to the stream on my left flank for cover.

The Terradons, for the express reason that, "because they can and I think it is fun", flew into the forest. This, by the way, is the type of play that makes me love our Team Starving Crazed Weasels gaming group. It really had no bearing on the outcome, but did reference and earlier rules discovery and discussion, and added some "color" to the game in a fun way.


He starts throwing magic around; gets off the spell allowing d3 re-rolls, adds 2. Then the skink on the Engine cast Celestial Shield on the Skink Screen. I had nothing it would affect, but he did not know that. Then the Slann cast Guardian Light with irresistible force. Had he not done so, i would have used a scroll, because psychology was going to matter I think.

He then casts Burning Gaze at Shaggy, but rolls a measly 3. He picks up the 1 and re-rolls it using one of his 2 re-rolls...and rolls a 1 again. Shrug, pick up the "2", re-roll it...and it is a 2. Yeah, that helped...and really set the tone for a game that would be full of wacky rolls and goofy but fun moments.

No shooting, he passes the turn.

Warriors of Chaos Turn 1

Mithridates (my General) sends the Marauder horsemen off to the left flank...and I make a serious mistake. I thought about going after his Skink Priest, but then remember how deadly Chameleon Skinks are...scratch that, WERE in 6th edition and go after them.

I have not used much Fast Cavalry, so think I hit on 4+ all the time more or less, forget to make it 1 harder for them being Skirmisher and a further -1 for being Chameleons. I roll 4 dice, 1 wounds, he is down a Chameleon.

Everyone else marches up the gut, though not their full range, most about 6-7". Like chess, I control the center of the table and am out of his charge range...except the Skinks who I will happily let charge me if they choose.

I then roll my 3 Power Dice trying to Dispel Guardian Light, needing an 8...and roll a 7. More on this in the next magic phase.

Lizardman turn 2

The Skinks advance to get in good shooting position on the Chaos Knights, the Chameleons advance to get close to the Marauder Horsemen. He advances the 2 Saurus units, but leaves the Temple Guard, trying to draw me in and get some flank charges.

His terradons fly over the Dragon Ogres, landing right behind them on my right flank.

His Skink Priest on my left flank continues to wreak havoc behind my lines, flying behind the Marauder Horsemen.


Magic

This time, he remembers to have the Engine of the Gods make the Lore of Heavens one easier5 to cast. Ironically, had he remembered this in the first turn, nothing else would have been successful for him...but my Dispel attempt would have succeeded. So his "error"worked to his advantage.

The Skink on the Engine tries the lethal Comet of Cassandra next to my Knights, but the casting score is not high enough. The Flyink Skink casts 2nd Sign, this time adding 1 re-roll...but taking 2 dice to do it. Another intriguing moment.

The Slann tries Burning Gaze against the Dragon Ogres, I roll dice and Dispel it.

In the shooting phase, the Chameleons twice wound the Marauder Horsemen, and I save but one, taking my first casualty.

Then his 10 skinks fire on my Knights...and fail miserably, garnering not a single hit. His Terradons will make up for it.

Not with their rock-dropping; they drop 8 rocks on the Dragon Ogres. Only 3 hit, just one wound goes through. But he then throws his Javelins,hitting 4 times, uses the re-roll which fails, of the 4, 3 wound, I save just 1 and take 2 wounds on my trial unit.

Chaos Turn 2: Time to get down to business

I turn Shaggy to charge the skinks, knowing they will flee and I will end up in his Saurus furthest off to my right. The Dragon Ogres, having circled the fence, charge, catching his Saurus flank. The Knights, having the Banner of Rage, have Frenzy and also charge the skinks.

And he makes the interesting (and probably correct) decision to let me hit his skinks, thinking it will redirect the charges, I think. *

This time I send my Marauder Horsemen after the flying skink. My Magic phase is short; I dispel the Remains in Play Celestial.


The Marauder Horsemen are deadly. Of my 4 attempts, needing 5s, 3 hit and all 3 wound...his priest is dead.

While the skink had done no actual damage, he had been a headache, as I thought he could use the skink to hit me with a magic missile cast by the slann, which could have hurt, coming from behind. Later conversation indicates this may not have been possible,...but it affected my thought process. The Marauder Horsemen were proving their worth!

Also, the possible worth of cheating...I think his Priest was in the stream, and if so should have benefited from a -1 to hit for soft cover. D'oh! My Horsemen look good when I play by my own rules....

Anyway, the mighty Shaggoth reels off his 5 attacks...and only 2 hit, though both do slay skinks. The Knights have a mighty 19 attacks, need 3s...and hit 13 times. The 7 dead skinks, horses finish them off, over-run...and the re-direct has mixed results.

Shaggy hits his Temple Guard head on, not getting into the juicy Saurus combat. The Knights hit the Saurus head-on...and since that is a fresh combat which has not been fought this turn, they get to immediately fight another combat, pursuant to the (cheesy) rules since the Dragon Ogres had yet to take their turn.

This just in, Knights are AWESOME and when they get to fight twice a turn, bad things generally happen for the enemy.

Mithridates challenges, the Saurus champ accepts, for the first time ever I get overkill, hitting just half of my attacks, but all 3 wounding unsaved. The other Knights kill 5 more Saurus, the horses kill another; Diphratus (the army Battle Standard Bearer) kills 2 more, the Dragon Ogres go 5 for 5, hitting 5 times and killing 5. That is a whopping 16 dead Saurus in one turn. He flees, the Dragon Ogres follow and catch him while the Knights...well, they run into the Shaggoth and stop right there.


Furthermore, the angle they are at combined with the width of his base means they will not be able to charge the Temple Guard next turn.

This was a very mixed turn for the Lizardmen. On the one hand, they lost a unit of Skinks and a unit of Saurus, and Shaggy got the charge on the Temple Guard.

On the other hand, ONLY the Shaggoth hit the Temple Guard, the Knights and Dragon Ogres are out of position, and my Warrior and Marauder blocks are still half way across the table.

Lizardman Turn 3
This was his most effective turn of the game, and it cost him heavily. (When I posted the photo below, I noticed how heavily...had I not moved the Knights, he very well might have flank charged THEM instead of Shaggy...which changes everything said below)


He moves the Engine of the Gods into ideal position. They are behind the Dragon Ogres, no charge there. He is close to the Shaggoth, who is locked in combat with the Stubborn Temple guard (who have a re-roll, making them effectively Unbreakable). Finally, he is close to the Chaos Knights, but because of positioning, the Shaggoth keeps them from chargin. In other words, his Burning Alignment will hit my 3 best units...and the Knights include my General and Battle Standard Bearer...while being in no danger himself.


Furthermore, he flies his Terradons behind my Knights for some fun little poison javelin throwing action.


He does make one choice I might have done differently; his remaining Saurus unit has a choice between dealing with my Marauder block or re-forming to flank charge Shaggy.
I personally would have gone after the Marauders; the Saurus would have forced them to choose between going with Shield for a 5+ save after strength modification, but only wounding on 5+, or having no armor but using their Great Weapons to wound on a 3+. Either way, the Saurus will have a chance of striking the Marauders and doing lots of wounds which force break tests.

At the same time, if he can break the Shaggoth, he will flank the Knights and possibly win by Static Combat Resolution.

I think he underestimated the power of a Stubborn with re-roll LD9 model and he later admitted as much.

Be that as it may, they reformed to get the flank charge next turn and the Chameleons moved forward.

Now for the magic phase, where he effectively lost the game...by being successful.

The Engine went with Burning Alignment and it was brutally effective. The Dragon Ogres take 3 wounds, killing one and leaving a second with just 2 wounds left. It doesn't touch the Shaggoth...but it does wonders against the Knights.

I had a large unit of 6 which, when the 3 characters were included, was really too wide because for some inexplicable reason, I went 8 wide with them. This made them hard to maneuver. It was a mistake. Fullur corrected that for me, killing 3 Knights with Burning Alignment.

Now, on the one hand, that was brutal. I just lost half of a 355 point unit in one moment with no way of stopping it or saving against it. It was proof to me of just how good the Engine is against my armies (seeing my Dragon Ogres going down did not hurt with that perception...they were taken specifically to deal with stuff like the Stegadon).

On the other hand, taking 2 Knights off one end and one off the other end...meant I now was not blocked off by the Shaggoth. So his greatest success turned into a Pyrrhic victory. I almost named my General Pyrrhus instead of Mithridates...oh, the irony.

Well, after seeing that damage, I figured this was going to be a key turn in the game. If he could break the Knight unit, it would mean the Shaggoth would probably run as it was the Standard that made him stubborn and with "only" 5 attacks, facing a unit with 3 ranks, outnumbering, unit standard and BSB in the Slann/Temple Guard, he was guaranteed to lose every combat even if he killed with every attack so it was vital to keep him next to my standard. I could not afford for it to run.

The Skink Priest on the Engine, emboldened by the carnage he had wreaked, unleashed Uranon's Thunderbolt on the hapless Knights...another d6 S5 hits with no armor save? Uh-oh...but he failed to meet the casting roll. Whew. Relief.

He cast some Blinding spell that would reduce the Shaggoth's attacks to WS1. I used my first Dispel Scroll. (probably a mistake:I should have saved it for Uranon or the Comet). He cast the lighter Magic Missile and I used all my dice to Dispel it. He then failed to cast Guardian Light and I used my last Dispel Scroll to stop Cleansing Flare.

Which left him plenty of dice to try the Comet which, to my tremendous relief, failed to get cast.

So magic was survived in what I thought would be the key turn.
His Chameleons then wound my Marauders thrice (including 2 with poison), I fail 2 tests and see a couple of them die.

The Terradons only get one poison attack through on the Knights which I save.

The Engine, still flush with success, poisons my Dragon Ogres twice, I save neither, and he kills a second Dragon Ogre in the same turn.

On to close combat. Shaggy goes ballistic, hitting 4 times and killing all 4, leaving only his unit Champion to attack back. The Champ shows why he is a champ, hitting three times and wounding twice, neither of which I can save. I then roll a 10...fortunately, my BSB is right there so I get to re-roll, and this time pass handily.
The Battle Standard Bearer paid for himself right there.

Warriors of Chaos Turn 3
No longer impeded by the Shaggoth, the Knights have a choice; flank charge the Temple Guard or go after the Engine. I do not want the Engine roaming around casting Burning Alignment, so I choose that.

I continue advancing my Marauder and Warrior blocks up the center of the table, my Marauder Horsemen ride over to reintroduce themselves to the Chameleon Skinks, and now they are inspired.

This time I DO take into account the penalties for Skirmishing and being Chameleons...and in 3 shots, score 2 6s, both of which then kill Chameleons.

Epic Close combat:last time I got into combat with a Skink Priest on an Engine, I had a daemon Prince with 5 WS8 attacks at S5. In 10 total rounds of combat (9 consecutive) I did a combined 1 wound. I never did wound his Stegadon or any skink rider. So I knew this wound be tough.

Fortunately, Mithridates was tooled up. He had 6 attacks with Frenzy, all would hit on 2+, wound on 2+ with a -3 to armor save, and on any failed wound, the Skink would have to pass a toughness test or else die...and do a S4 wound to everyone on the Stegadon. I liked my chances.

Of course, I then hit slightly less than true percentage, getting three hits through. Unsurprisingly, I wound all 3 times. He rolls three dice needing 5s to save...and saves them. All three. Every. Stinking. One.

What? Does taking a measly skink and throwing him onto a Stegadon give him the special rule, "Darth Weasels' killing machines cannot harm you, ward save 0+, cannot be modified in any way"? SO FRUSTRATING!

But not as frustrating as poor Fullur found it. Because my Chaos Horse, with just the 2 attacks, hits. Now, needing 3s to save....he fails them both and his Skink Priest dies, removing the Burning Radiance with it.

Whatever. Mithridates cannot touch you, but a weedy mount takes you down?

My Knights were similarly effective, with 4 of their 7 attacks hitting and, in a fit of great dice rolling, 3 of them wounding the Stegadon. He saves just 2 of them. Diophantus the Battle Standard Bearer hits 4 times...and fails to wound any of them. I had all the horses attack the skinks, and one skink went down.

Now he attacked back. The Stegadon wounded the Knights twice, but I saved them both. One skink somehow manages to get a wound on a Knight, but I save that too.

Save this moment;
He needs insane courage, does not get it, breaks, flees just 6", but that hits the dragon Ogres and he is destroyed, while the Knights pursue...but run into the Temple Guard. Since that combat has not been fought this turn, they immediately get to fight again. For those counting at home, this makes 4 times in two turns the Knights have fought which means the battle is going great for me.

Mithridates kills 4, his mount another, Diophantus continues his incompetent ways, hitting just once (though that kills) and his horse equals him by killing another temple guard. The Knights wound 6, he can save but 1, the horses wound another three, he saves just one. I have killed 14 Temple Guard in one frenetic, furious charge.

He gets to attack Shaggy next because Shaggy has a Great Weapon. They hit 3 times, wound once, and needing a 5, Shaggy saves. I am getting more than my share of rolls. Shaggy goes after the Champ, hits and wounds with all 5. Good night.

Remember that moment I said to save/ Lets re-examine it. He remembered at that moment that the Stegadon was supposed to be stubborn which means that, although he still failed the first roll, his second roll had included 2 dice totaling 5, so he should still be there.

I am a big fan of competitive games, not a fan of routs. Myself and Fixed Dice had to argue with Fullur at this point that the proper thing to do was put the Stegadon back in combat and put back all the casualties done to the Temple Guard.

Fullur, who is playing the Lizardmen, is arguing that he should pay the penalty for forgetting.

After much debate, and him saying that if the Steg stood, he still thinks the game is in doubt, we finally convince him to return it to its position and undue the ridiculous damage that should never have happened.

I am glad he did. Made for a much better game I think and I think it was the right thing to do in the spirit of Team Starving Crazed Weasels. I am very against cutthroat competition (ironic, I know...see regurgitation) and very in favor of doing whatever it takes to make the game better and more fun for both players.

So now it is Shaggy taking the break test since even with doing 1 wound (it was not a challenge, so no overkill). And for a second straight turn he fails it, rolling a 10 again. And again I pass on the re-roll allowed by the BSB being right there.

Lizardman Turn 4
His Saurus now flank charge the Shaggoth. He has taken three wounds, showing he is killable. He cannot attack both units well enough to kill every Saurus in contact. This might be the right play, but only if he gets it done this turn.


Meanwhile, his Terradons fly behind the Dragon Ogre, he does not move his Chameleons.

The magic phase is now more manageable. I killed both his Skink Priests, removing 4 or 5 dice from his pool. I also removed 3 or 4 spells he could cast from his options...though he still has some stuff that can hurt me.

His Magic Missile kills a couple Marauders. Slowly but surely he is whittling that unit down. He heals the Stegadon and I have to save my Dispel Dice. Boo! That thing is so hard to wound in the first place! But I really did not mind...it would make for a good battle I think.

I had to Dispel Dazzling Brilliance so now he is unopposed...and promptly fails to get either Cleansing Flare or Guiding Light cast successfully. It it wasn't for bad luck, he would have no luck at all.

The Terradons twice wound the Dragon Ogre, but he saves both. The Chameleons hit the Maraduer Horsemen three times but cannot wound even once.

Close combat; the charging Saurus hit just 2 times, just 1 wounds, I save it. The Temple Guard hit 4 times but fail to wound at all. At this moment, the game essentially ended because now his Saurus were in deep, deep trouble. Shaggy strikes back, 5 hit, 4 wound, 4 dead Saurus. Did not go after Temple Guard because I figured the Saurus needed to start losing rank bonus. This time I passed my break test outright.

Mithridates opened up a can of whoop-smurf. This was the guy I thought he was, hitting the Stegadon 5 times and wounding it 4 times...noe of which were saved and I promptly forgot to have him take a T test. Which I am okay with. Mithridates horse killed a skink for good measure.

Diophantus continued to prove he is no Mithridates, hitting just twice, wounding once, but it was saved. The Knights wound the Stegadon a further 3 times, 2 are saved...but he only had 1 wound left and that killed him. Which is bad, because that was on the Lizardman turn...

Chaos Turn 4
The Marauder infantry charges his Saurus in the flank. That would be the Saurus who are flank charging the Shaggoth is is frontally facing the Temple Guard...who then get rear-charged by the Dragon Ogre and flank charged by the Chaos Knights.


And it was ugly for the Lizardmen. My Great Weapon wielding Marauders kill 3 Saurus. Mithridates kills 4 Temple Guard, Diophantus chips in his usual 1, the Knights kill 1, the horses another 1, the Dragon Ogre kills just 1 (what? 3 attacks at S7? Whatever :-) . The Saurus and Temple Guard hit Shaggy 6 times, wound him 3 times, he saves 2 but takes another wound. Only one Marauder falls. Shaggy kills 4 more Saurus.

Now comes a dissapointing moment. The Saurus, needing insane courage, obviously fail both rolls and flee 6". I decide to restrain the Marauders. He then rolls Insane Courage for the Temple Guard...who were testing on a Stubborn 8 or 9 on three dice. If those rolls reverse, who knows what his Saurus could have done since they would attack the Marauders first, so might have not been attacked again...as it was, I think I somehow contacted the Temple Guard, though I am at a loss to explain how.

Lizardmen Turn 5
The Terradons see the combat and decide it is not complicated enough, so they rear-charge the Dragon Ogre who is rear-charging the Temple Guard that are being flank charged by the Chaos Knights and fighting the Shaggoth to their front (and soon the Marauders as well), the flank charge on Shaggy having just been seen off or the Marauders would have been flank charging a flank charge on a front charge matched by a flank and rear charge that was being rear-charged. That might be the single greatest situation in Warhammer history...


The fleeing Saurus are trying to figure out the ramifications of this and decide it is too difficult, so sp they roll 6,6,5 and run right off the table. Whatever. Fullur just cannot roll dice against me...

Well, he gets Blinding Brilliance off against the Chaos Knight unit, meaning Mithridates, Diophantus, and the 3 remaining Knights have WS1 this turn. Including horses, that means I will have 27 attacks needing a 5...so I should "only" hit him 9 times this turn. Kind of says something about how bad they made the Lizardman "elite" infantry. They still expect to lose lots of guys.

Anyway, he casts Cleansing Flare on a 13. I ponder for a long time; this will hit the Dragon Ogre, Chaos Knights, Shaggoth, and Marauders. I have but 3 Dispel Dice...okay, I will try to stop it. I roll...a 12. it wounds the Dragon Ogre once, kills a Knight, does 4 wounds to the Shaggoth and for the fourth straight battle (and 5th time in 7 outings), the Shaggoth dies.

Burning Gaze hits the Chaos Warriors three times, but did no damage. It would be the only action they saw in the entire game. He then got off the spell that makes his units within 12" Immune to Psychology.

His Chameleons then prove their worth. they have 6 shots needing 4s to hit. Taking a cue from the Saurus, they roll about 5 3s and a two, producing no hits.


His Terradons proved more formidable than I would have thought. The riders of course do little, wounding just once which is saved, but the mounts wound twice and I save neither. Dragon Ogre is one wound from joining Shaggy in the dead pile. But first he wounds the Terradons twice.


My Marauders wound the Temple Guard 4 times, and three are killed. And my mighty 9 hits? Well, actually, Diophantus hit once and failed to wound...and nobody else even hit! Epic fail...not that it mattered. Static combar resolution alone meant he would lose the combat. So it was a good time for it and proved the power of the blinding spell.

The Temple Guard hit the Marauders three times, wounding 2, 1 of which I saved.


Warriors of Chaos Turn 5
Not much to do. My Marauders are locked in a shoot-out with his Chameleon skinks, my Warriors are caught in the middle of the field with no viable opponent (they are within charge range of the Temple Guard, but the entire frontage is covered) and everyone else is in that epic duel.

So I (barely) Dispel his ItP spell.

Mithridates kills 3 Temple Guard and his horse kills the last one. This is bad because with no Temple Guard, the Slann is now alone and not Stubborn. The Marauders wound him 5 times; his Ward Save saves 3, Regeneration another, so he takes a wound. His Terradon then kills my Dragon Ogre which, ironically, removes the Terradons from the combat since they were only touching the Dragon Ogre...

Well, the Slann breaks, flees 10", my Marauders pursue just 7" and the Knights 6. Yes, the Marauders outran the Knights. Good stuff.


Lizardman Turn 6
The Slann rallies. The Terradons make a suicide charge into the Marauders.

The Slann heals himself with one spell. Casts Burning Gaze, wounding the Knights twice and making it so Mithridates and Diophantus no longer have a unit to join, so now they are just independent characters. Who happen to be deadlier than elite units.

Dazzling Brightness fails...which he was sad about because all game long he had been trying to mis-cast.

Which Cleansing Flare promptly does...and he uses the Cupped hands to transfer it to my Wizard, but the result, even after re-roll, is simply a wound which does not go through. So anti-climatic...

The Chameleons do manage to hit the Marauders twice, wound once, but I save.

The Terradons cannot even wound the Marauders. Whatever. I manage to wound the Terradons twice, howe3ver...they flee and are done.


Warriors of Chaos Turn 6
Diophantus charges the Slann, and in a surprise move, my Marauder Horsemen charge the Chameleons who hang around to see what happens. I have no idea what I did with Mithridates.


Diophantus has his best turn of the game, wounding the Slann twice unsaved. the Slann needs Insane Courage (I guess I must have charged my Marauders too)...and gets it!

The marauder Horsemen wipe out the Skink Chameleons.

The game ends with his Slann bravely facing about 18 Marauders, 13 Chaos Warriors, 3 Marauder Horsemen, Mithridates and Diophantus. He did a LOT of damage in this game...but so did I.

Conclusion/Regurgitation

First, what went right. Which was everything.

Diophantus, while completely useless in close combat (despite having 5 WS7, S5 attacks, he averaged about a wound a turn, killing just 1 Skink, 2 Saurus, and putting 2 wounds on the Slann) is almost game-breaking. When fields are set up so I can keep my important units within 6" of him...which is not all that hard to do...they are functionally Unbreakable. Killing Chaos Knights, Dragon Ogres, and Dragon Ogre Shaggoths to the last man can be done...since every one of those I had did die in this battle. But it takes a long time and lets them do a lot of damage in return. In future games, if they have the option, they should definitely target him as, if I take him, he makes the army over-poweringly strong.

Shaggy was awesome. He killed 2 Skinks, 4 Temple Guard (including their champ or it would have been 8) and 8 regular Saurus, single-handedly holding up the temple guard for two turns while I finished off the Engine Stegadon.

Mithridates was awesome. He killed a Saurus Champ in a challenge, getting overkill. He killed the Skink Priest in a challenge (and I just, as I typed this, realized I failed to roll on the Eye table). He put 4 wounds on the Stegadon, killed three regular Saurus and 8 Temple Guard, plus a few skinks.


The Knights are always awesome, ringing up 2 wounds on the Stegadon, about 5 or 6 skinks, 6 regular Saurus and 3 Temple Guard.

And the Marauder Horsemen are tremendous as well. Their fast Cavalry antics wiped out his Chameleon Skinks and a flying Skink Priest.

I would even argue the block Marauder infantry performed at or above expectations. They are such a low-priority target...and rightfully so...that they were almost unscathed, were allowed to flank charge a Saurus unit, and even managed to hurt the Temple Guard.
So what did not work? Uh...uh...well, not enough to counter magic, which did kill I think all 6 Knights, several wounds on Shaggy, a couple Dragon Ogres, made one turn by my Chaos Knights/Mithridates/Diophantus combo worthless....

yet if we totaled up the points, I either won by Solid Victory or more.

Which means I really did have enough to counter magic. He threw everything he had at me and I survived long enough to do what the Warriors of Chaos do.

But that kind of points up the "what went wrong" portion of the proceedings as well. He deliberately went without Cold One Knights which was kind of him...but also sort of means I had a pretty bent, cheese-filled list. Yes, he killed all of my power units...but he never touched any of my characters and had nothing left to deal with my second line units. I think he played about as well as he could with maybe one or two things that, if done differently, may or may not have been better choices...BUT DID NOT MATTER. I would still have won handily.

On the bright side, I think it was still an enjoyable game and it had some truly memorable moments.

I loved certain elements of this game; Mithridates seeing his best shot laughed off by the Skink Priest, only to have the horse wound 100% unsaved....that was awesome.

The convoluted combat with my Marauders flank charging his Saurus who were flank charging my Shaggoth who was face to face with his Temple Guard who were flank-charged by my Chaos Knights and rear-charged by my Dragon Ogre was awesome, and it took up the majority of the game to resolve.

For the future, I think I might look into more big blocks of Marauders...strong enough to do damage when kitted up, weak enough to be taken out. I also might go back to more Magic. It is spotty, erratic, and when people are prepared, does nothing, and there is one army it means near auto-loss against, but I think it might make the Warriors of Chaos more vulnerable while still potent.

I do not know. Still toying with ideas.
I did love the Dragon Ogres, even though they ended up doing surprisingly little. They were a good choice, and had they gotten together with Shaggy, they might have been able to take out the Engine and leave the Knights free to go after the Temple Guard.

I think I am starting to not care for Lord-level characters as they turn the game into Hero-hammer. Yes, it was great watching Mithridates rampage. But at the same time...he did more casualties than a unit of 6 Knights. The Knights did not kill all 8 skinks, Mithridates had already killed a couple before they attacked but I did not write it down. He did more wounds to the Stegadon (4-2), more to the Temple Guard (8-3) and, if you take Overkill into account, more against regular Saurus (8-6). That is ridiculous.

Meanwhile, my hero level character, with a VERY impressive stat line of his own was not particulary effective in this battle...but could be.

Of course, the problem I run into is my Knights are considered by some to be Hero or Lord level characters on their own...as all Knights are on the verge of being, though mine are admittedly a hair better than any but perhaps the Blood Knights.

And if you start saying, "No Lord-Level", where does it stop? "Okay, then, no Knights." "Fine, no monsters (including Shaggoths, Treemen, ridden mounts)." "Oh, and no items that invalidate armor saves or make magic all but useless...and no spells like Infernal Gateway or weapons like Frost Blade."

Great, you take 10 Dwarf Warriors, I will take 20 Night Goblins, lets put them next to each other and roll some dice...not much fun.

Early on, someone said they thought every Warriors of Chaos game would be a Massacre, one way or the other. At the time, I had a couple games that were closer than that, and I disagreed.

But I have not been able to get the balance right and am starting to agree. What to do?

I am seriously considering shelving the Warriors of Chaos for a while. It would mean switching to Wood Elfs or Vampire Counts, since those are the two armies being used seldom or never. Or maybe the Goblins. But they, I think, are too weak. I will have to think about it.

I do not mean to sound like I did not enjoy the game. I did. I loved it. It was great fun with epic combats, classic mano a mano duels, and some thrills.

But I want my opponent to enjoy it to, and I do not know if I would enjoy going against the WoC.

Any way you look at it, I will be playing them at least sometimes. But I might look to go in another direction for a while, just to see if it can be more fun for everyone.
* Okay, major, MAJOR reassessment of this battle. When putting in the pictures, I noticed something I may (read "almost certainly") have done wrong whcih COMPLETELY changed the character of this battle. Look at the photo by the asterisk. It was when putting this photo in after writing the report that I noticed this.
His Skinks receiving the charge was brilliant...IF I did my charges correctly. I had to declare my Shaggoth charge on the Skinks, but could not declare one with the Knights because they had the Banner of Rage and therefore had Frenzy. That means the Shaggoth had to charge first.
No problem, I "wheeled" him at the beginning of combat so he would overrun into the Saurus my Dragon Ogres were flanking. No problem there.
But then I wheeled my Knights and charged at the same angle.

Wrong, wrong, wrong. As soon as Shaggy hit the Skinks, they should have "ranked up" facing him. Which means my Knights would have hit the Skinks in their "flank". Which means A) they would not have gotten as many guys touching the Skinks and B, more importantly, THEY WOULD HAVE OVERRUN INTO THE FRONT OF THE TEMPLE GUARD. Or at worst, still been stopped by the Shaggoth, but I think they would have been almost dead center in front of the Temple Guard, so their subsequent slaying of the Saurus on my right flank and then the Engine would not happen.
Okay, that HUGELY changes the complexion of the game. If I am in front of the Temple Guard, their armor save is 2 better. More might survive to hit back at the Knights. His Saurus unit might survive. The other Saurus unit might flank the Knights or it might become a blocking unit that keeps my marauders out of that battle...and would make the Chaos Warriors go a long, long way to get in position to charge. I am still Stubborn with a re-roll on a 9 with my Knights...but now I have to find a way to deal with his Engine which OWNED me while it had the Burning Alignment going.
So look at all the mistakes I made rules-wise which HUGELY impacted this game; Marauder Horsemen might kill fewer Chameleon Skinks which means they might do more damage. The Skink Priest in water, -1 for soft cover, may have survived for another turn or three and occupied the Horsemen attention, letting the Chameleons whittle down ranks of infantry marauders...who probably do not now get to flank the Saurus unit in front of the Temple Guard.
So maybe the army is not strong...my ability to not clearly think through the rules during a game is super strong.
Either way, I now feel horrible. My apology, Fullur. Lets call this one a Draw.


Saturday, September 12, 2009

Warhammer 1K:Wood Elf versus Tomb Kings

We have recently instituted the "Warhammer 1000". Sunday afternoons we try to get in a 1000 point game. Smaller than our typical game, it allows us to try out some different armies and combinations.

I had not played the Wood Elf army in a while so thought it would be fun to give them a go. Meanwhile, Fixed Dice was going to roll out the tomb kings again.

Locally, there is a feeling the Tomb Kings are...well..under-powered. Weak core troops, weak shooting, and marginal magic is the general feeling. Of course, this would only be their second game and would again be just a small one.

Knowing they are a weaker army, I went an interesting way. I decided to go a heavily close combat army. I took 12 Dryads (all I have), 10 Wardancers (all I have), took 10 Waywatchers because they are cool. I was facing a Magic-heavy army so I took a Spellsinger with 2 Dispel Scrolls. I still needed one core unit so I took Glade Guard. I had about 270 points to spend or so and so went with a massive 20 man unit with Standard Bearer and the Banner of Aenach.

Sometimes you realize very shortly you are stupid. Aenach is only 25 points and allows a Stand and Shoot. Tomb Kings cannot march. They are never going to close with my mobile Elf army anyway unless I decide to let them, and in that case I can maneuever to ensure they are getting shot on the way in anyway. Not that 30ish points for Bearer and Banner is a big deal...but little errors can become big ones.

My hapless opponent went with a couple 10 man Skeleton units, a big block of Tomb Guard, the Casket of Souls and the requisite 3 heroes, all tooled up in some way or the other.

By the way, my army composition is very unusual for me; limited shooting, only one hero, and that hero not expected to do anything but Dispel. I specifically wanted to try a close combat oriented army.

The field had 3 (THREE) forests, some rough ground on my left flank and a deep lake on the right. I put my 20 Glade Guard in a line across the center of the field, the Wardancers to my left, and the Dryads to my right. The Dryads would have to ford the river and sweep along the flank...but that was better than stacking behind the Wardancers (?).

He put his Casket of Souls on the ever-present hill in opponents deployment zone that is the bane of my existence, the Tomb Guard to its right (from my point of view) and the two Skeleton units side by each in front of the Tomb Guard and open space.

That meant my Waywatchers could take advantage of their awesome deployment rules to set up on his flank in his deployment zone.

The roll for first turn would be critical and I won it. We each rolled a 4 but I had set up first and the bonus +1 for that gave me the choice. I elected to go first.


Wood Elf Turn 1
My Wardancers moved forwards out of the woods into the rough ground, stopping just short of the fence. On the right flank, my Dryads all made it across the ford and into the forest. My Glade Guard and Waywatchers took advantage of the "Asrai archery" rule to move, knowing it would not affect their "to-hit" roll, but might get into half range, putting into effect S4 for the Glade Guard and Killing Blow for the Waywatchers.

Magic Phase:
I had a choice pre-battle between the marginally useful Tree-Singing and the awesome but unlikely to happen Ariel's Blessing. I went the high-risk, high-reward route and took the Ariel, not realizing he would make me -1 to cast, meaning I needed a 10. Since I already figured I would need Irresistible Force to successfully get it off anyway, that probably would not have altered my decision. I could only cast once per turn and figured either spell would meet Dispel Scrolls unless Irresistible so why not try to give someone Regeneration?

I will save time. I successfully met the required "10" just once all game, he used a scroll.

Shooting:
This is the Wood Elf strength. Whereas for my beloved Warriors of Chaos, shooting phases are short and don't do much, they make or break the game for the Wood Elfs. Mobility and firepower are the watchwords.

And fire they did. My Waywatchers opened a can of whoop-smurf on the closest unit of Skeletons, killing 7 of them. The Glade Guard would have killed 5 more if there had been more than 3 left. The upshot was, turn one saw me wipe an entire unit off the board.

It was at this point Fixed Dice stated the game had a predetermined outcome. He could not come to grips with my guys unless I chose to allow it and could shoot him down completely before the game ended without him ever touching me.

Tomb King Turn 1
Still, he moved his other Skeleton unit in a wheel to try to cover the Tomb Guard from my Waywatchers and moved forward. Since they can not march, the ungainly maneuver meant they would still all be able to see my Glade Guard.

Magic Phase:
With their "always successful", my defense was at a premium. I only had 3 Dispel Dice. The Casket being on a hill meant every model I had could see it so I simply had to save my Dispel Dice for that. Which meant he got off a free shooting phast, killing 2 Glade Guard, and some movement. Then I did Dispel the Casket.

Shooting Phase
This slew just one more Glade Guard. Clearly, even taking two turns of shooting, the Tomb Kings are not going to win a shoot-out with the Wood Elf army.

Wood Elf Turn 2
I moved my Dryads forward, moved my Waywatchers and Glade Guard...and inexplicably completely forgot to move my Wardancers. I have no explanation. I planned to advance them about 3" which would have put me approximately 9" from his Tomb Guard...outside their charge range, inside mine. And then I...didn't.

Shooting: See turn one. Waywatchers were slightly less effective despite having Killing Blow but this time 8 Glade Guard were within half range so the carnage was terrible and all 10 Skeletons died. He was now down to the Casket and the Tomb Guard bolstered by a Hierophant and Liche priest...I think.

I now had a new plan. Anyone who could see the Casket was going to shoot at it. My Wardancers and Dryads would work on his Tomb Kings. My plan for the battle had been to see my Colse Combat machines in combat so why shoot up their only target?

Besides, even if close combat went poorly, with still 27 shots per turn, all either S4 or Killing Blow, his unit would fall like Skeletons before Chaos Knights...so even if they won Close Combat, maneuverability and firepower would carry the field. At least, so I thought...

Tomb King Turn 2
He had to choose who to face: my Wardancers, the Dryads approaching the flank, the deadly Waywatchers or the 17 strong Glade Guard.He elected to do a partial wheel to face the closest unit, the Wardancers. magic not particularly memorable, I dispelled the Casket. I was quite afraid of it.

Wood Elf Turn 3
Here we go. The mighty, awesome, fearsome, deadly Wardancers charge. The Dryads also charge.

Shooting: My Waywatchers, heretofore deadly marksmen with unerring aim, cover the sky with 10 arrows, all of which either miss entirely or hit the Casket.

And I somehow, until typing this report, completely forgot my Glade Guard could have seen the Casket since it was on a hill. I did not fire them at it even once. That was a mistake.

Close combat:
I knew for this round I had S4 and 2 attacks apiece. I decided to perform the Whirling Death to get Killing Blow. My Champion challenged and his...Hierophant? accepted. I rolled my 3 attacks...I wounded once that was not saved. 2 Wardancers attacked his Champion...and whiffed completely. My other Wardancers struck with fury...just not with talent or success, felling maybe 2 skeltons?

But the Dryads can still save the combat. Here come their mighty 6 attacks. Great...not one wound gets through.

He strikes back, kills my Champion though no other Wardancer. He has ranks and since the Dryads are Skirmishers, they cannot negate the rank bonus. He has a banner. Fortunately, I outnumber him and win the combat by 1.

Bad news...once again, my "elite" hand to hand units charge in with about every advantage they can muster and more or less are defeated. At this point, it will take a minotr miracle for me to win this combat.

Tomb King Turn 3
He has no movement. His magic lets him get off a free attack. One Dryad and two Wardancers die. He uses a bound spell to bring his unit back to full strength.

Close Combat phase: another Dryad becomes kindling, a couple Wardancers become mulch. I flail away ineffectually in return, doing one wound to his Liche Priest and nothing to anyone that matters. I lose the combat, my Wardancers break and flee fully 12".

I have ranted about how bad the Wardancers suck every time I have used them. I am not going to do that this time. I am going to talk about how awesome the model I purchased way back in 1994 and painted way back then still looks as compared to the awful paint jobs on the ones I bought off E-Bay. He looked fantastic as he advanced to the rear at a high rate of speed.

Wood Elf Turn 4
Good news. The Wardancers rallied. Bad news. It will take them until turn 6 to get back to the combat; rally this turn, march in turn 5, charge in turn 6. There are just 4 left. Is it worth it?

I forget to move my Spellsinger out of line of sight of the Casket (if I had done so, I would have used my Dispel Dice to block the 2nd attack instead of saving them for the Casket), repositioned the Glade Guard so they could shoot up the soon to be ultimately triumphant Tomb Guard, advanced the Waywatchers so they all were inside half range, and opened fire on the Casket. I put one wound on the General and shot down one of the two guards. Pretty good phase I must admit.

Close Combat: More of the same. I might have put down a Guard or two, and I think I actually killed his Liche Priest. Unfortunately, at this point even doing that meant I was losing the combat...BEFORE HE EVEN ATTACKED BACK. He had 2 ranks, outnumbering, and a Standard giving him +4 and I did just 3 wounds. He killed another Dryad or two, I miraculously passed my break test (needing a 6, I rolled a 5. So that was good).

Tomb King Turn 4
He healed the wound on his General, brought the Guard back to full strength, and got in an extra attack in his Magic phase. I think he also Magic Missiled down a Glade Guard or two. In close combat he broke me. I fled, he could not catch me.

Wood Elf Turn 5
This turn would be tricky. I rallied my Dryads, moved the Wardances into the protective cover of the forest they started in, moved my Spellsinger into the same forest, and then had a tough choice.

My fear was he would use his movement to reform his Tomb Guard, catch my Waywatchers in their sight, and use his movement spell to pick off that juicy target. So I tried to move far enough that he could not reach them. Just in case I advanced the Glade Guard and let the bowstrings twang.

The Tomb Guard felt the full force of my fury and something like 4 of them fell. They were proving to be a very tough unit. The Casket escaped unscathed.

Tomb King Turn 5
He saw the same thing regarding the Waywatchers but for some reason elected to go after the Dryads. I think he forgot how much Static Combat Resolution advantage he had. I would have been down by 4 to start any combat, and if the Waywatchers broke...which they most likely would....they were just a couple inches from table edge. I think that is the target I would have chosen. He already had half points for the Dryads.

But that is part of the beauty of this game. Though it is what I might have done, that does not mean it was necessarily correct. Everyone has their own strategies and different people play the same situation different ways.

He elected to go after the Dryads. This time he rolled just a "1" to move again which would have given him the charge. I used one of my precious Dispel Dice to block it. He used a Magic Missile to shoot down another Glade Guard and then brought the Tomb Guard back to full health.

Wood Elf Turn 6
I actually was quite sceptical of the outcome at this point. Yes, in the firat two turns I had shot down his skeletons. Whoopee. At 80 points a unit, I only scored 160. Meanwhile, he had half points for both my Wardancers and Dryads...97 and 72 points respectively. I had also slain his Liche Priest...probably les than 100 points I would assume...and he was likely to wipe out my dryads next turn. So it was probably a draw at this point.

I took some time pondering my options. I could shoot everything I had at the Tomb Kings and try to get half points for them...or I could unleash the Waywatchers at the Casket hoping against hope to put down his King. (Forgetting again my Glade Guard actually could see the Casket...)

I ran the numbers and ultimately decided to go high risk, high reward. I shot at the Casket. And wonder of wonders...I did three wounds to his Tomb King, putting him down for good. That decided the game.

Meanwhile, the Glade Guard put a bunch of holes in the Tomb Guard, 6 or 7 casualties if I recall correctly.

Tomb Kings Turn 6
His choice was easy, now. With just a Hierophant, his magic was weak, his options limited. He charged the Dryads, trying for that last 72 points. I blocked his magic since I no longer needed to fear the Casket.

Close Combat: I lost no further Dryads and, since he could not regenerate with all the lost magic, I was only down 2 (outnumber, standard) and passed my break test. Game.

Total points were something like 650-170 or in that neighborhood. We did not figure it exactly because it was obviously a Massacre.

What Went Right
The Waywatchers are simply awesome, easily worth the whopping 24 points apiece. Starting out hitting stuff on a "2", they are going to hit lots of things and even with just S3, they are going to do some damage.

The Glade Guard are also pretty spectacular. Cheap enough to risk not having a place to deploy 20, they are mobile, good at hitting what they shoot at, and from 15" in hit on S4 so they are going to cause some casualties as well. They are, in my humble yet accurate opinion, one of the absolutely best Core choices in the game.

What went wrong
The Wood Elf close combat army simply does not fit my play style. Being skirmishers means they cannot rank up, cannot remove the opponent's rank bonus, and start every combat behind by 2 or 3. They are simply not good enough fighters to overcome that. they fail miserably every. stinking. time for me.

I hear of other people having great success with them. Good for those people. I keep using them because I think the concept is awesome, but they are the type of troop that would NEVER see the table top for me if I was in a highly competitive environment where I wanted to win.

The Dryads did okay but have the same limitations. Their ability to cause Fear might be all right against someone like the Skaven or Goblins or Brettonians...but against Undead it is no benefit at all and their limited combat ability does not offset that.

I am still likely to take one or the other to be War Machine or Mage hunters, but the Wood Elf army in close combat against even Skeletons is something that you will only see when I am badly outmaneuevered or hemmed in by terrain. They are just no good at it.

In the end, a fortunate barrage of "6s" meant I did enough wounds to his King to win the game. All the way through, it felt like I was winning...my arrows took out 20 Skeletons in two turns, I took out probably a dozen more in close combat...but he kept regenerating them and until the last turn, I was barely scratching out a draw.

Overall, it was a fun game with an Army I hope to play a bit more. I might try some other fun units like a Treeman (the Wood Elf version of a Shaggoth), Treekin....maybe even a Great Eagle or two. I do like the army and, against all odds, LOVE my cheesy paint job. Designed to look like Autumn, the bright Orange and Jade Green really pop on the battlefield.