Saturday, May 14, 2011

4k Warriors of Chaos versus 4k Skaven

As always, click on the pictures to expand them (and also let you see the stuff cut off by being to the right of what shows)

Lately I have been doing a lot of experimenting. After dozens of games with the Warriors of Chaos, I pretty much know their ins and outs. I like the way they play. I like playing with that army. But I also like to switch it up so I have had a couple games using dwarfs, a couple using High Elfs and even my debut appearance with the Beastmen.

Kev and I wanted to play a big game, and the only army I could do that large without proxying was back to the one I love best, the WoC. I do not mind proxying within reason...frankly, with our groups financial resources and time commitments, it is pretty much a must to keep the game going. But if I can play with or without it, I will go the one route almost every time.

This is mostly for me...so I can keep straight in my own mind which models are where as that determines my tactical options.I tend to forget stuff sometimes and it becomes problematic when I make key mistakes because I forgot which of my units I meant to do something with.

Well, the first time I put the list together, I centered it around Galrauch. I love dragons, but seldom used them in 7th edition as they tended to be pretty over powered. In 8th, I feel fine about using them as they are not nearly as strong (?).

Unfortunately, one of my old bugaboos came back to strike that plan down; modeling. I hate metal models with a passion. Almost impossible to glue together without pinning...which I have yet to successfully do. So I tried to magnetize the wing...and it fell off this morning. So I had to retool the list.

Changing it around to keep a dragon in cost me my beloved Dragon Ogres. On the other hand, I think it came up with a build much stronger than the one with Galrauch.

I knew kev would bring either the Ogres or Skaven. If the Ogres, then I would basically just keep everything within 6" of my BSB and try to keep him from getting impact hits on the charge. If he brought Skaven I would try to get my unit of Chaos Warriors into his H-pit Abomination along with the Shaggoth and hope, and try to stay away from the Doomwheel and Plague Furnace.

He brought the Skaven. then we rolled a classic; the Battle line. I have not played this set-up in 8th yet, so even though it is "old", it is kind of new, too...

I feinted with my set-up, planting some Marauder Horsemen on my extreme right flank. With their Vanguard move and their role as Fast Cavalry, they could get where I needed them when I needed them. Their entire job was to go after anything he had like the Warp Lightning Cannon (present), Jezzails (present), or miscellaneous weapon teams I did not want hitting my knight (present, present, present, present).


By the time we were done setting up he had the Doom Wheel on my extreme left, Jezzails on the right, and kind of spread across the field. I packed in the center. The plan was drive up the middle and, depending on how the battle was going, use a block of tzeentch-marked, hand weapon and shield Chaos Warriors to hold him up while my Knights did the heavy lifting.

Warriors of Chaos....ASSEMBLE
I won the role for first turn. This made me happy.

Warriors of Chaos Turn 1
Perception matters when playing Warhammer. For example, in my various games I have;
1) thrown everything I had at the Abomination, had it kill my character designed specifically to kill the HPA, finally killed it by focusing over 1k points on it...only to have it come back and kill my Shaggoth and a few other things. I fear the HPA
2) Had weapon team after weapon team remove my armor saves. I fear them.
3) Had Queek single-handed wreck a 10-man unit of Knights. I fear him,
4) Had the plague furnace wipe out everything it touches. I fear it.
5) Had the Doomwheel  do mass carnage and only be stopped by a lucky charge with my Knights. I fear it.

So my perception of the Skaven is their specials are unkillable, they do not let me have armor saves, and they are good at putting down the WoC.

So my goals were to keep him from shooting as much as possible, take every shot I could at his tough stuff with magic, and keep as much as possible stubborn.

My Marauder Horsemen thundered forward, one unit planting itself in front of the Jezzails, the other in front of his Warpfire Cannon. I then rolled 12 for power dice.

Usually first turn magic is not so helpful. In this case I had flown my dragon riding General/Lord Wizard up close to him hoping to get lucky and Infernal Gateway his Plague Furnace away. But then I remember the damage Queek has done...Infernal on his Storm Vermin.

I roll 6 dice, do not get irresistible, and he chooses to feedback scroll it. I get 11 hits,  strength 7. Oh, I wish those were reversed...anyhow, I put down 9 Storm Vermin. This is already one of the 2 or 3 best magic phases I have ever had. 

I then get off Pandemonium, his attempt to Dispel fails. I then use my last dice for Flickering Fire at the Warp Lightning Cannon, he again rolls low and I wound it 3 times. Wow. I got everything off. That is the best magic phase I have ever had. And it will only get better.

Time for shooting. I often forget about my throwing axes. I prefer them to javelins because, though their range is shorter, their strength is higher. When I hit I want to wound. And hit I do. All 5 hit the Warp Lightning cannon. Only 1 wound sticks....but that, combined with the Flickering Fire, is enough to get rid of the Warp Lightning Cannon. I do a happy dance.

On the right my shooting is equally good as I hit the Jezzails 4 times, do 2 wounds and he flees. Lots of shooting I will NOT be facing in turn one. I do not even care when the H-cannon scatters wide of anyone.

We both agree this was a tremendously successful turn for me.

Skaven Turn 1
His doom wheel careens towards me a whopping 14". Feeling jealous, the HPA manages a 13" move which crashes into my Marauder Horsemen. Some Storm Vermin come along for fun.

Queek charges my Marauder Horsemen. I am about 4" from him. I can flee, be within range of my BSB, recover and shoot next turn. For one of the few times I can recall, instead of standing, I flee. And my plan falls apart when I flee 7", he charges 11". Oops.

Oh, well, they cost 71 points, they got rid of his deadly 90 point Warp Fire Cannon. I will take that trade. And now Queek is where I want him...not charging me.

His Weapon team with the giant propeller tries to charge the Shaggoth. I am not familiar with that weapon...I thought it was another shooter, but I guess it would have done massive damage. Failed charge is good for me. the jezzails rally. He makes a general advance, time for magic.

He tries wither. I dither about it for a while, counting and recounting his power dice and my dispel dice. With a Dispel Scroll in my back pocket, I stop it.

He attempts Cracks Call...doubles! Miscast! I use Infernal Puppet to modify it to a dimensional cascade, his level 4 disappears, and to add insult to injury...I dispel the spell.

His doomwheel then mis-fires and rolls 15". That takes it off the table. We cannot find rule and decide to make it same as pursuing off table. He is having horrific luck so far...though the 14", 13" and 15" moves on 3d6 kind of tell you he is rolling high...just at the wrong times.

So as you can tell, we were uncertain about one rule. I was dead wrong about another. I had in the back of my head you could not shoot on the turn you garrison a building. You can. His Globadiers unleashed on my Dragon-riding Wizard. Fortunately, of his 13 globes, only 1 wound got through, and that to my Dragon. But it was an unexpected, terrifying wound.

My T6 meant nothing, the ward on my rider was pointless. His globes could put me down with ease.

In close combat, his HPA impact kills 1 Marauder Horsemen, his Assassin another, then he rolls Avalanche of fists, gets 12 hits, 9 actually hit (needing 4s), 6 wound, bye-bye all my fast cavalry in one turn. He is actually winning at this point, 142 points to 90.

Warriors of Chaos Turn 2
I have lots of choices. I am the Warriors of Chaos...there is really only one answer. Charge! This turn I remember to test leadership for my cannon. He fails. And rampages....3". Triple ones. I roll an unbelievable number of those.

I also manage just 3 power dice.I channel another.

As I charge, he chooses to flee with his weapon teams. My Knights fly through and redirect onto his storm vermin. I combo-charge his Queek unit and am uncertain what to do with the dragon. I had declared a charge on that unit, but by choosing a different order kept him out of the combat, I should have flown him away from the globes. I erred.

I get Infernal off with irresistible on the Globadiers. I again roll 11 hits, this time at S8.; 9 Globadiers are no longer with us. I feel better.

My knights in his clan rats on the left do what Knights do, he dies in droves, though he does kill one Knight. He flees, I chase. He runs 6", I chase....5". Grr.

My other Knights and Chaos Warriors also do well. I challenge with my unit champ; Queek fails to kill him when I parry save, everyone else dies, Queek flees, I pursue, and a feared model is no longer with us.

At this point I am feeling pretty good. He is down his general, his BSB, rats are fleeing, and I control the center of the field.

Then again, he still has the Plague Furnace, Doom Wheel, and HPA...all of which I struggle to wound.

Skaven turn 2
I knew I had given my flank with the Chaos Warriors. I hoped to run further. Then again...with a 3+ armors, 5+ ward, I should last a while. I just want to keep his Furnace busy while I wipe out everything else.

His fleeing rats leave the table, the Furnace charges into the Warriors, slaves combo charge me, the Doomwheel moves a more modest amount.

He gets a big number for Withering on the Warriors. I do not dare chance it, I burn my scroll. He then mis-casts with the seer thanks to Pandemonium, I modify it to reduce levels, he is now a level 0. Magic is ruling for me.

The Doomwheel fires and I lose a Chaos Warrior. Well, that is not a terrible outcome. It could have been much worse. For two turns I have lost just one Chaos Warrior total to his Doomwheel.


Well, he gets 6 Impact hits, 5 wound, and my vaunted armor save/ward save combo saves....zero. Zip. Nada.

*Sigh*. I finally get saves...good saves...and whiff on them all. Then his shroud attack wounds 6 more, this time I save....1. 10 Warriors down before I have lifted a weapon.

But the Warriors step up to the plate. I kill 8 of his slaves. None of his plague monks. His slaves get 1 wound through, but this time I save it. then his wrecker ball of doom gets 10 S5 hits off, 7 of them wound, and I save just 3.

Well now. I had 21 Warriors about 30 seconds ago. Now I have 3. That 3+/5+ combo is not so good, is it then?

My BSB being right there lets me stay, being stubborn and all. So, uh...some good news, I guess.

Meanwhile, he had also charged my knights with his rats. I allocate one attack to his unit champ, kill it. Then I do 8 more wounds. The horses kill 4 more. His 20 attacks hit 13 times, wound 7, and I save 5. So yeah...3 knights dead already. Out of 5. He flees, I overrun.

Warriors of Chaos Turn 3
I had about as good of turn one as could be believed, beginning to end. Then his plague furnace and clan rats turned it around. I have a badly damaged unit of knights, an all but dead unit of warriors...who I had counted on holding him up for three or four turns...I was reeling.

It gets even worse when the H-cannon fails his test again and pounds forward about 6". I just have not had good success with that thing.

My Knights, being frenzied, and my Warriors, being dead, combined to now give me a path to attack his Plague Furnace. I had really mixed emotions about this. The furnace is unbreakable, does massive casualties throughout combat, and I have no faith in my ability to take it down no matter how much I throw at it.

Ah, smurf...charge. In go the knights. Shaggoth flanks the slaves. Chaos Warriors flank the slaves. They are going down. The dragon rider charges his last globadier. Might as well.

I remember to roll Wulfrik and his 47 marauders on, they come behind his recovered jezzails.


I roll 3 for power dice again. I whiff on Infernal. I cast Purple Sun towards his Doomwheel but it falls short by 24". Well...it was a long shot, but I had little else to do.

My Sorcerer lord takes care of business and the Globadier heads for the bone pile.

His shroud attack does what it does...kills 2 knights, a chaos warrior and a slave. My BSB kills the Seer on the bell. I am happy.

The knights do 7 wounds. The Chaos Warriors, with little left to attack, swing at the Furnace and manage a wound. Those facing the slaves then kill 4. His Plague monks manage 7 wounds and this time my armor works great, saving 6 of them and my ward the 7th.

The furnace then whacks the warriors thrice, I save none, many more dead.

His slaves explode, killing one of the fresh block of warriors and 2 plague monks.

Skaven turn 3
He charges the Shaggoth with some warlord guy. His clan rats charge the H-cannon. His HPA slams into my general on a dragon.  And then his feared shooting phase opens up.

His doomwheel is out of range, but the jezzails kill a Chaos Warrior. then his weapons teams with the templates each kill 9 Marauders. 18 guys killed in a heartbeat. *GULP*

I am really not liking this right now. His bell could kill my knights, warriors, and other warriors on its own. A 2 or 300 point model is tying up well over 1000. His 230ish point A-bomb is something I expect to kill my 700 point Dragon/Wizard in a couple of turns. I am unsure how the rats/cannon combat will go. And I have nothing left to deal with his doomwheel. I cannot withstand another turn of that lethal shooting with my Marauders.

On the other hand, I have a clear lead at this point. I have the situations I try to set up; I have vastly more force involved in 2 of the 3 combats from a points standpoint. I have an unbreakable unit hopefully holding up another unit for a while. And I have a clear magic advantage.

Close combat is a little better. His assassin and clan rats cannot wound the h-cannon. The cannon kills a couple rats.

His HPA only gets 2 impact hits, 1 wounds, and I ward save that. The Talisman of Preservation/mark of tzeentch combination to give me a 3+ ward is going to be HUGE. I get a wound through with my wizard, even though I get just 1 hit. Wow.

He then gets the flailing fist result, and rolls a whopping 13 attacks. 5 wound....and I ward save all of them. The Dragon hits all 6 times, 4 of them wound, he regenerates two. In just one turn I put 3 wounds on him. I start to feel hope.

The plague furnace kills another knight and warrior with its shroud attack. His Warlord wounds the Shaggoth 3 times, but I somehow save 2. Saves aplenty.

My BSB then wounds the Furnace 2 more times, the knights kill 11 plague monks, my Chaos Warriors kill the last 4 0plague monks, the Shaggoth wounds the Bell, and then I thunderstomp his warlord, but he saves one of the two wounds. The Furnace then hits the big block of warriors 8 times, I take 6 wounds and save just 3.

Warriors of Chaos Turn 4
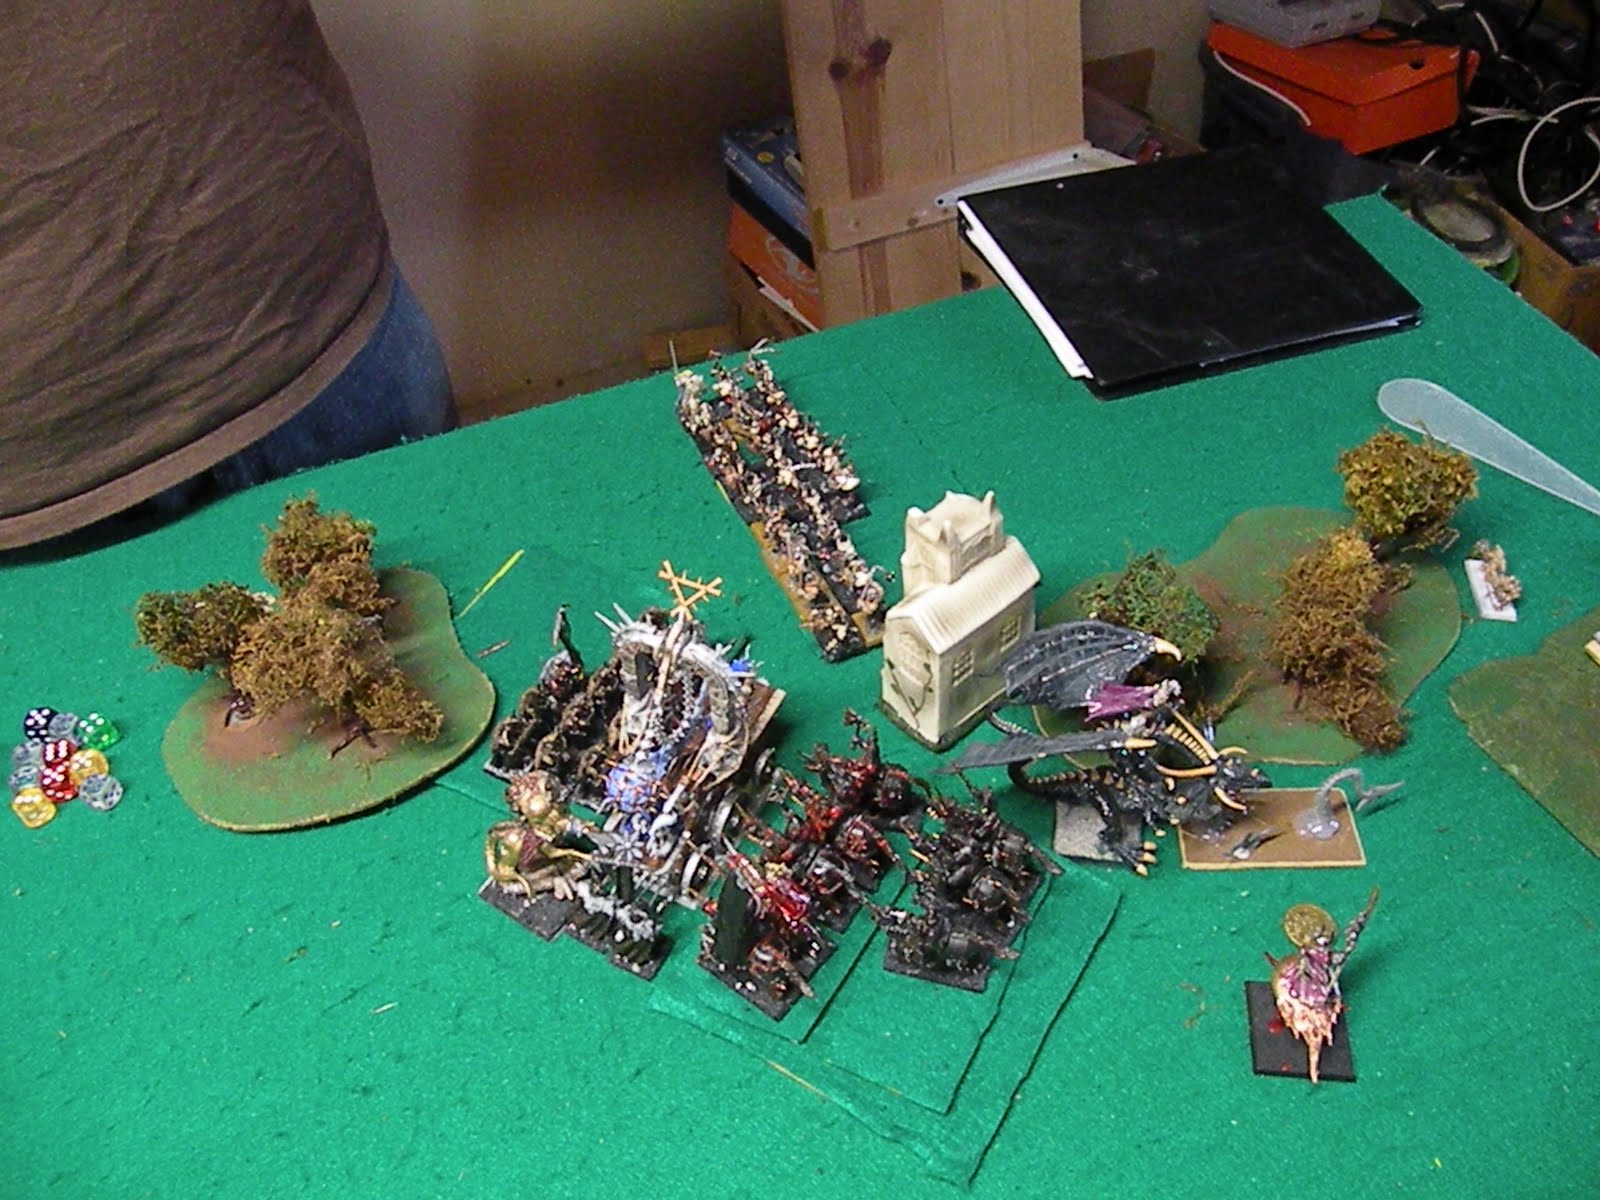
I move my Sorcerer on disc towards the HPA. I have a vague idea of using the flaming attack on the HPA to stop the regeneration.

My Marauders charge the jezzails who flee but are over-run and I hit his rat ogre thing which dies easily.

I then get Infernal off with irresistible. I do 10 S10 hits. I wound him 9 times. This will be it for the HPA...until he regens 7 of them! He still has 1 wound left. I just...can...not...kill...that...stupid...thing.

The great part is I modify the mis-cast to a 7. He is hit by the template. He is wounded by the template. Do I even need to mention he regenerates it? Stupid unbreakable, unkillable beast.

Meanwhile, the H-cannon decides to get rid of his annoying assassin but can only wound it once, losing a crewman in return.

The Sorcerer then wounds the HPA twice and...wonder of wonders...IT DIES! YES! Victory is mine! There is n stopping me now. It is gone and...what? He rolled a 6? It comes back...with 2 wounds...an inch away and ready to get more impact hits since he gets next turn...NOOOOOOOOOOOOOOOOOOOOOO

There is no stopping that stupid thing.

The bell wounds my Shaggoth. He has no plague monks left. My BSB wounds the Bell twice and the Knights finish it off. Shaggy kills his warlord.

Take that, Skaven rats!

Skaven turn 4
Skaven turn 4
The HPA charges back at my wizard on the dragon. His Doomwheel kills the last Chaos Warrior of my big block with its shooting.

I save his only impact hit. I which at him. He gets the "Avalanche of flesh" attack. Does the HPA ever do a reasonable number of attacks? I fail the I roll but ward it. He hits 7 more times, 6 of which wound, 5 of which I save. The Dragon then puts him down again, doing the 2 necessary wounds.

And he...comes back. As Rat Swarms, this time. Much better.

His Assassin kills another crewman. The Cannon kills the assassin.


Warriors of Chaos Turn 5

Okay,  at this point I am feeling pretty good. His doom wheel is not as tough as the Furnace, which I took down. Sure, I had to use 10 knights, an exalted hero, a shaggoth, some magic, and 31 Chaos Warriors...but I took it down.

I mean, sure, I was throwing as many as 23 S5, 49 S4, and 5 S8 attacks at it for multiple turns...but I took it down. Sure, I lost over 20 chaos warriors and a handful of knights...but I took it down. Sure, I....ah, smurf, who am I kidding. I am not confident in my ability to take down the Doomwheel in the next 2 turns.

At the same time...he cannot do near enough damage. I have wiped out almost his entire army.

The Dragon decided to leave the swarms for the knights, flew over them at his weapon team...which fled. I redirected onto his clan rats. The Knights charge the swarm.

And here comes the whiff factor. The BSB puts 4 wounds on the swarms...but the knights under perform. Completely. Four wounds. Wow, really? Fortunately, the horses do just as much, 4 more wounds, the swarm melts.

The cannon kills another storm vermin after he saves half the wounds.

Now we will see what a Chaos Sorcerer on a Chaos Dragon can do against ranked up Clan Rats. This is the type of situation I typically avoid...I like to combo charge and bring overwhelming force. I do not like things that might be close combats or risking 695 point models without being pretty sure I have the advantage.

However, the game kind of got out of hand a bit. He has done a lot of damage, but it has been spread out. So he has very few points at this juncture. So even if I get hammered, it makes it arguably a better game...and if not, it does not really matter a lot.

Well, all three of the Wizards attacks kill. He strikes before the dragon, but only wounds 1 time, which I duly save. Then the Dragon kills 5 with his breath, 3 with base attacks and 4 with his thunderstomp.

Totally epic. I did a whopping 14 casualties in one round...he cannot stand, I pursue off table, his non-fleeing weapon team breaks. I am duly impressed by the power of the dragon.

Skaven Turn 5
He fails to rally anything, his weapon teams flee off the field.

Shooting will be bad; Shaggy is the closest to his doomwheel, and is immune to the effects,. He tries to restrain. Fails. He fires...or rather, mis-fires. He takes 6 S6 hits. His doomwheel blows itself up.

His last weapon team mis-fires...blows up.

He does manage to put a wound on the H-cannon, though, so at least that went right.

Warriors of Chaos Turn 6
My Knights, being frenzied, must charge. The Scree slope forces dangerous terrain tests. My BSB duly rolls a 1, I do not ward save it. The others all pass.

He kills a Storm Vermin, in a challenge my champ kills his, my other knights kill 2 more, he kill the last Chaos Dwarf, then the cannon kills 4 more. He breaks, runs, flees table.

Skaven Turn 6


Conclusion
Well then. On the one hand, I am really not fond of tabling my opponent. On the other hand, I think Kev takes it better than anyone. And he thought it was an enjoyable game, so I am not going to dwell on that aspect too much.

What went right?

 Well, first off, my plan worked beautifully. His force ended up being split into distinct elements whereas mine was almost all centered and working in concert. As a result, I had 2-1/2 - 1 points advantages at almost every point of contact. This spread my casualties out very well to where I lost just three units despite taking dozens of casualties. Meanwhile, I got rid of some dangerous guys without taking much damage. Queek, I am looking at you here.

Second, I played very well. I can count on one hand the number of mistakes I made: forgot to use the warshrine on turn 1 (minor, not really relevant), forgot to roll LD test for the Cannon on turn one and to roll for Wulfrik on turn 3. I was able to minimize his shooting which let me get into hand to hand before he could whittle me down to manageable sizes.

Third, I had a fair amount of good fortune with lots of irresistible without being harmed by mis-casts, whereas his mis-casts cost him his level 4 and level 2 wizards. I also made a pretty fair number of saves. Of course, that meant he had a lot of attempts to wound me...but that is kind of the point of playing an army based around good saves. To make them. I am often disappointed when I either do not get to attempt saves or fail abnormally large amounts. This game I made a lot of saves and I enjoy that.

Fourth, he had some timely very bad fortune...like his low impact hits, his weapons teams mis-firing on command and his being struck repeatedly by miscasts that were devastating.

Regardless, this was an extremely entertaining game. In retrospect, it was a demolition beginning to end...but for about 4 turns it felt like I was fighting uphill. We had epic, grinding combats that lasted multiple turns. We had crushing charges and stellar defenses.

One great moment was when I smurf-slapped his HPA with 10 S10 hits and laughingly said, "You only need to regen 7 to survive" only to see him do just that. What a great, memorable moment.

Or seeing said A-bomb come back with wounds once and then again as a swarm. It began to feel like I would never be rid of that thing. I just did not know how weak swarms are.

Which leads me to another point. I often point out that person x or y is a better player than I am. Part of that has to do with research.

I don't.

I cannot tell you how many times in the game I had to ask wounds, strength, abilities, etc. of the various Skaven rats. I had no idea they even had a close combat weapon team. As he pointed out, the team had a giant propeller blade...I just thought it was another gun of some sort.

I also had no comprehension of the sheer destructive power of the template guys who nearly wrecked my Marauder horde.

Yet some guys in the group know the 'enemy army" nearly as well as they know their own. This is a valuable skill as it allows you to dictate who you want to fight against who, and when you want them to do so.

Looking back, I should have had everyone attacking the Bell, not the Monks (or Furnace...I actually think it was a screaming bell, not a plague furnace...) from turn one. But thinking I could not touch it, I let it live much too long. Once I got around to attacking it, I killed it in relatively short order. Not knowing the Skaven book very well altered in-game decisions.

So studying the opponent is a valuable tool for improving play. Not knowing them is a handicap. Though not necessarily a game-breaking one. It just makes it a bit tougher.


Overall, this was a very, very entertaining game. I was on pins and needles for 4+ turns....which in a 4k game means for about 5 hours. Great game, great time, thanks for the match, Kev.

Only one thing left to do; Survivor group photo

Tuesday, April 26, 2011

Beastmen v. Tomb Kings

 Some of you may have been watching the slow but steady progress of my Beastmen army painting. Obviously my updating of it is a bit behind as I have completed a chariot, several heroes and the minotaur since then.

In fact, I have painted all the models I exchanged my once-well loved Wood Elf army for. So I was kind of wanting a game with them. My brother Ken came through, accepting a challenge for a Beastmen v. Tomb Kings battle.

It would be an epic battle between two of the lowest-regarded books currently.

Now, on the one hand this is advantageous for me. I have found a build for the Beastmen that looks like it would be both fun and effective. On the down side...I do not yet have the models to put it together.

On the other hand, there is a certain disadvantage. Back in 1995 I was unquestionably better at Warhammer than my brothers. Of course, back then I also had a lot of power gamer/waac type stuff in me. My Brettonian list involved a Lord character on dragon, a few archers, and the rest Grail Knights. It was all but untouchable in that edition and pretty stupid of me.

I would no longer argue I am the better player. In fact, if you had to pick one player in our group who I believe is currently the best, it would be Ken.

Part of that revolves around his list building. He mixes up his lists so well that I often have no idea what he will bring. This is not always true for the rest of us.

With me, for example, you know my WoC list will revolve around Knights. Everything else is just filler. Same with Liam's Bretonnians.

Kev's Skaven will always have the Plague Furnace, HPA, and Doomwheel with miscellaneous other stuff filling in around it.

Fullur will bring boatloads of skinks, some temple guard, slann, and a stegadon.

Ken does the best job of any of us of changing up his lists.

Then he deploys them well, maneuvers them with talent, and tends to maximize his advantages.

In short, any time I can win against him I figure I have done exceptionally well. In our group, I always feel I had to play well to come out on top. But with him I feel like I cannot make any mistakes and win. Which is good.

Well, anyway, I started to build a form of the list I am working towards building overall. But then something happened. I decided I really, really, really wanted to try a doombull. This already throws me off trail because it costs me that LD9 re-rollable big block I typically center my beastmen lists around.

So I decided to take it a step further. I went with a Gorebull as my bsb, costing myself another dip from LD8 to LD7.

Instead of multiple mobile blocks of Gor I horded 53, planting the Gorebull with Banner of the Beasts. To fill my core I upped my chariot plans from 0 to 3.

Going against prevailing wisdom I took a grand total of zero bestigor. I then fought prevailing wisdom by taking the vastly over-costed, nigh-defenseless Ghorgon. Then I followed up by taking 5 minotaur without doing the "plant a bunch of characters in there so the rank and file attack but do not get hit" mino-bus thing.

I had challenged him to a "soft" game between two low-ranked books. I felt like this was in the spirit of that. I "only" took 2 bray-shamans and a great bray-shaman instead of the 5 or 6ish I initially planned. I did come with a plan, though.

I expected him to take the special character who gave his entire army poison and figured to be facing blocks of skeleton archers hitting on 5s, doing wounds on 6s against my unarmored, no-save guys. So I was going to be flying towards him, hoping to get into combat on turn two as many people claim they unfailingly manage. With minimum 7" moves, this seemed possible.

The big Gor block should be steadfast for quite a while, so re-rolling on LD7 and tying up his expected Tomb Guard and/or Skeleton blocks. Meanwhile, my Chariots and Minotaur would sweep up the flanks close by, charging in to benefit from their impact hits to do some real damage.

It was really the Doombull and minotaur I was centering my battle plan around. Much like the Wood Elf Wardancers, Dragon Ogre Shaggoth, Galrauch, and the Chaos Knights I had mighty expectations for them.


 We rolled up Battle for the Pass, a scenario I had yet to play. With no less than three @#$%^ mysterious forests hanging out, I had to think about my plan. I decided to put the massive Gor block in the center. My BSB would go here, and by turn 2 everyone would be within range of the banner.  My three chariots went on my left, my Ghorgon and minos on the right.

As we set up, I began to see the first flaw in my plan. He had a couple chariot units. A casket. Not one guy on foot in unit form. Gulp. No stomp/thunderstomp for me. Already the Wardancer debut loomed in my head for the minos and the Shaggoth for the less-anticipated Ghorgon debut.
.

He set up one chariot unit on each flank and, wonder of wonders, had no hill in his deployment zone for his casket. I caught a break.


Beastmen Turn 1
I marched my gor forward, then made mistake one. Remember, the whole plan was to get everyone close to the banner. That means the Chariots should have circled behind the Gor. Instead I...moved them forward.

I then rolled snake-eyes for magic. With the Herdstone and a couple channels from the Arcane Ruins I got up to 5 or 6 magic dice. No point to any spell at this point so it did not really hurt me.

Tomb King 1
He has no ability to march. Still, he advances full speed. magic phase, I let him move everything forward since I want us in close combat ASAP. I try to stop his bowfire via magic but take a wound to a mino anyway.

Beastmen 2
I realize I had erred in turn one so turn my chariots to get close to the banner, then twitch the minos over to get in range. This turn probably should have been full advance, but I took the time to correct for my turn 1 error. Also, if he did full advance, then I stopped his magic I could charge in with my minos, get some nice impact hits and brutalize him.

I then miasma his chariots on my left flank, dropping their movement by 3. I want them out of the battle. I get Wyssans wildform on teh gor just in case he gets into them with Ushabti or Bone Giants. He then uses some TK item to auto-stop my pit of shades on his left side chariots.

Tomb King 2
He moves his chariots forward to where my minos will charge next turn. I have been saving my Dispel scroll for this turn. I am going to stop his charge so I get the charge and the impact hits.

Then I misunderstand his magic phase. I think I have to stop 8 attempts at the movement spell. After I stop the first, I think there are still 6 to go (notice the addition issue there) and, figuring I cannot stop them all, decide to try to stop the bonus attack and/or Casket.


So now his chariots boosted by a couple heroes slam into my minos. I then fluff my dispel roll and he gets the bonus attack. His Tomb King? Prince? wounds the mino champ, the other guys put 2 wounds on the rank and file. I have lost a mino already.

Meanwhile, on the other flank he gets off a few potshots at my chariots, wounding one.

His chariots are fierce, slapping down 13(!) impact hits, doing 8 wounds and killing the rest of my rank and file. In the obligatory challenge, his TK kills my mino champ.

So...yeah. Unlike the legendary fluffed Wardancer epic debut charge of failure, more like the Shaggoth debut of disappointment...all 5 minotaur died without ever getting to swing.

We later talked about it quite a bit and decided I should have taken the challenge with my Doombull, thus guaranteeing the champ could attack and my Doombull probably kills his TK. But my thought process was the Doombull's massive number of attacks should wreak havoc on his chariots.

He did. He hit 8 times, wounding 5, he saves none. He then wounds me back once which I save. I have the stubborn hat and BSB. I pass exactly on my LD8.

Great, epic charge. That is the type of charge I love. And he executed it perfectly, outplaying me badly and doing incredible quantities of damage.

Then again...the Doombull brutalized him right back, really doing a number on his poor chariots. So great, great combat.

Honestly, at this point I was thinking I was doomed. The Gor were there to withstand something like that chariot charge via re-rolls and steadfast, thus allowing the Minotaurs to sweep in and do damage. I had little faith in the Gor to do enough damage to make up for the 345 points just swept away.

Beastmen 3
My Ghorgon charged headlong into the front of his chariot line while my Gor flank him. My chariots irresolutely move back to pseudo-protect the Bray Shaman herdstone/Arcane Ruin magic park.


This will be the key turn. I need some big magic. Slap a Miasma or two on the chariots, a Wyssans and/or Okrans Mindrazor on the Gor and I can really do some work.

OR....I can roll snake-eyes for magic for the second time in the battle. then channel just 2, so I only have 6 magic dice for the key turn.

*sigh*

well, I start with an enfeebling foe with three dice, hoping to draw out his Dispel Scroll, then either wyssans or Mindrazor. Instead I get irresistible force, lose 2 levels and only accomplish reducing his S by 1. I then fail to get enough force for Wyssans. Epic fail.

Oh, the humanity. Wait, beastmen. Oh, the bestiality...wait a second...lets go back to the first. It was not a good moment for my morale.

This time I accept his challenge with my Doombull. He gets always strike first with some magic item, needs 4s, attacks 5 times and 4 of them hit. Then, needing 5s to wound, he wounds me 3 times. Needing a 5 to save, I save 1. I then hit him 5 times, wounding him back 3 times, he saves that same one.

The Ghorgon is more successful, with 5 hits, 3 wounds.

Then...the power of the Beast-Banner strengthened Gor.

Due to the length of his two ranks deep chariots, I get all 10 in contact. With the front row having frenzy from the Gorebull and extra hand weapon, that gave me a whopping 50 attacks; 30 from the front row, 10 from each of the next two. Slightly less/more as my Great Bray-Shaman and Gorebull replaced 2 of those.

Anyway, I hit 27 times and wound 13 times, he saves just 2. I end up winning even more epically than he did (by 19)! and he disappears to combat resolution. I follow just 7". Bad, bad position for me to be in.


Tomb King 3
His bone giant flank charges my Gor. His Ushabti rear charge them.

I try to dispel his bonus chariot move and fail to do so. They will be on my magic park next turn. Fortunately, he fails his charge this turn so moves only 4" extra.

I debate a long time about his righteous smiting ushabti attack on my gor. Ultimately, I make the single best decision I have made all game. I decide the point of a horde is to absorb casualties and still attack. I save my dice for the casket.

His Ushabti manage just one wound. I stop his giant from getting it when he rolls poorly, then stuff the casket again.

My Gorebull BSB makes way to face the Giant. I hit and wound 3 times. I am impressed. Everyone left is initiative 3 so will attack simultaneously.

The Gor hit the bone giant 4 times, but can muster just 1 wound which he saves. I hit the Ushabti 12 times, doing 4 wounds, of which he saves just 1.

The bone giant goes after the Gorebull. This was the chance I took. If he kills him, I will lose my LD re-roll. Fortunately, he whiffs all but one attack which fails to wound. The Ushabti do markedly better on my r&f gor, hitting 8 times and killing 7. He then stomps pretty good but the thunderstomp rolls just 1, so he kills just 4 more gor.

Still, he wins handily between his 11 wounds, charge, flank and rear. But I am steadfast and pass. I fail the reform roll by...well, bt the one point of LD difference between a Doombull and Beastlord.


At this point I have one chariot that will flank charge his Ushabti next turn. The other two will be moving to protect my two bray Shaman. That means he is likely to get 2 of my three chariots and the 2 bray-shaman in the next couple of turns.

Meanwhile, I need the Gor to hold off his Bone Giant long enough for the Ghorgon to sweep around the back and hit the Ushabti and the Doombull to go after his Bone Giant.

One bad roll kills by BSB and gives a good chance of my gor fleeing before that can happen. One good roll kills his Bone Giant and lets me concentrate on his Ushabti.

It is late, his kids want to watch The Sorcerers Apprentice, and this game has given us a great time.

He got off an epic charge. I got off an epic charge. I offer a draw. He accepts. I think it is a fitting end to this game.

He held an early advantage. I held a mid-game advantage. The dice could turn it into a massacre for either of us. I had a great time, I would just as soon reflect on it.


Reflections
Well, as usual for me, a unit I looked forward to rolling out was a huge disappointment. But this one was different.

With the Wardancers, I will never not believe I played them correctly. I softened their target, charged the right unit at the right time and fluffed the rolls, only to run into some very good rolls.

With the Shaggoth I simply experienced one of the problems of running into a shooting heavy army with a lightly armored model and died to shooting.

With the Chaos Knights, I played them correctly and they inflicted mass carnage.

With my highly anticipated Minotaurs I simply got out-played. He out-maneuvered me to get the charge, then I took the challenge with the wrong model and thus died bloodily and deservedly. this was not a unit fail. It was combo player fail and opponent superior play. Mostly it was his better use of magic, so I do not feel badly about their performance. I am simply not good enough to stop the plan he developed and executed.

Meanwhile, the herdstone park performed outstanding. As he commented at one point, "you rolled snake-eyes for magic and have 6 dice." Yep. And it mattered. I think slowing his chariots on the left flank for that one turn made a huge difference.I think having enough dice to at least ATTEMPT Wyssans on the key turn despite rolling snake-eyes was huge.

And the Gor with Beast banner...hitting the flank, rolling all those dice...oh, I LOVED that. Still think I would have been better served with units of 20 and 30 for assistance if we had rolled Blood and Glory or Watchtower.

But there is something about rolling 50 S4 attacks that is just plain awesome.

Overall, I am going to declare my initial foray with the Beastmen a smashing success. I enjoyed the game, it was much more involved than sometimes I get with my Warriors of Chaos, and every turn except the first brought excitement.

Thanks too, to Fixed Dice for a most entertaining game.

On a completely unrelated note...Fullur, you should come to painting Friday. Come early. We will go by Performance Bike. Let you try riding a...well, different type of bike. I see why you drive to work. You should try it on a more comfortable bike.


All fear the Beastmen!


Thursday, April 7, 2011

List Building: A Matter of Blocks

There was a faint possibility I might be able to catch a game against fellow Starving Crazed Weasel Kev on Thursday night. However, we had not previously discussed the PRECISE size of the game.

So I went way back in the time machine to when we first re-started Warhammer.

For the first few games I would painstakingly construct 3x5 index cards for each unit with their stat lines, equipment, etc. On each card I would highlight stuff that might need to be remembered such as armor saves, weapons conferring Always Strikes Last, any magical banners or items and so forth, thus allowing me to tell at a glance where things stood.

The original plan was to keep these in a file so that at the drop of a hat I could construct an army just by pulling out the appropriate cards.

Unfortunately, soon after this the army books changed from Hordes of Chaos to Warriors of Chaos, my unit sizes kept switching and I got confused as to which ones were up to date and which were hold-overs from the Battle for Skull Pass rules versus actually using the appropriate army books.

Now that the composition rules have changed, I am giving serious consideration to attempting the modular build system again.

Basically it would revolve around making cards for the commonly taken units I make.

Example;
 12 Chaos Warriors with Hand Weapon, shield, full command, mark of tzeentch.
5 chaos knights with full command, mark of nurgle, banner of rage
5 chaos knights with full command, mark of khorne, war banner
50 Chaos Marauders with full command, great weapons, mark of khorne
5 Chaos Marauder Horsemen with throwing axes, musician, light armor.
Exalted Champion on chaos steed, mark of nurgle, banner of chaos
Level 2 w.Dispel scroll
Level 2 w/tzeentch, puppet, steed
Level 4 w/tzeentch

I use these often enough that I would be able to build a list in 5 minutes.

"Want to play 1600?"
"Sure." Hasty calculation tells me I need 400 points of core. Either the Chaos Warriors and 2 Marauder Horsemen units or the Marauder horde and 2 Horsemen would work...so would a larger block of Warriors (with or without the Horsemen).

Then drop in the ever-present Knights (and soon returning Shaggoth and Dragon Ogres) and I have my list built.

Want to play 2400? No problem. 600 points of core is easily filled by the Marauder Horse, Marauder Horde and one Chaos Warrior blocks. Now I can "modular up" my Knights to a unit of 10 and unit of 5 and I am almost there.

In short, if I sit down for just one evening and put in the work I could easily have in place a modular army building system that, with but minor tweaks could assemble an army of virtually any size in moments.

Of course, in the case of the Warriors, that is largely true because of my familiarity.

But the system would be easily converted to some of my more seldom played forces. Say I decided to play the dwarfs. I probably should since they fit me so well. Slow moving, portly, constantly grumbling...I think I might just be a really tall Dwarf.

Anyway, instead of having locked in units like I do with WoC, I might more have slots such as this:
"Full command:x points"
"Option for Great Weapon: +x points/model"
"Option for Hand Weapon /Shield: +x points/model"
Base cost: x points/model"

Now, the observant among us will point out "Isn't that pretty much what the army book does?"

First off...shut up.

Second...yes and no. In this case, by having the 3x5 index card with appropriate things highlighted (as:4+) and knowing I need x points of core, I can simply grab the card, throw it on the table and not have to write out all their stats/important things. A scratch paper lets me fiddle with the points and meanwhile I will save time by not having to look at units I never take such as Quarrelers, Slayers, etc.

But realistically, I would be trying to build them in ROUGHLY 250 point blocks. This makes the 25% thing pretty easy to manipulate.

So take a unit such as Thunderers. I routinely give them shields and a musician (and recently even standards). I also tend to take them in 10-man units due to frontage plans. Throw down an index card for that and I am well on my way to being ready to fill my core.

Do the same thing with blocks of 20, 25 and 30 Warriors and I am set.

Also, since my character builds tend to be pretty similar, I could have them pre-made and ready to go.

It would not take much time to make these lists for the High Elf and Orc and Goblin armies, either. In just an evening I could make the index cards.

This would allow me to play virtually any army at virtually any size in 5 or 10 minutes without ever picking up the army book.

A little bit of prep work would thus result in a LOT of enhanced play enjoyment.

The sad part is...I suspect a person who knew how to work Excel could probably make this up so even the cards would be extraneous. I suspect a person using them solely for their own use (or possibly their small gaming group) would not run afoul of the notorious G-W legal beagles for any copyright issues.

But that person is not me. So for now, modular, pointed, highlighted index cards seem like a wise way to go.


Check out this battle about half way down for a couple glimpses of the index cards in action

Saturday, March 19, 2011

High Elf Versus Brettonians, Blood and Glory

Liam and I set up a game at 2900 points. Why 2900 you ask?

I looked at the models I had and started there. 10 Swordmasters. 17 White Lions. 5 Dragon Princes plus I could use 5 Silver helms as unit filler. 2 Repeater bolt Throwers.

Throw in some Wizards with various items to ensure a big magic phase. Figure out I needed 475 points in HERO level characters.

Decided to try the horde of Lothern Sea Guard. Had I remembered I had a chariot...that would have appeared as well.


Check out the spears poking through from the second rank. Good times.


Anyway, we rolled the scenario and three consecutive times came up with meeting engagement. That has been Liam's last two games and one of those was with me so we re-rolled until we got something different. Ended up being Blood and Glory.

I had a BSB, banners in the Swordmasters, White Lions and Sea Guard so I was in good shape with 6 points there. He had a whopping 11 banners. Unlikely to win via scenario rules...I would need points.

I knew he had double trebuchets. One of the reasons I seldom play High elfs is because they do not really suit my play style. I try to keep my casualties low, make sure the troops engaged have the capability of doing something and are therefore worth taking.

Against S5 templates I have no save and am wounded on twos. Horrible, horrible match up. On the bright side, I do have two units with either S5 or S6 so his 1 or 2+ armor saves can be hit by those, plus the RBTs will theoretically allow no armor save because I plan to penetrate ranks after I take out his Trebuchets.

Well, I set up the White Lions in a forest to my left. It was a mysterious Forest, but I thought I would play against type and not treat it as impassable terrain as I usually do.

 On the other side of the forest I planted my LSG unit (and later all my characters went in this unit) with another Mysterious Forest to the right and the Dragon princes angled to flank anyone who hit the LSG in the front.

Above this set-up were my small block of 12 Archers, then one RBT on the ground to the right of the second Mysterious Forest, another on a building with Swordmasters there to protect it.

This was a badly flawed set-up. I was thinking the RBT had S10 when they single-shot. Their assigned task was to take out his Trebuchets. The Swordmasters I set up hidden by the building, but I faced them wrong so they would take two turns to threaten any upcoming unit.

I would have been better off putting a RBT to either side of  the LSG and concentrating on the Knights. Not knowing my own stats is inexcusable.  


HE Turn 1
I march the White Lions on the left. Cannot remember the Mysterious result but it ended up having no effect.I make a lesser advance with the archers. Across the field I am looking at Knights flanked by Knights flanked by Knights...so...yeah.

Time for Magic. I get max dice. Throne succeeds. I then put Flesh to Stone and one Wyssans on the LSG. He dispels the second Wyssan. So here you see my battle plan. Now I have as many as 50 S4 attacks with re-roll to hit and T6.

Even charging Knights are only wounding on a 4. Now I have a tough, rugged army.

Of my 35 shots 5 wounded...a little low, I should have wounded with about 9. He then proceeded to save all of them but one. So about one wound light by math.

My RBTs targeted his Pegasus Knights because it was at this point I figured out the lower S thing. The first one missed, the second saw its hit discarded by the Enchanted shield.

The theme begins.

Brettonian Turn 1
His Pegasus Knights and hero fly towards my RBT on top of the building. I am not worried...I am on a building, so untouchable by fliers.

Well...actually not. Turns out I invented that rule in my own head. For some reason I was thinking Cavalry, fliers, and monsters could not attack garrisons. I was wrong. Not knowing the rules is not good.

Anyhow, he maxes out on Magic dice as well. He dispels Throne and Flesh to Stone.

Now, the clever reader instantly says Rules Error. Flesh to Stone is an Augment spell that lasts until the casters next magic phase. If it is successful it cannot be dispelled, stopped, removed, etc.

Now...I built this army specifically around having these Augments on my units. I know he will probably get all the charges based on his superior movement. No big deal...I took Okrams Mind Razor with one Wizard along with Wand of jet.

On the key turn I will be using the Power Stone, Wand of Jet, and power Scroll hiding out on my wizards to have him facing a S8/T 6 or 7 Always Strikes First mass attack unit.

And now, by not knowing my own rules, I changed my entire strategy.

Not once in the entire battle did I A) use the aforementioned magic items, B)remember to use the Lore of Life attribute or C) use the strategy I built the army around.

Anyhow, I block his Iceshard and Comet, in both cases only tying him because the High Elf Archmage adds +1 to Dispel.

The first Trebuchet scatters. So far, so good.

The second one kills 18 of 21 possible LSG when it hits.

T4 not as good as T6. Instead of wounding on 5s he was wounding on 3s.

His peasants then kill 5 of my small archer unit.

HE Turn 2
Again my White Lions march on the left. Next turn they can charge the trebuchet on that flank.

This time he dispels Throne, I get Wyssans off and I then Miscast with Flesh to Stone, putting a wound on each of my Wizards and losing the rest of my power dice.

He is moving a big block of Peasants up towards my second RBT so I weirdly break my own rule of concentrating fire and unleash everything...RBTs, LSG, at them. The RBTs kill 4 and the LSG kill 6.

The RBT never hit again in the entire battle.

On the bright side, the remaining 7 archers put a whopping 5 wounds on the Questing Knights and he only saves 4.

Brettonian Turn 2
His Pegasus Knights charge my RBT on the building. His Pegasus Hero charges the other one. Everyone else...knights, the peasant horde...advance on the LSG.

Magic all gets shafted. he again dispels Wyssans. Both Trebuchets hit, though one partially scattered. I lose another 15 LSG this turn. I have now lost 33 of them to two turns of shooting.

His peasant bowmen shoot down 6 more of the small archer unit, leaving just one who stands.

I wound the Pegasus hero once in a minor upset, he kills a crewman. I pass my test.

On the building I wound him TWICE, but he saves the first with armor and ward saves the second. But he whiffs. Drawn combat. Go-go gadget garrison!

HE TURN 3
He dispels most things, I get regrow off, put back three LSG.

The White Lions charge....the peasants. Why? Why? Why?

The Trebuchet is RIGHT THERE. It is the correct target.

Another play error. I really erred time and again in this game.

Well, the White Lions did what high WS, S models with re-rolls do and slew 9 peasant bowmen. They do none in return and break. His Treb fails LD test so will not shoot for a turn. I fail LD test to combat reform and chase the Peasants but do not catch them.

Brettonian Turn 3
He announces charges on my LSG with Grail Knights and...knights Errant? Knights of the Realm? I stand and shoot his Grail unit, wounding twice but he saves them both. He then fails both charges. His other knight unit charges my lone archer and I elect to flee. I do not want him overrunning into my LSG.

His magic is good, getting the Comet off irresistibly.

High Elf Turn 4
The unit that charged the lone archer presents its rear to my White Lions who charge it. The lone archer...rolls insane courage. Worst possible result for me.

He is now blocking my Dragon princes who, instead of charging, are now trapped behind ONE model.

Tired of playing poorly, I elect to play unbelievably badly. The idea is with the BSB and Crown of Command, I am Stubborn on a re-rollable 9. I am effectively unbreakable.

Yet for some inexplicable reason I break off my wizards and run them into the nearby Mysterious Forest. Oh, by the way...the Crown of Command was on my Archmage, not my BSB. So now my unit is not stubborn.

My shooting and magic all fail. Now my non-stubborn unit is facing 20+ S6 attacks with T3 and no Stubborn. I am probably going to need Insane Courage to stick around.

On the bright side, the White Lions kill 4 knights plus their champ, forcing him to flee and I pursue.

Brettonian Turn 4
This time his Grail Knights make the charge. He rallies everyone else.

And then the Comet hits. And r9olls 9". All my Wizards are now individual units and three consecutive times he rolls 13 hits. 3 dead wizards.

He then kills his Pegasus Hero (which had wiped out my RBT)kills 6 Grail Knights and 6 LSG. I will take the LSG/Grail Trade...

Which frees up his Trebuchets to kill 7 Swordmasters.

In the challenge his one guy kills my champ, I wound his character 5 times, he saves them all. Nobody runs.

High Elf 5
The solo archer has to get out of the way of my Dragon Princes, so he suicide charges the freshly rallied Knights as the White Lions, thinking I need to get that banner, rear-charge the unit next to them. The Dragon Princes then flank his Grail Knight/Champ.

My Dragon princes lay waste to his Grail Knight. My LSG do wound his hero 5 times, but he saves them all. Still, he breaks, I run him down.

The archer, to the surprise of nobody, dies, but the White Lions wound his Knights Errant 10 times, killing 6 of them. He kills 3 back, breaks, I run him down as well.

Bretonnian Turn 5
He begins a strategic retreat. We debated calling it, but a hasty points calculation discovered I was ahead. He would need to do lots of damage with his Trebuchets so we played it out.

12 White Lions die to Trebuchet.

High Elf 6
I do flank charge him with my Swordmasters on his peasants. He can treb me to death anyway with just 3 left. I actually win the combat, he has to test on a 6...and that is what he rolls.

Brettonian Turn 6
His Pegasus Knights charge my Swordmasters, I do a wound or so, he kills them all.

His trebuchets cannot finish off my LSG, leaving like 2...but I fail my re-rollable 9 LD test. I roll a 5, am about 5-1/8" from table edge but declare them off anyway and he gets the win via scenario rules.


Retrospect
Honestly, at this point I was pretty disgusted with the High Elf army. I built the army around Augment spells but at this point was thinking...they would never be in effect when they mattered. People would just dispel them on their turn.

Furthermore, all the shooting was very ineffective. Yes, I had 35 shots at first but just did one wound. S3 is still S3 and against armored troops with a back-up ward, that does nothing.

But after thinking about it...oh, how wrong I was. I had all the tools to not just win that game but win it handily.

With better set-up I would have gotten the Dragon Princes and Swordmasters into multiple combats. My LSG would have had 25 or 30 guys around between taking fewer wounds and using the Life attribute. My Wizards would have been alive. I would likely have had S9 on the key turn by using the tools I built into the army.

Furthermore, the shooting was much more effective than I gave it credit for. I just failed to focus my shots and it was my tactical errors that reduced the effectiveness of the shooting.

He outplayed me in set-up, in knowledge of key rules, and garnered a well-deserved victory.

And it was the best kind of game; enjoyable throughout and led to me rethinking a couple of things. Playing different armies is good... 

Tuesday, March 15, 2011

Reflecting on High Elf versus Brettonia

Saturday I had a fun game against Liam. I was using the High Elf army again against his Brettonians. Worked on the battle report last night but was having some issues with the Picasa-blog interface, so that report has been delayed a couple days.

Meanwhile, a few observations from the game.

When I built my list, it was done in my standard style. I love Knights so took a unit and, in light of my habit of failing or not even getting ridiculously large numbers of saves, I decided to take 10. I also mounted my BSB, planning to put him in that unit so they could lose a guy and still have a rank bonus.

That is one thing that makes a huge difference. When a lance of 10ish Brettonian Knights loses a model it loses little to nothing in terms of effectiveness. No single casualty ever cost him a rank bonus.

But when my beloved Chaos Knight 5 man units lose a model, they lose 20% effectiveness. 5 man units are simply too small when facing things like double trebuchets, 50 man Repeater Crossbow hordes, Jezzails, Engines of the gods, Waywatchers, etc.

Sure, there might be just one or two wounds suffered in crossing the field...but that is 20 - 40% effectiveness lost.

Liam took 2 I believe 2 casualties to his Grail Knights before getting them into combat. I think that cost him 1 attack and maybe a rank bonus?

He did take about 4 wounds to his knights total in crossing the board...but I made the same mistake I have benefited from others making, spreading my fire across units so I reduced the effectiveness of none of them.

So first off, units need to be bigger for WoC to deal with the loss of effectiveness. Second, I need to concentrate my fire.

I also took 10 Swordmasters...all I have painted...and 17 White Lions with a champ giving the unit magic attacks...all I have painted. I also took two Repeater Bolt Throwers.

It is an "all-comers" list...I need to be able to deal with Lizardmen, Ogre Kingdoms, Skaven, Empire, Dark Elfs, Wood Elfs, Brettonians, Tomb Kings, maybe even Vampire Counts or Orcs and Goblins.

So I put in some flaming and planned to use the Swordmasters and White Lions to deal with stuff like the Hydra, the Plague Furnace/Doomwheel/Abomination, etc...anything with high T.

The irony is I did not want to use the White Lions. 1 attack each just does not cut it.

After all this, I still had points I had to put into core units. There just are not any core units I really want to use since they are all pretty ineffective.

So I horded 50 Lothern Sea Guard, then spammed level 1 mages with Shadow and Beasts. The idea was to have the stubborn, re-rollable 9 LD Sea Guard blast everything in sight with 35 shots per turn, get into combat with some buffs from Wyssans Wildform and Life (my level 4) and then have the Dragon Princes and Swordmasters blast the flanks to build combat resolution.


So the list design is simple; 4 total wizards buffing the LSG and keeping it stubborn, everyone else to protect/atack the flanks. Oh, and the RBT to deal with hard to damage stuff.

During the game, however, several things went wrong.

First off, the amount of space 10 wide, 5 deep + 5 heroes takes up a LOT of space and when you roll large quantities of terrain...sometimes it is not possible to set up to protect the flanks with cavalry as forests might be in the way.

Second...if you pay the points for a mount...REMEMBER TO USE THE MOUNT. Instead I forgot the BSB had a horse and put him unmounted in the LSG.

Third...if you build your army around the idea of having a re-rollable stubborn horde unit full of buffs, make sure you can run that strategy and make sure your tactical decisions do not remove it.

Case in point; On the first turn, I buffed the unit with Wyssan and Flesh to stone. Thus when his dual Trebuchets went off, I would have good survivability; T6 troops survive much better than T3. But we made a rules error and let him dispel both buffs.

This was 7th edition thinking. They cannot be dispelled. They are not remains in play spells.

It changed my tactics in subsequent turns. Knowing I would never have the buffs on the unit when he shot or charged, I refocused my magic elsewhere and it became ineffective. So half of the strategy I built the army around was shot down immediately. And having launched 35 shots to do zero wounds...forgetting I had given the Ellyrian Longbow to my BSB and never using it in the game...I thought there was no way to touch the various Knight units he had.

It was also at this point I discovered the RBT did not have S10 as I was thinking. So instead of firing at his Trebuchets as I planned, I shot at his Pegasus Knight, only to see him have some 2+ shield that discounted the shot.

So my first turn saw a great deal of my strategy shot out of the water, partially through rules error and partially due to poor tactical decisions. I have mentioned others splitting their fire...I did the same thing all game long, cnging my mind as to what the target should be from turn to turn.

But the biggest error I made was not knowing what equipment was on what person and/or not using it at the right time.

Case in point 1) NEVER using the S5 bow.
Case in point 2) Never using the Wand of Jet, Power Stone or Power Scroll. I had the dice to use. But the plan was to use Mind Razor on the LSG when they got in combat, guaranteeing it through use of the Power scroll, to have the unit buffed with double Wyssans using the Wand of Jet and Power Stone to provide the extra magic dice punch, and use most of my magic dice for a key Stone to flesh/regrowth combo that would mean on the key turn when his Grail Knights charged in I would have S9, T6 troops striking first with a re-roll to hit.

But I changed magic focus knowing he would just dispel them the turn he charged because I did not know the rules, ended up never using any of those items, and then made a far, far worse error.

Case in point 3) Perhaps the most egregious mistake I made. Not knowing who had what item. I built the list around taking a charge from any and all comers with heavily buffed and, more importantly, STUBBORN with re-roll LSG.

This would let me side-smash him with my stronger units and I had no fear I would be running away. I was effectively unbreakable.

Until I forgot the Crown of Command was on my Level 4 Life Wizard, not on my BSB. So I fled my wizards out of the unit...I still am not sure why I did that....which removed the Crown of Command. And since the unit would have T3 against charging S5 and S6 knights...I was looking at losing 15 - 20 models. Insane Courage is rare.

Instead of rock hard anvil my ignorance of rules, lack of knowing who had what in my own army, and forgetting how the army was built turned it into a marshmallow.

Only his ill-timed Comet of Cassandra saved me from disaster.

I could have saved myself from the final disaster. After I wrecked his peasants, the correct move was to crush his trebuchet. Cutting his firepower in half was the single best thing I could do to help myself. Instead I saw the tempting target of his knight unit.

Now, on the one hand charging them was fun. It was destructive as my White Lions absolutely destroyed them. Arguably, it was a fine decision as it gained me a banner in the Death and Glory scenario.


Realistically, however, it was a poor decision. The dual trebuchets were chewing my LSG to pieces. If it broke I lost and since he started with ELEVEN banners, taking out a second banner did not help all that much.

Taking out a second trebuchet would have halved the damage my key unit was taking. I saw a shiny target that might make sense in a last man standing scenario but meant nothing in this one. They were a tempting, shiny soft target. But they were the wrong target.

I had assigned that unit the role of taking out the trebuchet. I had the chance of doing so. I chose a different target. Bad move.

All of this is just prelude explaining these things which will improve my army and play. In truth, after the first couple of games with the High Elfs I really was looking at them as an extremely sub-par list.

The truth is, I was hamstrung by sub-par list design and sub-par play. If I just correct the following things, that list actually can compete with a lot of things.


1) Know the rules.
Having a good plan can easily be invalidated if it is illegal or if it is legal but you forget a key rule that makes it effective.

2) Know your strategy.
Make your tactics fit in with your strategy.

3) Do not panic.
Bad tactical decisions can wreck good strategy.

4) Do not get distracted by unimportant side issues.

I had all the tools in place to compete with a pretty stout, tough Brettonian list. I just mis-used or did not use them at all.

Saturday, March 12, 2011

Upcoming Tournaments

So I have been doing some research. Lets all talk about who would be interested in which tournament.

1) $10.00 entry fee, 2500 points, Guardian Games, Portland Saturday, March 19th. No special characters, armies do NOT have to be fully painted


2) Entry fee is $25 dollar PURCHASE, Saturday, April 9th, at Borderland Games in Salem. Special Characters allowed, bonus points for thematic armies. Link has info on those, scenarios, and also bonus points for how the army is painted. Seems like somewhat more advanced tournament.

3) One we are unlikely to do, but linking to WoW seems nice. We would be late and leave early because of church. $10.00 entry, some VERY strict comp, small games, but very laid back.

Any interest in any of these or other tournaments if I find them? Which one(s) interest you and why? Should I keep looking them up?

Tuesday, March 8, 2011

Warhammer Tactica: How to rule with cavalry in 8th edition

Cavalry was, in many ways, King in 7th edition. With superior movement, enhanced strength on the charge and little to no fear of being attacked in return, the only things cavalry feared were unbreakable units and flying monsters.


A typical cavalry battle included a furious charge, most or all of the opposing front rank being wiped out, and thus the opponent already losing the combat before their turn to strike ever arrived.


With the advent of 8th edition, the mindset changed. People dismissed cavalry as chaff, unworthy of being taken. After all, they no longer got to attack first due to charging, their advantage in charge distances diminished, and steadfast meant they can be…and are…drawn into multi-turn slugfests with steadfast infantry. They then can be taken out in wars of attrition.


People who dismiss cavalry out of hand are often simply stuck in 7th edition thinking. They are trying to use cavalry in the same role as it was used in that time frame and thus miss out on a great deal of the strength of cavalry.


Lets start with the movement. The swift stride rule still presents an advantage in charge difference for cavalry. To start with, a typical cavalry base Movement is roughly 3” greater than its foot-slogger counterpart.


Second, rolling 3d6 and choosing the best 2 will typically result in better movement than simply rolling 2d6 and accepting the result. The average result in charge distance for cavalry thus starts with two advantages and, occasional outliers due to atypical dice rolling aside, almost always going to result in more distance on the charge thus allowing them to project their force further.


Example: Take a typical infantryman, say an Empire Greatsword with M4 versus his cavalry counterpart. The battle line having been maintained, they both start 11” away from the enemy.


The infantry needs to roll a 7 on 2 dice, a fairly typical result most players “expect” to make. And they will about 58% of the time. Which means slightly more than 4 in 10 times they will fail.


The cavalry, however, has 3 dice to roll needing to total just 4” on any two to accomplish their charge. (Note that later I will argue the charge may not be a good idea anyway). Even without rolling 3 dice, they would have an 83% chance of accomplishing the charge, and that percentage is only improved by being able to roll 3 and discard 1.


Thus it is vastly easier for the cavalry to drive home the charge due to their better base movement and extra die. However, they are also more likely to be in the position to make the charge already.


Infantry moves over 40% slower, on average, than cavalry. The further they are moving, the larger the gap in range.


Example: The Empire marches their battle line forward for 2 consecutive turns, trying to get at the Dwarf battle line 36” away. The infantry moves 8” away, leaving them still 28” from the Dwarf lines. The cavalry, meanwhile, has advanced 28” which virtually assures them of being able to charge the enemy line now just 8” away.


Obviously there are times this will not be a good approach. Most times this will not be a good approach as unsupported cavalry not called Chaos Knights will have a difficult time taking out a stout infantry block.


But it is a powerful option. It also ensures cavalry has the means to set up flank charges for when the slower-moving infantry DOES get to the enemy battle lines.


Thus we clearly see the blatantly obvious; cavalry still has a massive mobility advantage over infantry.


The problem is, many people still attempted to use cavalry the way it was used in 7th. Get there first, charge in, wipe out the front rank, and expect to see the enemy run. But 8th edition infantry tends to A) stay in place due to being steadfast or else have something like the Crown of Command.


Furthermore, they still get to attack back. On the turn the cavalry charged. This leads people to see cavalry get bogged down, worn down by losing a knight or two a turn while doing no damage, and get seen off.


A change in thinking is in order.


Cavalry still has two massive advantages besides their mobility. First, they often are equipped with lances or spears that give them a nice strength advantage on the charge that tends to lead to inflicting large numbers of casualties.


Second, they are heavily armored which tends to increase their survivability.


The best-armored foot troops typically have a 3+ save and that is limited to a handful of troops such as Chaos Warriors and the increasingly rare Gromril Armor/Shield combo for Dwarf armies.


More typically heavy armor and shield is giving a 4+, and most infantry units have even worse armor. Compare that to the 2+ cavalry routinely achieves. Even against S5 troops they are saving 50% of the wounds inflicted!


So how to use a fast-moving, hard-hitting, rugged unit?


All too often the answer has been to send them unsupported into ranked infantry and be disappointed with the results. The correct answer is to use them in conjunction with your own infantry.


When two infantry units clash, it typically is a war of attrition unless the steadfast unit somehow wins the combat. Most steadfast units either have very high leadership, re-rolls, or both, thus making them very difficult to budge.


Cavalry gives your own unit a way of turning that combat into a decisive win. This works best with armies with inexpensive infantry. Chaos Marauders, Empire State Troops, Brettonian Men at Arms are all fine examples.


First you bring an infantry block of your own that either is already large enough on its own to have the steadfast rule or else is close enough in size that a good round of combat might flip it.


Then you use that mobile, fast moving cavalry to hit the steadfast unit in the flank. Several things are going to happen.


First, you are going to get attacked back. That is the reality of 8th edition. Even your most elite, strike first, hard-hitting units are highly unlikely to do enough damage to one-turn annihilate even Skaven slaves even if they do an unsaved wound with every attack and save every wound done in return.


Second, what you are trying to do is take away their steadfast. Charge too early and you will do massive casualties but not remove enough ranks to keep them from being steadfast. Charge too late and your own unit may have run by now.


But charge at the right moment and your cavalry becomes what it should be designed for; a shock unit that hits so hard the unit that was effectively unbreakable loses steadfast, takes so many casualties that their ensuing break test will require insane courage or close to it, and runs.


Third, by charging at the right moment you are going to keep that juicy strength bonus by being able to charge again.


Fourth, even if you get bogged down, you should have advantages in saves so be taking fewer casualties than most infantry forces, though of course there are exceptions.


There are defenses against this maneuver of course. There are always ways of protecting the flanks or having a unit that is stubborn. Of course, there are ways of dealing with flank protectors and often ways of removing stubborn, so do not get too caught up in the extraneous details.


Start by figuring out what cavalry is good at, then using cavalry for that instead of remembering what it used to do and being upset it is not that anymore.