Showing posts with label 8th edition. Show all posts

Saturday, November 24, 2012

Warriors of Chaos versus...does it really matter?

As always, click on the pics for full-size glory

Kev and I had planned to play a really big game. Unfortunately, little things like...modeling, painting and, most importantly, building the @#$%^& army list got in the way so we settled in at 3600.

I built an atypical army for me; no Marauder Horsemen, only one unit of Knights, no Dragon Ogres, and 3, count em 3 units of Chaos Warriors are all quite unusual. Furthermore, I included a D-prince as my general...which means instead of my normal unbreakable army (LD 10 with re-roll staying within the bubble) I would be counting on LD 8.

I built it with a 45 strong Marauder horde with mark of khorne and great weapons. They would come on the most important side whenever the dice were with me, probably the back line via Wulfrik the Wanderer's ability.

Then I planned a really strong battle line; 2 12 strong units of chaos warriors with shield and mark of tzeentch intended to flank a 12-strong Chaos Warrior unit with great weapons and mark of khorne.

On one flank would be 10 Chaos Knights with khorne and on the other 3 Juggernaut Knights. The D-prince would fly around wherever needed to muck things up. Throw in a Dragon Ogre Shaggoth to hit tough targets and the H-cannon for a little distance shooting and I feel equipped to battle anything.

So lets start counting set-up mistakes.

We rolled up battleline. He would be playing the Ogres.
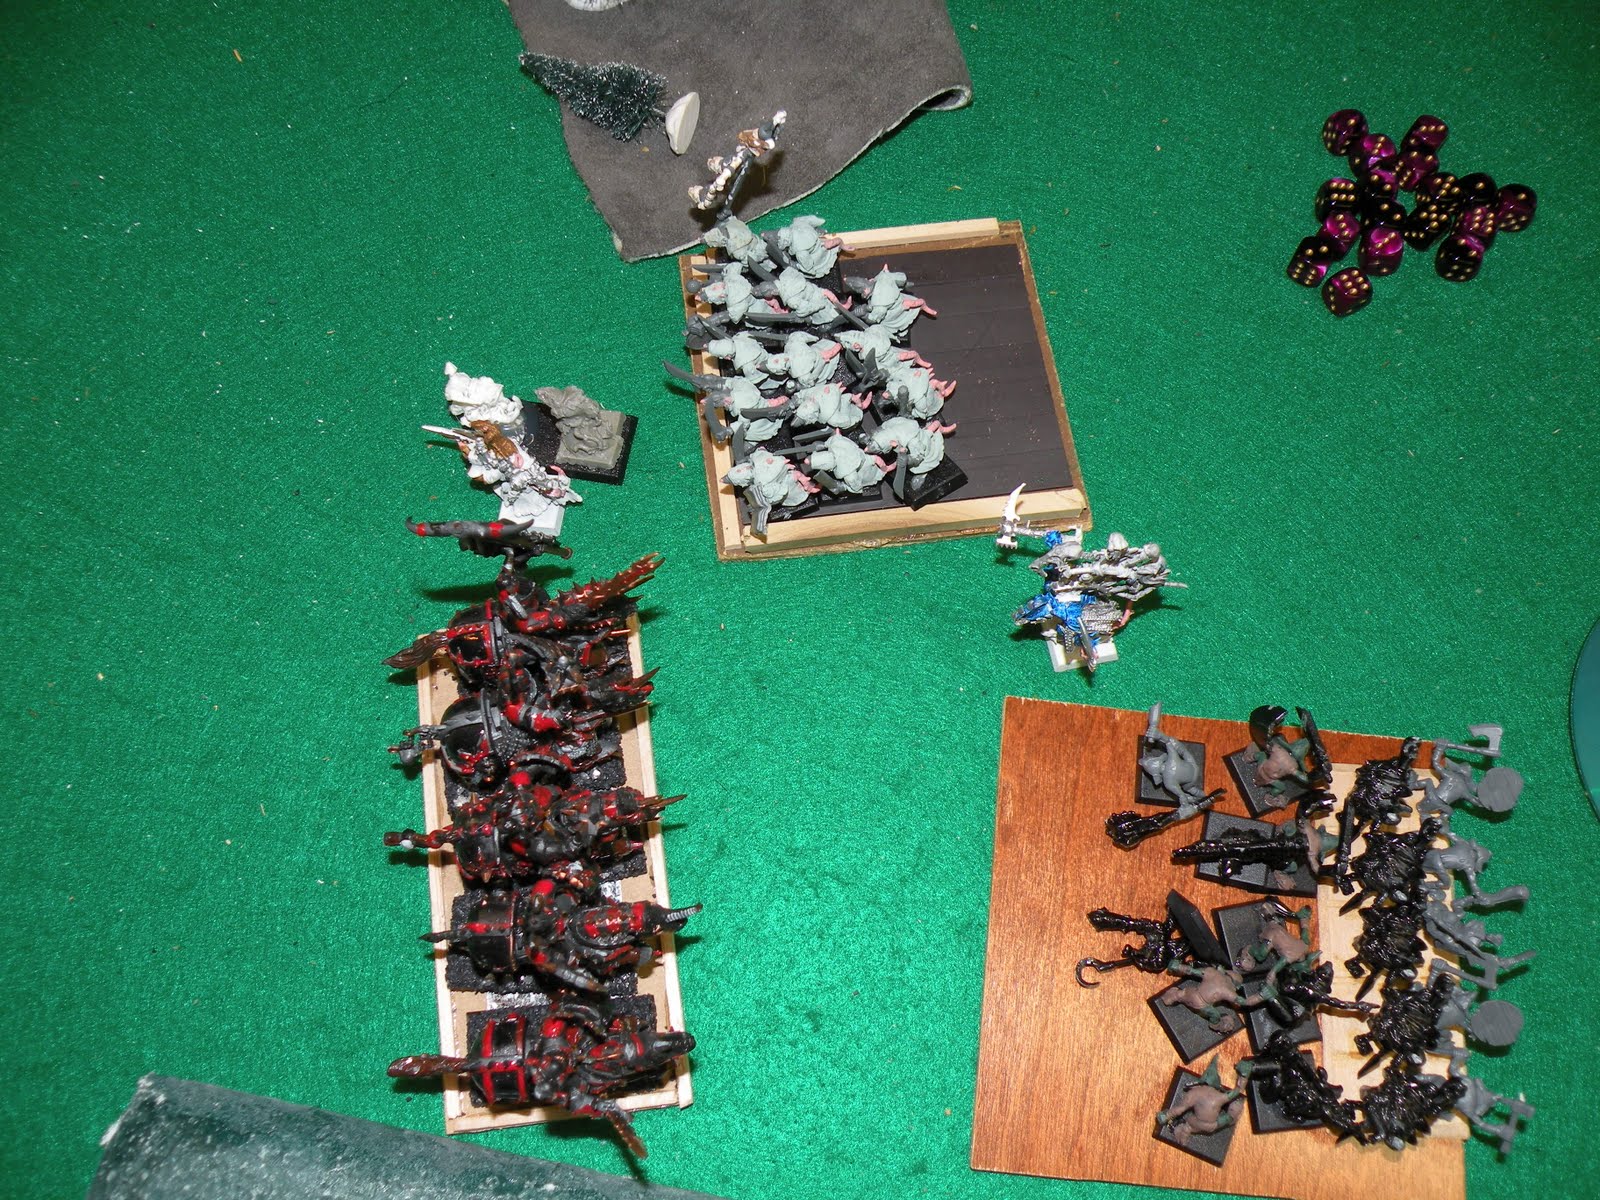
Ogres setup. 


And I would be playing the Warriors of Chaos.

The Warriors of Chaos set-up


All directions are from my point of view because, lets face it, I am the only one that matters :-)

He planted the new Iron-blaster cannon on a hill on the left flank. I responded by planting the H-cannon on the left corner. I had good line of sight to the entire field, I am happy.

He plants his giant just to the right f the hill the iron-blaster is on. I put my Dragon Ogre Shaggoth behind the house so he cannot shoot me with the iron blaster, planning to intercept the giant with my great-weapon wielding monster hunting Shaggy.

Your idiot alarm probably just went off. Giants are so-so against line troops but get them in a battle where they attack first...like, for instance, against a great-weapon wielding Shaggoth who is Always Strikes Last, for instance...and the giant's ability to pretty much keep the opponent from ever getting a chance to attack makes him a very poor target. But surely one mistake is all I would make, right?

He puts his Stonehorn next door. I know I am going to put either my Knights or Juggernauts opposite them so carefully measure off to leave space for them and put down...wait for it...THE MARAUDER HORDE.

Yep, the centerpiece of my offensive strategy to sneak in his back line and run rampage is now clogging my set-up under my "unit he must account for that will control space" theory. It would be a good setup...if it did not wreck my PLANNED setup. Huge, huge, huge error.

He launches some Ironguts.

I counter with my Knights, 10 strong. Hmm...fast moving, hard hitting shock troops...setting up opposite something they will take multiple turns to put down if they are not wrecked first. Set-up is not going well.

I then start deploying in depth and anchor my Ranger Banner carrying Skullcrushers of khorne on the right behind the forest.

Analysis
It has been a while since I played so I more or less went with my "I designed the army to control space, make you come to me, force lots of combats" set-up instead of the one I designed the army around.

Fortunately, the WoC are flexible enough to withstand such an error. And lets face it...my standard set-up is pretty strong. I have fast, dangerous units on either flank so there will be no rolling up my lines. I can advance in a line and, with more available units across the front force advantageous combats. The set-up is poor because it is not the plan I built the army around...but it is a very strong set-up anyway.


Ogre Turn 1
He starts his Leadbelchers wheeling around the mysterious forest on the right threatening KR8-KR...wait, not chess notation, sorry about that...threatening  a flank shot at my Juggers. Everything else makes a measured advance up the middle except the Cannon on the hill.

Winds blow a 3 and I dispel his Comet. His Iron Blaster misfires and does nothing to itself.

Analysis
Strong first turn. He set me up to have long charges that I needed to try anyway or risk getting charged with impact hits. Ogre impact hits can hurt. His Leadbelchers needed to move to get a shot and if I pursue them I risk doing nothing else with my Juggers. Meanwhile his center is extremely strong.

WoC Turn 1
I declare the charge with my knights against his Stonehorn. I then roll a 3/3/1 for the fail. I advance everything in a row. I move my Juggers to make it so if he advances the Leadbelchers I should get a turn 2 charge but he will not be able to shoot his entire unit.

I 6-dice the Purple Sun and total about a 15 including my level 2. He then dispels Pandaemonium. As usual for me, magic is pretty dominant...

The H-Cannon scatters well away from anything. It will not fire again all game...
Setting the trap; charge my horde, do some damage, take a Warriors of Chaos unit in the side

Analysis
I figured to miss the one charge. I needed a 10 to make it. But with his cannon up on the hill I could not sit back and let him blast away. Plus I have been torn to shreds by the Leadbelchers a few times in the past so would not be surprised to see them wipe out my Juggers in one turn. I had to be somewhat aggressive.

He forced me into that position, so good on him. I erred here with my D-prince. I did not want to peak him out in the open to get shot my the Iron Blaster so did nothing with him.  That was a mistake. Taking models is fine unless I plan to do nothing with them.

Ogre Turn 2
He declares two charges; Mournfangs against my Marauders, Stonehorn against my Knights.

His Stonehorn then rolls triple 1s for distance. Fail. His Mournfang fail their charge by 1" and pass both dangerous terrain tests. He moves everything else slightly forward.

Winds; he rolls two dice at Harmonic Convergence; both are "6"s. I then Infernal Puppet his roll to the worst one on the chart, he loses 3 levels and is never a factor after that.

His Ironblaster goes perfect; the carry lands it on Wulfrik, the bounce hits the rest of the unit. I make my "Look Out Sir!" roll and he kills 5 marauders. It will not successfully fire again.

Meanwhile, 4 of his Leadbelchers have sight to my Juggers; 11 shots result in 1 wound which I save. Remember that save; 1 for 1 at this point.

Analysis
He advanced pretty quickly giving me some tempting charges. I think he mis-guessed how many Leadbelchers could fire. He made a couple of good, aggressive charge declarations that could have put some hurt on me and hit some poor luck. We are about to have massive contact, and the benefit to getting the charge is well worth the penalty of minor positional disadvantage for failing.

WoC Turn 2
I declare several charges; the H-cannon Rampages forward about 11", doing nothing constructive.

The Juggers crash into the Leadbelchers. The Knights charge his Ironguts. The Shaggoth charges the Giant to keep it from hitting the Knights should they not be gone by his turn. The Marauders fail by an inch to charge his other unit up front.

In a shocking development my magic fails to achieve the casting score on the Purple Sun and he stuffs whatever else I tried. But wait, Magic will have some success in this game. Just not in the first two turns...

The Juggers prove awesome; the hit 7 times and put 5 wounds on him. The mounts do 2 more. 7 wounds dished out; nice. I save all 5 wounds he gets on me (yeah, he was hitting well). 6 for 6 on saves. I run him down.


A clever observer might see a rarity; I am using 2 proxies in this unit. See if you can find them...


Meanwhile, the Giant Yells & Bawls. Needing a 10 or less, I promptly roll...11. Standard Bearer and choosing proper combat order to the rescue. Re-roll passes.
I see your size and raise you this giant axe. Which I will never use...


Last but not least, here comes the thunder; my Chaos Knight unit champ takes on his Bruiser; I hit thrice, wound once; he hits back 4 times, 3 wounds, I ward save 1; 7 for 10 on saves.
Hack, slash, slay. No rinse, lots of repeat

The BSB does 2 wounds, the knights another 13. Things look good. He breaks and flees a whopping 10" which is pretty good. Not as good as the 12" I pursue and hit another unit...

Hey, where did our army go? Slow-pokes.

Analysis
Well, for a successful turn, that was brutal. The Leadbelchers being gone is great. I am at least two turns from the Juggernauts being relevant, though, and his Ironblaster can take all 3 out with one well-placed shot.

My knights can be hit in both flanks, his Mournfangs are about to do some nasty stuff, his Giant can keep my Shaggoth from ever using his axe...the reward does not out-way the risk. I might be in trouble even though the table looks good at the moment.

Ogre Turn 3
The Mournfangs and Ogre Bulls smash into my Marauders. Not worried. I will absorb lots of casualties, be steadfast, and hold him in place for the counter charge.

The Stonehorn makes the long charge and hits a unit of Chaos warriors. I am not worried, they are designed to laugh on nonsense like this; he might be running if not stubborn after I put a couple wounds on him and use banner and ranks to win the combat.

For a second time he gets a spell off; the irreistible force costs him a wound and gives him +1 T. The Ironblaster mis-fires and splits in two.

The Giant does thump with club. I fail the test, he does 7 wounds, Shaggy died without ever taking his axe off his shoulder. Ouch.

The Stonehorn does 5 impact hits, 3 wound, I fail all three saves and the ward as well. 7 for 16. The warriors then swing...and wound him once. Which he saves. His rider does another wound, I duly fail both saves. His thunderstomp does 6 (six) hits, 4 wounds, I save 1. 8 for 26 on saves.

Still steadfast, but now there are just 6 guys left. He did over half the unit in during that one turn.

Meanwhile, my chaos knights pt a barrel of attacks on his BSB, can only wound him once. My regular knights do 1 more wound. The exalted puts a second wound on the BSB. The horses finish off the BSB and do one to his regular guys.

He kills one knight in return, I run him down. His wizard breaks, his gnoblars break; I have wrecked his center.

Apparently he wants vengeance. Looking around, he spots my Marauders.
No problem. Counter charges to the left and right to wreck you with my steadfast army. 


6 impact kills start us off. Wulfrik gets in a challenge with his...Maneater? Whatever the wizard is. Does 1 wound Takes 1 wound...Wulfrik seldom performs for me. My level 2 Chaos sorcerer does wound a Mournfang, so I feel a little better.

then his Ogres hit 12 of 15 tries needing 4s. Uh oh. His Mournfangs start scratching biting, clawing and hacking; 23 Marauders lay dead before they get to swing. But they DO get to swing.

They do 8 wounds to the ogres, 5 to the Mournfangs..and the Mournfangs save 2. Fie upon thee, Great Weapons. Do some damage! (actually, I am pleased with doing 11 wounds in one turn but I cannot admit it, right?)
He stomps for 3 and thunderstomps for another 6.

He did 32 wounds in one turn; I fell one wound short of decreasing his ogres to no full rank. If I were steadfast I would still be there. I am not, am not...I flee, he overruns into my Great Weapon khorn threshers.
Someone explain my plan to Kev. His failure to co-operate has me worried about outcomes

Analysis
I thought flanking the knights and almost assuredly wiping them out would have been a strong move. My Warriors would have needed a 12 or more to charge successfully. Not doing that let me wreck his unit, get into Groesus and chase off a couple units he would need.

Who is getting ready to turn Groesus into Grease? Us.
Other than that I like his turn. Very destructive.

The stomp/thunderstomp/impact hits were lethal, lethal, lethal. I thought 20 wounds taken was way on the high side and was not worried about my Marauders hanging around. I figured to lose the combat, but figured it would not be by a lot and I would wear him down. Wulfrik 's failure followed by being one figure too few attacking his Bulls was costly but that was good positioning by him.

I was now worried; his Mournfangs impact hits and attacking first could put a hurt on my great weapons. If I had at least one rank left I still figured to put his Mournfangs down, but if I would have enough survivors was an open question.

WoC Turn 3
The Knights have Groesus' flank. Auto-charge; I must declare challenge, figure to limit the damage he does, use flank charge, standard, battle standard and ranks to make him run.

I bring my D-prince into action, flank-charging the Ogres. I will hope he must accept my challenge, he has 1 wound left, I should slay him outright, win the combat and with luck he will run. At worst he has one guy attacking me. I should win this combat.

I hesitate about what to do with the H-cannon. Ultimately, I do not want the giant joining in against my Warriors because at the moment it looks like his stonehorn, mournfangs and ogre bulls are going to be roughing me up pretty good. In a desperation maneuver, I charge into the giant.

Meanwhile, I flip my unengaged Warriors in the forlorn hope the khorne threshers can hold up his Mournfangs for a turn so I can get into action.

Inexplicably, I forget he slew my champ earlier. I use my unit champ against Groesus; I do get a wound through, dies in return. Groesus stays...barely.

His Giant does the Thump with Club and, with I2, inexplicably I pass. I then wound him once, but he sticks around for more.

I want the Stonehorn unengaged if I can break his ogres; maybe a failed break test will do what my army cannot. I wound it once, he saves; he does 3 wounds back, I save 1; his rider then does another one, the Thunderstomp kills another, I flee and he overruns.

His fortune against the Threshers is worse; he only does 2 wounds and I save 1. The Rhinorxes whiff; I then retaliate with 12 wounds. No more Mournfangs. Being frenzied, there will be no turning to face the Stonehorn. I move away

He accepts my challenge, I do indeed kill his wizard, he flees, I run him down. Perfection.

Analysis
Unintentional cheating aside, a near perfect turn.

I would have like Groesus to go away. His magic weapon is FIERCE. His ability can be lethal. I had a shot at his Giant...did not do much, but it is something, right? The Mournfangs are gone, the bulls are gone...in one turn I went from feeling like I was in deep trouble to liking where I was at.

Except I really felt like his Stonehorn alone could take out the rest of my Chaos Warriors. I was down to the D-prince for magic and he had nothing useful. As usual, we combine to do one wound (no casualties) despite both having a level 4 and 2 level 2s. Magic is its typical irrelevant thing.

Ogre Turn 4
His wiz continues to flee. His Gnoblars wuto-rally due to Groesus. His Ironblaster rear-charges the knights. His Stonehorn goes to face my assembled avengers.

Hisgiant headbutts my cannon, doing a wound. I do not get to attack.

My Exalted, forced to challenge, knows he will die but makes a valiant effort, hitting 4 times and getting off 3 wounds. Groesus hits just once, multiplies to 2 wounds...down goes my BSB.

Meanwhile, only 2 knights are facing his Blaster; they do wound him twice. The rhinox is the only thing to hit and puts down 1 knight.

By the time we get done adding ranks, banner, wounds, his rear charge...I win. His cannon breaks, Groesus breaks, I run down Groesus, the Gnoblars break again...
I was expecting a fight, not a group hug


Analysis
When his Ironblaster charged my knights in the rear I was nervous. I knew my BSB was going to die; with his multiplying wound thing, he could have gotten plenty of overkill. I was expecint lots of Impact damage, the +2 for hitting me in the back, me only having 2 knights involved...recipe for disaster.

I benefited from some good fortune at the right time and suddenly I liked my chances overall.

WoC Turn 4
I turn the Juggers to see off the Gnoblars. I turn the knights to see off the wizard and/or Iron Blaster. I turn the khorne threshers and tzeentch-marked Warriors to face his Stone Horn and move the D-Prince to not be in the way.

I do get off 3 spells; Flickering Fire does the minimum 2 hits, zero wounds. Baleful sees him pass his LD test. Pandemonium gets off, probably should have done Call to Glory but...

His Giant does thump with club and unbelievably I again pass initiative. I think I even wounded him this turn

Analysis
Most of this turn played itself; Nothing else I can do with Knights and Juggers at this point, it is either form to receive charge or try to run from the Stonehorn. Again, maybe getting the Exalted...but going to a S4 without shield and 2 wounds instead of S4 with shield and parry save does not seem very effective strategy to me.
Wherever you go I will be right here waiting for you

Ogre Turn 5
Stonehorn chooses to charge the tzeentch marked block of warriors. His Wiz rallies an inch from the table edge, his stoneblaster continues to flee (and does so the rest of the game, leaving the table in turn 6).

Ironically, after spending the game rolling 2s, 3s and a 5 for the winds, he now rolls something like 9 or 10...with no usable spells to cast.

The Stonehorn does what it does; 4 impact hits, 2 wounds, I save zero. I hit him 8 times, do 4 wounds, he saves 2. He thunderstomps for just 1. We tie, I have musician and win. No more frenzy for him.
Look Who is Coming to (have you for) Dinner

The Giant yells and bawls, my H-cannon is unbreakable.

Analysis
Touch choice between charging the tzeentch marked guys who probably cannot hurt him but should withstand the charge and charging the great-weapon wielding guys who you could conceivably break...but who might one-turn slay your Stonehorn is a dilemma I was glad it was him facing. No right answer, just a couple forlorn hopes.

Ultimately at this point I think, retroactively, it was ever so slightly a better choice to go after the threshers; if he could break them, there was a slim chance the other unit would break and he could run them down in turn 6. Conversely, breaking the tzeentch guys could not force a test on the frenzied threshers.

Honestly though I do not think there was a "right" answer here.

As it turns out, he was in a bad spot and in deep trouble.

WoC Turn 5
The Juggernauts finish the formality, charging the fleeing Gnoblars and finishing them off.

The Knight charge the wizard, kill him on the way in. The D-Prince rear-charges the Stonehorn, the threshers flank him; the prince hits 4 times but can only wound the Stonehorn 1 time. the knights hit 10 times, can only do 2 wounds. He kills three of the threshers, but they hit 21 times and get through a whopping 7 wounds. Turns out not charging them was probably the right move because they are th only thing I had that could touch him...

The only model he has left is the giant and in the bottom of the 6th the H-cannon absorbs two wounds, then finishes off the giant to table him.

Overall Analysis

This game was fantastically fun. My first charge seemed devastating but put me in a precarious position. Then when he massacred my Marauder horde in one turn, his stonehorn single-handedly wrecked a unit of warriors and my knights and Juggernauts were basically out of the game, it did not look good.

It seemed I had nothing that could touch his stonehorn, Mournfang Cavalry, or Ironblaster; my defensive units were not surviving, my offensive units were not creating mayhem and magic....phshaw, that stuff is worthless for me.

I think had he flanked and destroyed my knights he might have won. When he went for broke, however, it gave me time to get my units of Chaos Warriors into position to start tag-teaming his tough units. When the Great Weapon wielding Chaos Warriors went to work they were a buzz-saw, chewing through everything they touched. Definitely a game-winning unit.

There were a couple bad moments where he could have won convincingly and a couple where I thought I was going to rampage through him in about three turns. In the end, it was in doubt until the 5th turn when it turned irrevocably in my favor and from there the only question was who would die, H-cannon or Giant.

We both enjoyed the game a great deal, got to see some fierce units in action and I think that 32 casualty blitz he threw at me put to shame the best efforts my theoretically super-deadly knights have ever put forth.

Hope for more games like this one. Love 8th edition.
Seems like there were a lot more of us a couple hours ago...

The traditional survivor picture.


Sunday, June 12, 2011

Warhammer; What stat is most important? Wounds

Wounds do not have a whole lot to talk about on the surface. The vast majority of troops have the same number; 1. Whether you are the mighty Grail Knight or the humble Gnoblar, you have one shot at life. Take a single unsaved wound and you are done for this game.


There are, of course, exceptions. Most characters,chariots, war machines, monstrous infantry and war machines have multiple wounds.


Count the wounds in this mess


It is indeed in the realm of wounds that monstrous infantry have their strongest advantage and that relates to the concept of frontage.


Not everyone has played a wargame for long, so if you just stumbled upon this in some random search, let me explain frontage.


Every model takes up a certain amount of space. A goblin, for example, is on a 20 mm base. A Troll has a 40mm base, so takes up twice as much space.


This matters hugely for how much potential damage you can deal within the realm of a specified distance. One of the reason frenzied troops are so powerful is they add so much power to such a small amount of space; if you have 5 troops on a 25mm base with 1 attack each, the most damage you can deal in 5” is 5 wounds. But give those troops 2 attacks each and you have doubled their potential output in the same amount of space.


By the time you get configurations like 5 Chaos Warriors with extra hand weapon and frenzy, you can pump out a whopping 20 attacks in the same space.


As a result, space considerations are important when considering damage output.


What does this have to do with wounds?


As a general rule, the models that have multiple wounds have multiple attacks. They also tend towards a higher toughness which helps their survivability.


Generally a high T, high W model will take fewer wounds in any one round which means they are more likely to still be there when it is their turn to strike, whether on that turn or the next go-round.


Each additional wound helps with this exponentially. A model with T4, 3 wounds can reasonably expect to last 2 – 3 rounds against even the most lethal opponent, and if he has something like T5, 6 wounds he is going to stand there for a long, long time.


So how many extra points are an extra wound worth? Is it as few as 10 or as many as 50? Some other number?


Unfortunately, I am going to drop back to my Texas Hold-Em stock answer; it depends.


If you have the choice between giving your model an extra point of T or an extra wound, for example, what is worth more?


I think it is clear from earlier postings I would rather have an extra W than WS or BS, but it is a closer thing when looking at S or T. Sticking around long enough to attempt even a task with a low probability of success is obviously superior to dying before getting to attempt a task with a high probability of success.


So which is better? For line troops (think monstrous infantry here) the extra wound is arguably better than S, worse than T as you will block more wounds with T than you will gain extra wounds. If you have monstrous infantry that one unit has W3 and the other W4, take the W4 even if it is 20 points more.


For characters, often they will be armed and armored well enough that the extra point of S or T will be more valuable in performing their assigned role.


And for all the guys with just 1 W…well, tough luck, bub. Next time, keep your head down, other guys in front of you and fight better.

Sunday, February 27, 2011

2500 Dwarfs v. Wood Elfs


Recently I have been watching a lot of How to Train Your Dragon, Despicable Me, Toy Story 3, Iron Man, and Iron Man II. I know all the movies quite well by now, so it allows me to free part of my mind to do other things.

One thing to do is something I generally consider pure drudgery. Put together army lists. So I did. I pretty much have standing lists at virtually any point level for my beloved Warriors of Chaos. I know what units I like to use and those go in regardless of how weak they are considered this edition.

But I want to mix it up a bit, play some other armies. So I sat down and made Wood Elf lists for 1k, 1500k, 2k and 2500.

Then I did the same with the Dwarf army. I even made a couple different versions at some of the point levels.

Obviously I am making "all comers" lists. These are not lists specifically designed to fight any of the armies I routinely have as potential opponents: Lizardmen, Skaven, Dark Elf, Ogre Kingdoms, Bretonnians being the most likely, with Empire, Beastmen being next most likely and the seldom-seen Tomb Kings and Orcs and Goblins bringing up the rear.

My good friend Liam stepped up to the plate and asked if I would mind if he played the Wood Elf army. I laughed at the irony of me finally getting around to building a list and then someone else getting interested and hastily agreed. I would play the Dwarf list v. his Wood Elf list at 2500.

I have two units of 10 thunderers apiece, 2 cannons and an Organ Gun. Not all that much shooting. The Cannons both have the Rune that makes their shots flaming and are there explicitly to deal with Hydras, HP Abominations, Stegadons, and anything else that has high T, multiple wounds.

The organ gun is there because I thought a Grudge Thrower might be a bit too much shooting.

Leading my army with a noble means I can have core Longbeards and to me the extra S is well worth it. So my line troops all end up with the parry save and S4 but are going to be outnumbered.

We rolled up the Meeting Engagement and he planted a big unit of glade guard in a tower in one corner, 5 or 6 treekin next to them, some Dryads in a forest next to them, about 14 more glade guard, and on the far right flank a Treeman.

Lately I have A) not been able to play much and B) been lackadaisical about my deployment. Since I really count on my Knights, Dragon Ogres, and Shaggoth with WoC, deploying on the wrong flank is no big deal. I simply take a turn and a half to get where I want to be. It is lazy, it degrades my playing and usually makes the game tougher for me.

That is not a mistake I can make with the Dwarf army. But I did. I made sure to set up over 30" from his big glade guard block, and starting on my left put my Ironbreakers, planted my cannons one on each side of the organ gun and looking at his treekin, guarded their flank with side by each units of thunderers, then the miners, then on the far right flank my Longbeards. Only my Rune Lord showed up late.

Mistake #1. My miners should have come on via their ability per my initial plan. But...having played the Wood Elf army, I know the power of their shooting. The thought of coming behind the building, taking 28 S4 shots, charging, him testing on re-rollable steadfast, taking another 20 - 25 shots, charging, him testing on re-rollable steadfast...I chickened out and posted them.

Mistake #2. In the wrong spot. It extended my line even further so my General and BSB-reinforced Longbeard horde was on my far right flank. Where his Treeman could flank them in turn...

He then dropped a scout on my back line. I had forgotten the new scout rules. Or that people use scouts...


WE TURN 1

He flies his eagle out behind my Longbeards and makes a slow advance in general. He rolls almost no PD, I forget my Rune Lord is not on the table and steal one, he has just 3 PD now and gets something irrelevant off which I dispel on my turn.

His lone scout unleashes the Hail of Doom at my center most Thunderers. He gets 13 shots, 12 of them hit and 7 wound. I save just one. Not a problem, I have a 9. And roll an 11. I am about 1" outside of BSB range...remember that mistake in planting the Miners there? Costly.

They break and run towards the center of the field. His Glade Guard then shoot the other thunderer unit, causing 3 wounds, but I save 2.

This is funny because if it were my Knights with a 1+ save I would fail 2 of 3. Or all 3. Because on the rare occasions the Knights get hit with a weapon that actually allows an armor save I routinely fail 90%. Not usually relevant since 90% of the time when they get hit they are not allowed a save anyway.

But because I have a 5+ save...I save 2 of 3. Whatever. Dwarf armor for the win.

His Waywatchers then hit the Ironbreakers 7 times, can only muster 2 wounds. Here I have a 3+ save...and fail them both. Bwoohahahha.

I should point out...my thunderers that got hit with Hail of Doom were in range of all his shooting. He did 9 casualties this turn. That Thunderer unit still had 4 guys in it at this point and ended the game with 1, so he got no points.

Strategy suggestion; armies with shooting need to concentrate their fire. Wiping out that unit would be a great way to go. And would force other panic tests, which I have already shown I can fail with ease.

Dividing fire helps your opponent more than it helps the person firing. By having the wounds spread out, I was able to absorb a lot of punishment throughout this battle without the damage adding up as quick as it might have.

Dwarf Turn 1

Dwarfs are good at holding grudges.I have no charges, the Thunderers rally, much to the surprise of no one and start walking towards their own lines.

The other unit advances to get within 24". So they march as far as they can.

The Longbeards measure. If I march forward, I am about 1/4" short of being past Treemans line of sight. So I reform to accept his charge.

I debate what to do with the cannons. But the whole point of them is NOT to take shots at Glade Guard in buildings or the open, Dryads I have no fear of, or even Waywatchers. No, I had a great target in the Treekin. That was the proper shot.

One cannonball later, he had one dead Treekin and two wounds on another. Would have been one wound, but he reminded me flaming doubles the wounds.

I only shot one cannon...I moved the other to guarantee my Organ Gun had a clear shot at his Hail of Doom scout. I PROBABLY had one anyway...but because I made such big bases for scenic purposes, I wanted it to be clear. (as you can see, the bases are designed with "scenes" in mind. An Arachnarok Spider could not be bigger...)

The Organ Gun unleashed the full 10 shots, and 7 wounded. One dead scout. It was now imperative for him to finish off my Thunderer unit or I would have enough points for a victory right there.


Wood Elf Turn 2
His Eagle wants to march but he rolls boxcars. He just flies behind the longbeards. His Glade Guard realize they will take no part in this entire battle, so they exit the building.

At this point I notice I forgot to bring on my Rune Lord...which is when I realized I had illegally stolen one of his 4 PD. Fortunately my inadvertent cheating would have no real effect on the game.

He makes a slight advance, gets Throne of Vines off. I save the only wound his Waywatchers shooting does, save the one wound his small Glade Guard unit is able to lay out.


I think this was partially due to his inexperience with the Wood Elf army. I, knowing how slow Dwarf armies are, would probably have moved to just within 15" to get that key additional S point with the Glade Guard and Lethal Shot with the Waywatchers, knowing they can retreat 5" per turn and still fire with no penalty whereas the Dwarf army can only advance 6" per turn total!

I suspect he also knew his 30" Longbows out-ranged my 24" Thunderers. However, by this point I had 9 and 4 thunderers...so it might have been worthwhile to have a closer range duel. Maybe not. Hindsight is 20-20 and I know how it turned out...


Dwarf Turn 2
This time I bring on my Rune Lord straight away. I am not much bothered by his Eagle. I have no clue what he is planning, I kind of hope he charges one of my units. Any of my units. I will be so far ahead based on static combat resolution alone that I am almost guaranteed points for the eagle. Unless he charges by whittled-down Thunderer unit...
The Longbeards tweak their line to prepare to move if the Treeman ever is no threat. The Miners advance.
I easily Dispel Throne of Vines.
The cannons both roar and two more treekin go down. The Thunderers only have the Waywatchers in range and that extra -1 ensures my firing is worse than worthless. Gunpowder costs gold...gold that could be used in that Dwarf Alehouse on my left flank!

Wood Elf Turn 3
I was a championship chess player at one point. Won plenteous awards. Mostly because the other guy might see two or three moves ahead, but I would see ten, fifteen, twenty moves ahead at times.
I am not that guy anymore.
It is on this flight of his eagle that I realize...he is going to charge my cannon. Next turn. This is bad.
He disengages his Level one wizard from the Treekin unit to hide behind the building, inches forward marginally.
He rolls a 6 and 5 for the Winds of magic. I steal one, add 2 for my Rune Lord...he has 10 power dice, I have 8 Dispel.
He is out of range for Dwellers. He gets Throne with Irresistible, and Throne protects him from the miscast. That means I have so many Dispel Dice he has no chance of getting anything off.
I should point out...I had the Rune of Spellbreaking unused at the end of the game. He never had a single spell in use when it mattered. Magic v. Dwarves is an exercise in futility.

He unleashes his big block of Glade Guard on the cannon, but only gets 1 wound through. I do not save.
His 13 Glade Guard wound my block of 4 Thunderers 3 times, I save zero. Down to one guy. That guy is worth 150 points to one of us...
His Waywatchers shoot at my big block of Thunderers and I save the only wound.
Dwarf 3
I, uh...I need to do something about that Eagle. I advance a bit on my right flank. This will prove to be a mistake. Had I marched this turn and both turns 4 and 5 as well on turn 6 to get a charge off. If not marching...i should get back behind the hill. Like my one Thunderer starts to do.
I do charge my Thane with flaming and a couple strength modifiers to help the cannon. But I am going to be too late. Not thinking about the eagle might cost me.
My cannons do finish off his Treekin unit. He is now in a big hole. I have the points for them and the scout. he has zero points and has not advanced any close combat troops. He will not have enough time to shoot any of my units into non-existence barring some bad break tests.
The Organ Gun only gets off I think 4 shots and does one wound to the eagle. My Thunderers manage to kill a Waywatcher.


Wood Elf Turn 4
The Eagle charges my cannon. He gets 11 PD, no magic off successfully.
His 28 Glade Guard volley for the first time; 24 shots, 11 hits, 2 wounds, 1 save. That cannon has lost 2 guys now. But I do have an Engineer there...
His other Glade Guard unit kills 2 Thunderers and the Waywatchers get another. I am losing that shootout for sure, even with him being S3 and me having armor!
The Eagle can only slay one cannoneer, but he has done his job..he silenced half my artillery!
Dwarf Turn 4
My thane needs a 10 to make it into the cannon battle...and I roll...a ten! Yes!
Everyone else starts moving backwards. Make it as hard as possible for him to shoot me. I cannot reach him even if I march the rest of the game.
My cannonball at his Level 4 in the big glade guard unit gets ward saved.
His Eagle uses its initiative to kill the two cannoneers. He has points! My Thane then kills his Eagle.

Wood Elf Turn 5
His Waywatchers kill another thunderer, his Glade Guard get 2 more. My guys are getting thin.

His big unit of Glade Guard hits my last cannon 17 times. Needing sixes, he gets six wounds on me. Needing sixes, I decide to be unreasonable and save two of them...but not enough. He doubles his point haul, wiping out my second cannon.


Dwarf 5
Run! Get out of sight of those horrible woodie bows. They are sticking arrows in everything!
The only unit not moving directly away is my Ironbreakers, heading towards the Dwarf Ale House.
Wood Elf 6
He advances to take one last stab at points. Every shot he has goes against the Organ Gun. 1 wound goes through but it is not enough.
Dwarf 6
I basically just take a group photo of my survivors.


I mistakenly give him points for the unit of Thunderers with one guy left, making it look closer than it was at 534-395. But because the one guy survived and there are no half points, the actual score was 534-245.
Recap
This was two guys who have not played all that much lately using armies they are not overly familiar with and playing them poorly.
I mentioned some mistakes in set-up. Now lets go over mistakes during the game.
1) I should have marched my close combat troops forward. I would have taken more casualties...bit horded up Longbeards v. Waywatchers or Glade Guard is a match up I like. So are max-ranked Ironbreakers v. Glade Guard.
I should have sent my Miners after the Treeman and swung my Longbeards behind them. But I forgot how slow 6" a turn is. By the time I realized it, it was too late.
Initial deployment and 2 or 3 turns of letting one Treeman hold an entire flank turned this game into a shooting skirmish.
2) I was never sure what to do with my Thunderers. I should have moved them forward twice or gotten them behind the hill. They were never going to wipe out an entire unit sniping away needing 4s, 5s and 6s to hit. Instead I risked them to no purpose.
3) I ignored the one viable threat he presented for far two long. My Thane should have been close enough to deal with the Eagle the turn he arrived, not the next turn. I should have protected my cannon better.
4) When it became obvious the Treeman and Longbeards were just going to move back and forth, I should have gotten my BSB towards the center along with my General to give a re-rollable LD 10 bubble instead of a one-shot 9. It did not cost me...but it could have. Just because the results were good does not mean the play was.
Things I did well;
1) I chose the correct target with my Cannons. Shooting the Treekin completely away was total win. There was no point to using my big guns to pot-shot away 2 or 3 glade guard or Dryads per
turn. Target selection +1
2) I saved points by getting my Thunderer out of harms way ASAP.
From where I sit, things Liam might have done better:
1) The big block of Glade Guard should have exited maybe one turn sooner.
2) I think he dispersed his fire a bit more than he should have. Had he finished off one Thunderer unit, then turned everything (including the big GG unit) on the second one, we might have had a draw.
3) He took a Treeman, Treekin, and Dryads. None of them every advanced on me. Having close combat troops you are unwilling to put in close combat may or may not be prudent.

If he marches his Treekin towards my Ironbreakers, I might not have them weakened enough with cannon fire. His Treeman and Dryads, if they combo charge the Ironbreakers, MIGHT be okay...maybe not. I may have played it the same way.
4) When the Treekin were getting plunked by laser guided cannon fire, he probably should have run them behind the building to save the points.
What he did well
1) His inital setup was excellent. His shooting troops were protected, he put his guys where they should be, and got me to make some mistakes in my own deployment.
2) He shot. Every turn. He took some shots at causing panic.
3) He thought about whether it was worth the Treeman getting hit with a cannonball just to strangle-rrot attack and made the right decision.
4) He chose the right spell to attempt every time. That they never got to remain in play is irrelevant. He made the correct plays.
All in all, as battles between he and I tend to do, it was mostly a war of maneuver and little bloodshed. If we played it again...I think that would change.
First, my miners would go outside of the Longbeards and go after the Treeman. This means my Longbeards would go after his Waywatchers. I probably wipe them out and his small glade guard as well. But I do not go into the forest after his Dryads. Not sure why...
Second, my left wing would also advance. I would take on his big block of Glade Guard, with the cannons hopefully rendering his Treekin insignificant.
All in all, a fun game I enjoyed a great deal.

Thursday, September 23, 2010

Tavern Topic: 8th Edition

First off, thanks to Kuffeh for his efforts at building a series of viewpoints.

So let's address his questions one by one. First up, what has 8th done to my army?


It is no secret that my favorite units, without regard to edition, are Knights, powerful Wizards, and Dragons.


In 7th edition, I typically loaded up on Knights, took a scroll caddy and called it good. No matter how many points I spent on magic, my opponent could easily counteract it with a scroll caddy or, in some cases, a 50 point magic item.


I seldom took a dragon because it was too strong. Even the most basic tactical ability allowed a dragon to break huge units simply by attacking from the right direction, killing everything it touched, and thus wiping out huge units with little or no risk to itself.


So two of my three favorite things to use were seldom seen (though I occasionally broke them out, and always was disappointed.)


By contrast, core quickly became "take a unit of Marauder Horsemen for each core spot requirement and call it good." The fact that everyone had access to faster moving troops that could easily wipe out my front ranks, thus allowing no attack back, could ignore or eliminate armor saves and never need come in contact with them meant that Chaos Marauders and Chaos Warriors were arguably the worst troops available to any army in the game. It was all but impossible to build a 'competitive but fun to play against" list with them.


8th has changed everything.


First off, I now plan to take a wizard every game and know I will be able to actually get some spells cast successully. That is very exciting to me and has altered the fundamental make-up of my armies.


Second, the Warhammer community in general thinks cavalry is worthless now. I happen to disagree. Where as in 7th simply wiping out the front rank usually overcame any static combat resolution, in 8th sheer killing power is valuable. So having a unit that deals out 18+ WS5 S5 attacks at I5 is pretty sweet.


And packing them 2+ ranks in means they can take some punishment and still deal out a whipping.


In 7th, the points for a second rank were wasted. In 8th, they are nearly as valuable as the front rank.


Cavalry is no longer a "rampage over everything you come across without fear of reprisal" but instead a shock troop to finish off combats.


Furthermore, infantry has a place now. A horde of marauders is now a phenomenal investment, able to withstand a couple of big hits from template weapons/spells/hard combat units and deal back some damage of their own.


Now I find myself fielding multiple units of infantry, large blocks of Knights, and a heavy dose of Wiazards...a build I enjoy playing but would never consider in 7th because frankly...it blew might chunks of hairy underarm monkey sweat.
Okay, so that answer bled into the second and third questions...but that is the beauty of 8th. In 7th, you could and often did lose games on the strategic level...simply building a list you thought might be fun was an auto-loss to anyone who put together a list that worked together.
In 8th, there is certainly a strategic level to building...but great additions to the rules such as Steadfast, Swift Reform, and removing casualties from the back rank mean the superior tactician generally is able to obtain favorable positions and when you do that, you frequently end up with victories.
I guess one other issue should be addressed. Not attacking first on the charge automatically and not being allowed to choose your weapon if you had two did make a major change to how I equip my troops.

Example: Chaos Warriors were something I routinely gave both a shield and a great weapon. Against low S, low T opponents I would use the shield. Against high T opponents...say dragons, ogres, etc., the Great Weapons made them formidable. It was very nice having a flexible troop.
In 8th, however...hand weapon and shield. Which becomes a little non-sensical since I started doing it specifically for the parry bonus since it gets very irritating having an army whose 'advantage" is its tremendous armor save only to not even get to attempt an armor save...and then giving them frenzy so they do not benefit from it anyway.
One member of our group often responds to that complaint about not getting armor saves by pointing to my respectable win-loss record...which completely misses the point. Having a toy but never being allowed to use it (and rarely being successful when you do get to use it) removes a lot of the fun.
It reminds me a bit of a wrestling-based card game I used to play. My goal in the games was to get off my "Trademark Finisher". I would rather get off my TMF and lose than not get it off and win. In fact, my all-time favorite game was one where I got off both TMFs first turn...only to lose the game to my opponent's second TMF.

It was not the win or loss that mattered...it was seeing everyone get off "their move".
In Warhammer, it is often not winning or losing but what happens along the way. I have had more success with magic in 3 games of 8 than in all of 7th combined. Ironically, it has barely impacted the games...in fact, I have taken more damage from one Skaven Plague that wiped out almost half my horde than I have dealt...but I do not care because I am getting some spells cast successfully.
By the same token, probably the most memorable 8th moment for me so far was when I threw everything I had at his H-pit Abomination...an Exalted on Juggernaut with 5 S7 attacks, a couple spells, my own H-cannon shot, my H-cannon blowing up, and finally my Shaggoth, killing it...and having it come back to life with 4 wounds, kill my Shaggoth and a nearby wizard.
Since Shaggy dies every time I put him on the table, that is expected...but it became memorable because of the secondary result.
And that, to me, is the thing...I have a relative idea of what my win-loss record was in 7th edition. In 8th, I have a better idea of the moments that were stupendously fun...my irresistable Purple Sun wounding nobody but my Wizard, the Abomination coming back, the one extra casualty that won a combat for me which in turn cost me my unit of Knights when his spell killed my BSB...taking a flank charge by hero-buffed Grail Knights and sending them off in full flight 4", but rolling a 3 for pursuit...
Those were the highlights by far.
So in conclusion to this rambling, oft off-topic bit, I have changed my army into, except for the mages, something that could be mistaken for an actual historical force of light troops, solid infantry, and shock cavalry.
It has definitely improved any troop that can deal out large numbers of quality attacks, de-emphasized "glass cannon" heroes, and brought magic back as a reliable, fun part of the game. Great job by Games Workshop.


Thursday, September 9, 2010

Warrios of Chaos v. Beastmen

With Labor day looming, we decided to have another 3K game. I tried some new stuff.

Typically when I design an army, I start with the stuff that is guaranteed to go in...Shaggy the Shaggoth, some Knights, some more Knights, a chariot...then I put in a character or two and fill in around it.

So this would prove to be a shocking army. Nowhere in sight would there be Shaggy or a chariot.

There would be a 50 strong horde of Corn Scythes (Marauders with full command, great weapons and mark of khorne), 36 Corn Threshers (Chaos Warriors w/full command, hand weapon and shield, mark of khorne and some banner...probably against shooting?).

What is shocking is...this is what I built the army around.

I then included two Knight units, one fully 15 strong, the Amaizeing Knights (get the "subtle" corn reference?) and the other 7 strong. These would allow me to protect my flanks and, once my infantry pulled the enemy into combat, fulfill the shock cavalry role and blast the enemy in the flank.

Also, by putting in a Jugger riding dude and my typical BSB build, they would start the game with a rank...

I finished off with 2 wizards; one Vilitch the Curseling, who I wanted to try out, the other a humble level one with Shadow? Whatever lore has Miasma as the signature. He was also packing the Infernal Puppet and Channeling Staff.


Across the field would be the Beastmen. He had 2 units of Gors ranked up, 6 Minotaurs, and some nasty characters like Doombulls, a couple Bray Shamans, and 2 Gorgons. He also had a couple of Ambushing units.

Now, the reason I usually take Shaggy is he is really all I have to deal with multiple wound tough things like the Gorgons. In this game...I would need Magic and luck.

On top of this, the field was full of special terrain. In my deployment zone alone we had a Haunted Mansion, Scree hill, and Arcane Ruins. In the center of the field was a Temple of Skulls.

We had rolled up the Honor and Glory scenario and with a breaking point of three, this would take a while; his General and 6 standards gave him a fortitude of 8, as opposed to my mere 7.

My strategy was simple and appropriately chaotic. Find enemy. Smash face. Rinse, repeat.

To deal with the Gorgons I intended to devote large quantities of Magic as I did not have much faith in the abilities of my troops.

Warriors of Chaos Turn 1

I moved enough forward to perhaps tempt him into charging with a low chance of making it into contact. With no shooting, time for magic.

With 2 Wizards, one with the channeling staff and hanging out by the Arcane Ruins, I had 5 chances to channel on a 6 and one on a 5. It started well as I rolled a 10 for Winds and channeled 2.

This, by the way, would be the last time I successfully channeled in the entire battle, despite having 6 chances per turn. I figured it up and this means I was 6 short of expected power dice over the course of the battle.

On the bright side...in 8th, that does not mean I get nothing back from my investment in magic. It actually still did stuff...

Such as on this turn, I cast Infernal Great Way on his Gorgon on my right flank with Irresistible Force, doing about 3 wounds and modifying the miscast to a harmless 7, which ended the phase.


Beastmen Turn 1
He was able to bring one unit on my left flank, threatening my Puppet/channeling Wizard. Grr. His other unit I got to choose and just had him come on on his own edge.

Otherwise he just generally made a general advance. I blocked his good magic.


Warriors of Chaos Turn 2
I now had a conundrum. His big nasty unit of several Minotaurs and a couple characters (just next to the hill) flanked by the Gorgon were well set up to charge my Knights. It was an unlikely charge...I would need an 8 to reach him. But at the same time, better to get the charge than to get counter charged and take all those impact hits.

I climbed the temple with my Corn Threshers and took a chance with my champion, who got very lucky and improved his strength to a whopping 7. Not bad for a core infantry champ. The Corn Scythes advanced on the left with the Knights advancing in support, carefully avoiding the Haunted Mansion.

My foot wizard then failed to pass his March Leadership test and I barely got out of line of sight of the Beastmen.

My charge hit home.

Now, the problem here is...that Gorgon looks likely to flank charge my Knights. I do not like that much. So I will try Infernal on him again. But first, I force the Gors to take a panic test. They roll something like a 4 and pass easily. Bummer.

I was hoping to force a panic check, have them fail and run off and thus keep my juicy channeling post and Infernal Puppet carrier out of harms way as he had no shooting. A failed panic test would most likely send them scuttling right off the field and thus keep my back lines safe. Good strategy, good execution, but you still do not always get the desired result...

Though the inevitable Infernal Gateway was cast successfully. And killed the Gorgon.

Unfortunately, I forgot Vilitch's ability or would have had 4 more power dice, the ones he unsuccessfully tried to dispel with, which would have instantly seen me cast Treason on said Gor ambushers...

The close combat was epic. His doombull accepted my unit champion's challenge. He wounded the champ 3 times. I saved two of them.

This, by the way, would be the only two armor saves I passed. Not just in the combat...in the entire game. More on this later.

I then put a hurting on him, slaying every Minotaur and a hero, while taking back a further 5 casualties myself. Something like 20 total wounds dealt out between us. It was awesome.

And unsurprising when he broke and ran a whopping 7". Of course, all I had were Knights, so you know I had no chance of catching such a massive roll as I rolled my typical 2/2/1 to follow all of 4".


Beastmen Turn 2
Sometimes an unlucky thing...such as rolling a disappointing pursue distance...can prove to be a good thing. Liam was forced into a difficult choice. He set up to receive my charge with his Doombull/hero and set up a nice counter-charge with his hilltop Gors.

However, I pointed out to him...since I had lost 6 Knights when his Doombull was limited to just one, I was far more likely to charge the Gors next to me since I would have their flank. This possibility was a result of my poor pursuit roll.

So he was forced to close with my Marauder Horde/Chaos Warrior blocks.

So he then pulled up his chariot and circled his remaining Gorgon to flank my Marauder horde.


Warriors of Chaos Turn 3 or the Perils of being lazy
From my viewpoint, the gap between his heroes of doom and the forward sitting Gors was easily large enough for me to go after his Bray Shaman.

Now, tactically this was a huge mistake...to win the scenario, I needed to off his General and one unit of Gors. But having seen the carnage he wrought and fearing I could not hurt his doombull, I declared the charge on the Shamans.

Unfortunately, the gap was an optical illusion....no way of making it happen without clipping the Minotaur hero. He kindly offered to let me target the Doombull instead but I took it as a failed charge.

Speaking of failed...I would still need a "9" to make it into contact with my Marauders so I did not want to charge...and promptly failed the Leadership check, forgot I was allowed a re-roll and had to charge...which then succeeded and because they were going to have to charge, I charged my second knights into his Gorgon.

Not to feel left out, the Corn Threshers also elected to charge.

To my surprise, the Chaos Lord on Juggernaut did quite well, rocking the Gorgon for about 3 wounds and the Knights finished it off.


This time I remembered I had to go last due to Great Weapons with the Marauders. My Warrior champ handily dispatched the Gor champ, and the other three Warriors did a couple of casualties.

The Gors unleashed their fury solely on the Marauders, who with T3 and no armor were pretty soft and squishy, and the Gors did okay, felling about 6 of them.

Okay is a relative term...the Marauders unleashed 41 S5 attacks. 6 casualties checks in significantly less than the 14 or 15 that I inflicted. He had 4 shots at Insane courage...none passed, he broke, and the Doombull was not his general...which meant the game was over. He had one standard left.


Just for fun we played his combo charge on the Knights. Sure enough, the Doombull went all berserk, killing about 5 of them single-handed and the other character killed another. Out of I think 6 attempts, I saved zero.

On the other hand, I did kill the single hero and a few of the Gors.

Recap
Again the game fulfilled...indeed, exceeded expectations. We had a couple of clashes where there were multiple casualties on both sides. Magic was fearsome and actually part of the game instead of "Oh, you cast successfully? I dispel."

On the dark side...

I really, really like the Warriors of Chaos. They are very deadly, capable of inflicting great quantities of damage. It is one of their two strengths that set them apart.

Very few armies can put out as many attacks that have a probability of causing wounds on such a narrow frontage.

Their other strength lies in their great armor. Knights with a 1+ and Warriors with a 3+ mean I should be very, very durable.

What gets annoying is having 1/2 of my strengths mean absolutely nothing. Between spells, war machines, and whatnot, it feels like about half the time someone inflicts harm on my model, no armor save is allowed.

Then, when it is allowed, I very, very seldom make it whether modified or not. In this game I think I had 12 attempted saves and passed none of them.

That is pretty discouraging. What is the point to having good armor if it never matters? I seldom get a chance to save in the first place, the ones I do get are usually heavily modified, and regardless of whether it is 2+ or 6+, I make them at a rate far less than should happen.

At some point, it becomes nonsensical to play an armor where half the bonuses are invalidated. It would be nice to have some shooting, to have a way to deal with fliers/monsters/war machines that was reliable, or to have the army work the way it should.

To be sure, I have been able to manipulate the combats so that I usually still enter with and leave with an advantage...but I am successful because I plan to lose as a casualty every model the opponent wounds since I know I will never save anywhere near statistically accurate numbers of models.

The funny part of Warhammer is people typically notice the strengths of other armies while discounting their own. It is no less true of the WoC.

For me, their strengths have narrowed to one; I can put out very high quantities of S4 or S5 attacks in a relatively narrow frontage. The saves are irrelevant since they have no impact.

It is mentally wearing having to defend against shooting, magic, monsters, fliers, and really only be equipped to deal with the magic...in that I am well equipped.

Yes, I recognize the irony of having a sparkling win-loss record and being disappointed with the performance of the army. But it is winning more because I know how to use the offensive capability than because of the theoretical advantages.

When your second biggest advantage...survivability...is rendered impotent, it really means nothing. And that is just n0t cool.

So beware the forthcoming cunning plans and deadly alterations. If armor means nothing...why waste time with it?

Sunday, September 5, 2010

8th Edition Inaugral Battle:5k WoC v. 2500k Skaven/Bretonnians

I had been greatly looking forward to the 8th edition, and the single biggest reason is what many people (myself included) incorrectly call the "step-up rule". That change alone makes Marauders and Chaos Warriors worth taking.


But the old problem remained. I still despised...and continue to despise to the point I have not yet started on tomorrow's list...building army lists. It bores and annoys me.

So I decided I wanted to use Galrauch AND my flying D-Prince, so I chose 5K, got Liam and Kev to throw together 2500 points apiece, and off we went.

Now, although the points levels are even, I have a couple advantages in this format and a couple disadvantages.

Advantage one: I have 1250 points to spend on lord-level characters, they have but 625.
Advantage 2: I have a unified force theoretically designed to work with itself. They have two distinct forces not designed to have synergies with each other.

Disadvantage: against just one army, I know how to handle the elite sections of the army. With two separate armies, I will most likely be facing tough, hard-hitting units more spread out than normal.


As the scenario required them to set up first, it allowed me to hastily build my battle plan. I would use Magic, Marauders, Knights and the Shaggoth to fend off the skaven while the bulk of my army dealt with the Bretonnians. I would then swing over those forces, roll up the skaven flank and walk away talking about my greatness....

Alternatively, the larger numbers of skaven forces, combined with their mighty monsters and war machines could roll up my left flank, I could get clogged up in the middle and end up being flanked/assaulted from behind my lines and bemoan my stupidity (as opposed to granting credit to the greatness of Kev and Liam's battle plan...)


By the way, click on the picture above. Check out his VERY creative h-pit abomination scratch built from bits. Looks like the Loch Ness monster I think.

The brets asked for the blessing, so I got turn 1.

Warriors of Chaos turn 1
On the left I was playing a stalling game, so made at best a modest advance. In the center, I had a trap set up with a small unit of Knights ready to flank any Brets who moved into the middle while my block of 40 (!) Chaos Warriors locked down the middle. My non-fast cavalry Marauder Horsemen would go after the War machines, allowing my big block of Chaos Knights to sweep around and protect the flank of the Warriors.

Seeing his 5 Peasant Men at Arms on horses, I figured the 10 Marauder horsemen with light armor and shield would have an easy time with them and declared the charge. I needed to roll a "6" by rolling 3d6 and choosing the highest two...and promptly rolled a 4. Which meant they moved a whopping 2".

This meant to protect my flanks I had to slow everyone else's advance in the center and my Chaos Knights would be locked into dangerous area, unable to maneuver.

Battle plans are made to alter. One bad roll will not wreck it.

I flew the D-prince up to his right flank with a perfect shot at several units.

For magic, I rolled a "5" and a "1"...meaning I had one more power die than they had...then they channelled 2 additional dispel dice and I scored zero, so they had more Dispel dice than I had power dice.

I put all my eggs in one basket and threw all 6 at the Purple Sun big template. If I got irresistible force, sending that big template through his Knights of the Realm, Grail Knights, peasant bowmen and, if lucky, two trebuchets and several Skaven war machines would be devastating.

Of course, I could also simply fail to achieve the casting value...

On the left, the cannon dropped the template on top of his 5 Jezzails, a weapon I truly fear.

I was fortunate to roll a "hit" so one was under the template and died. The other 4, I just needed a "2" to wound. So I rolled 4d6...and for the second consecutive game, rolled 4 "1"s, slaying zero jezzails.

So the first round was...well..disastrous. I was out of position, did no damage of note, and he was in great shape.


Skaven/Bretonnian Turn 1
His men at arms charged my Marauder horsemen. This was probably a good move in 7th edition...not so much in 8th.

Conversely, seeing my Knights ready to flank him, he did NOT charge my Chaos Warriors with his Knights of the realm. In 7th...probably good idea again as I would have removed his rank bonuses and crushed him on my turn. In 8th...he really needed to get the strength bonus for his lances.

On the other flank there was a general advance.

They channeled a few dice, had about 5 more power dice. I had to use my one scroll to stop his plague spell that would have cost me about 34 marauders had it gone through. That let Liam put regeneration on his peasants.

They also shot down a few Marauders...I fail my first 4 save attempts, all needing 5+.

He manages a wound on my Marauder Horsemen. No problem, But I then unleash the pain and put down all 5 of his men at arms and over-run into the peasants behind.


Warriors of Chaos Turn 2
I have a tough choice. I have a pretty unlikely charge on his Knights of the Realm, a more likely charge on his Grail Knights. If I charge the peasants, I am virtually certain to make it and unleash a huge amount of carnage which should allow me to overrun into their artillery park....but if something goes wrong, I have presented my flank to Grail Knights. This is seldom a good idea...

Shaggy charges his abomination, my Marauder Horde charges...I dunno, skaven clanrats?


Magic goes about the same. I roll a 5 and 1 again. They channel 2, I channel zero. For the second consecutive time, I have fewer power dice than they have dispel. So I go the big Purple Sun rout.
This time it works. Irresistible force. And then...it misfires, lands on my wizard and wounds him, scattering away from their battle lines. Then I roll snake eyes for the miscast and a 2 for Infernal Puppet...fortunately, I am not thrown into the warp, but that was...well...not good.
Time for shooting. After my colossal whiff on turn one, I am expecting good things. I do not get them as the cannon blows up, and I roll a whopping 16" for distance other units are wounded on.
By the time we are done taking wounds from the blow-up I have lost marauders, wounds on Shaggy and a wizard, he has taken a couple on the abomination and a couple clanrats.

A quick points count: I have done 40% wounds to my best wizard, half wounds to another wizard, 33% to my Shaggoth, and killed my own cannon. They have slain I think 4 Marauders at this point...I vote for me as their MVP.
On the bright side, it also killed 3 Jezzail members, and the other would spend the next 4 (!) turns fleeing off the board....

Well, close combat is the key for the Warriors of Chaos. Forgetting great weapons no longer go first on the charge, I inflict mayhem on his clanrats, slaying 13 of his guys. He attacks back, kills 2...and then rolls Insane Courage.


My Warriors cause 13 wounds to his peasants, he saves 3 with the blessing/regenerate. The Marauders and their horse kill 8 more. I am happy. I have had two epic combats that offset my horrific shooting and magic. I rout him.


I then roll horribly and fail to catch him...but it does move my Marauder horsemen to where it seems like an illegal charge in 8th as his Grail Knights, to hit my juicy Chaos Warriors would have to wheel to get around them, but that wheel would lessen the number of troops he got in combat...so I was perhaps fortunate to have awful pursuit rolls...


Skaven/Bretonnian Turn 2
He charges his plague furnace into my Marauder horde.
He gets off the Skaven plague spell, killing 17 Marauders.


The combat is brutal as I do a number on his clanrats, his Furnace does a number on my Horde, but I win the combat. He is down to ONE clanrat by now...


Warriors of Chaos Turn 3
the block of 10 Knights has his Doom Wheel in front of it and charges. I again have a spell dice deficit, but get Infernal Gateway off irresistibly, doing a few wounds to a war machine.


(fair warning; about this point I stopped taking notes so...well...who knows what REALLY happened after this..)
The Knights just barely kill the Doom wheel and overrun into some clan rats or plague monks or whatever. My Warriors go after his Knights of the Realm.
His Grail Knights charge my Knight block in the flank...the key moment in the game.
This is his best Knights, bolstered by their general, getting a flank charge (reducing my armor save by one) with S6 hits on my best unit. My Marauder Horde is dying, the Shaggoth is odds on to die to the Abomination, and magic,...well, for the first 4 turns he had more Dispel Dice than I had Power Dice.
But then something happened...he did indeed put down a couple Chaos Knights. But in return I kill all 7 Plague Monks and kill his Battle Standard Bearer. I win the combat and he epically fails his Leadership roll...not a huge shock as his 2 ranks were easily countered by my BSB/War banner/more kills. He flees a whopping 5"...and I pursue a whopping 4".


My Chaos Warriors run his Knights of the Realm.
Shaggy kills the Abomination while having just 1 wound remaining himself. And Kev promptly rolls a 6 to bring it back and gets fully 4 wounds. Uh-oh...


So now we have an interesting situation. On the left flank I have a foot wizard, 5 Knights, and 1 wound remaining on my Shaggoth. He has the Abomination, some skaven clanrats, the plague furnace, and a couple other miscellaneous units.

meanwhile, on the right I have 35ish Chaos Warriors, 8 or 9 Chaos Knights, another unit of 5 knights, a dragon, and D-prince...so we have done the classic Greek maneuver of each shattering the right flank of the other.

From here on it got bloody (as if, you know, the hundreds of casualties already dealt were not...) as there were charges, counter charges, counter/counter charges...


This just in. His Skaven general with something like a bajillion I9 or 10 attacks allowing no armor save is bad, bad jujupe. He tore up a unit of Knights and everything else he touched.


But I overran their artillery park and by the end it was obvious the game was going to be some sort of Chaos victory.


Ironically, I had one epic charge left where I failed a LD test with re-roll to restrain, thus forcing my corny knights (mark of khorne) to make an unfavorable charge on my 6th turn. I dealt out something like 17 casualties...as Fixed Dice pointed out, had I done just 16, he would have passed his test instead of getting overrun.
He paid me back, killing my BSB with magic when I failed my Initiative test which meant my Knights broke instead of being stubborn with a reroll....


He also wiped out everything I had on the left, including his Abomination taking out my Shaggoth and wizard.


So the epic blood bath ended.
Bretonnia was all but wiped out, with only the peasant bowmen hanging out on my left flank alive.
Conversely, almost all the Skaven were alive.
I started the game with 20 Knights and 2 Knight heroes and an exalted hero on juggernaut. At the end of the game I had 2 Knights left of all that...his Abomination withstood my 5 S7 attacks without taking a wound and slew the jugger rider on turn 1 or 2, killed the Shaggoth, and his clanrats did for 10 more Knights. the others fell to Brets and Magic.


Reflections
Wee totaled the points. They scored something like 2300 points, I scored about 3500 or so.
It was great fun. Much of my conjecture was backed up. The "remove casualties from the back rank" rule makes, to me, this game 1000000% better. It meant peasants, clanrats, plague monks, storm vermin were all a real even to my mighty Knights...who did well but took a TON of damage.
Magic was...well, what it often is for me. I spent far more points on it than they did. And I did have some success...which is nice because in 7th, I would have gotten nothing done. I did think it was funny that on 5 of 6 turns they actually had more Dispel Dice than I had power dice...
and awesome that I still managed to get some stuff off.
I think the Horde rule is awesome, though I doubt I would use it in a tournament or competitive situation.
Not so fond of everything being dangerous terrain as it really restricted my movement, and the placing of templates makes them super powerful. Wish they scattered a bit more.
Overall, the game is much more tactical and much more fun now, with a heavy dose of random swings thrown in. Love, love, love it.