Tuesday, May 31, 2011

Steadfast: We have been playing it wrong

At least, I have been playing it wrong. I have been playing it like the old Stubborn rule. I.e. You may test on the UNIT'S unmodified leadership. This is not the Steadfast rule.

The Steadfast (and by extension the NEW Stubborn rule) says, "Steadfast units can always take Break tests on their unmodified Leadership (or the General's unmodified Leadership if the testing unit is in range of his Inspiring Presence special rule - see page 107). "

And just for completeness, the new Stubborn rule reads, "Stubborn units are always steadfast, whether or not they have more ranks than their enemy (see page 54 for details)."

Therefore a unit with Ld 6 which is steadfast and in range of its Ld 10 general would roll on an unmodified 10 when they lose the combat.

Friday, May 27, 2011

Prove It: Basketball, Warhammer, and Chihuahuas

"Prove it."

This was a common phrase when we were playing Horse or Pig, the final shot was too difficult for the person about to be eliminated and they had already missed their first shot.

So instead of attempting it a second time, knowing they would miss it, that person would calculate the chances and decide there was a greater chance of their opponent missing the shot than the eliminatee had of making it.

So instead of chancing it, they would go to the time-honored "prove it card."

The amazing thing is...typically the person challenged to prove it would. If it was a twisting, turning, spinning reverse off the opposite foot, they would calmly and complacently throw it up and watch it go in the basket, thus allowing them to label the loser a horse.

Or if it was a long bomb they almost always watched the basketball swish through nicely and cleanly. It was as inevitable as rain in Oregon, lies from politicians, or me purchasing the new Weird Al cd when it is released.

There is a reason this worked. Most basketball players have a comfort zone. If one person has better range, they will step outside their opponents' range when time for that key shot. Conversely, if they make their living in the paint then a difficult lay-in will be a piece of cake for them but virtually impossible for their opponent.

And if one player has better range and is also comfortable with the most spectacular work around the basket, they would win nearly every time.

So what does this have to do with Warhammer?

There was a Warhammer event in Portland not too long ago that was a little bit off the beaten path. I suspect it owes a fair amount to one I have seen mentioned from the United Kingdom. Essentially, you take a smallish army and play each opponent twice. The first time you use your own army, the second your opponent's.

The idea behind this is that this will determine the better player by comparing the outcomes of the two games. It is also an oft-suggested resolution among the Starving Crazed Weasels.

The problem with the concept is similar to the problem with resorting to "prove it" in a game of Horse.

Though the army list might be the same, the results will seldom be equal.

For example, my standard finishing move in Horse started with a right hand dribble, 360 degree double pump lay in with the left hand.

It could trip people up many places...the dribble, spin, double pump, or especially using the left hand.

Often when that was the challenge shot, I would have to walk the victim through the steps several times and even then they seldom got it correct. Did not matter because it was even more rare that they made the shot.

Army construction often has a similar principle. Picking up a list and seeing "47 dudes with weapons, 18 different dudes with piercing eyes, firm jaw and a lock of wavy hair, and dude with a staff" might tell you what is in the army but not why.

A lot of times it has to do with play style. For example, a player who works to minimize casualties and protect themselves from shooting and magic through judicious entry into close combats will struggle to play a shooting based High Elf army well (why you would make a shooting based High Elf army is an open question).

By contrast, the person who relies heavily on magic to buff their troops, move them around the field, etc. will struggle mightily to do well when handed a Dwarf list, even if it has Thorek and a host of war machines.

Two players with the same list will not have the same results. I am a fine example.

Give me a list I put together and I will typically know which unit is supposed to perform which role. I have a sense of how long my troops will last before being swept aside...or sweeping aside their opponent.

Hand me the identical list, but put together by someone else and odds are good I will struggle with it and, in fact, will lose the majority of the games I play with it, even against inferior lists.

But there is something else to consider. When we played previously back in the last millenium, I used a Bretonnian list. Great armor saves, great mobility, and a beastly dragon rider.

When we restarted, I took to the Warriors of Chaos like a Beagle to rabbit hunting.

They fit my style very well. They are rugged, fast (the way I build lists), and reliable.

I tend to find when I use other styles of lists that I am less successful not only in the game, but in figuring out how to use the troops to hand.

It is not just that the troops die in droves...I do that with the Warriors. I cannot count the number of times my 5 strong Knight unit has lost 3 of 5 members to a 4 wound barrage or my Chaos Warrior unit has been shredded by a trebuchet or scraplauncher.

Ironically, losing 3 knights is much more costly than losing say...22 Lothern Sea Guard as I did not too long ago in just one turn. I have lost far more in potential combat ability by losing 60% of my frontage than I have by losing 0% of my frontage.

But the plan for how to use them changes. One thing I have noted in my list-building is that regardless of what troops are available, I know what roles I want my troops to play and often shoe-horn other troops into that role when my preferred troop is unavailable.


Thus in recent games with both the High Elf and Beastmen army I have had uncomfortable moments when key troops were in the wrong place. Once I lost a Watchtower game to the Lizardmen because of it when I planted deadly but too few in number Swordsmen in the Watchtower instead of the larger, less lethal but much sturdier Sea Guard block. (Arguably I would have lost it anyway, but that made the outcome certain.)

It is a mistake probably nobody else in the Starving Crazed Weasels would make. This is largely because they tend to mix up the army styles they build more frequently than I mix my builds.

I seldom take Chaos Marauders or Chaos Warriors in any numbers larger than the bare minimum because when I look at them I tend to maximize their disadvantages and minimize their strengths.

I like a mobile army. Typically facing one of the various Elven armies, Skaven, Lizardmen and Ogres, I find that M4 is just too slow. 20 - 33% slower than the opponent, the blocks of Marauders and Warriors all too often fail to get where they need to be when I need them to be there.

Conversely, Chaos Knights, Marauder Horsemen, Shaggoths, and Dragon Ogres are fully capable of following Nathan Bedford Forrests' dictum to "get thar fustest with the mostest".

My brothers, Kev and Liam have mastered skills that I envy. They all make much heavier use of infantry than I do and are far more effective with it. Whereas my Marauders, Chaos Warriors, Lothern Sea Guard, and other miscellaneous blocks of infantry often see little to no meaningful combat, they seem to get their infantry blocks into combat almost every game*.

As an interesting side-note, the use of infantry blocks is more of a finesse tactic where the majority of my tactics revolve around blunt force trauma. I also find it is quite difficult to go from blunt force trauma to the tactics of parry and thrust required to play fragile troops well, whereas I do believe it is easier to adjust finesse tactics to bft. But not always.

I think the last Watchtower game was a case in point. In the magic phase, I would have immediately gone the blunt force trauma route of throwing max dice at the power spells every turn and most likely ended up with two dead Slann due to miscast before they could ever have gotten through my Temple Guard with Chaos Knights, Chaos Warriors, etc. if the roles were reversed....in fact, that is what I did with my magic phase.

I am willing to bet they would have taken Pandemonium as one of their spells and spent more time trying to get that cast than Infernal Gateway. I believe this because both brothers are better at finesse, long-term thinking like that than I am. They use those tactics far more often and effectively than I do.


Yet I have also seen them commit the bft style attacks as well. Both use Cold One Knights (one for Lizardmen, the other for Dark Elves), chariots, and "glass cannon" characters quite well.

I am not always certain the reverse is true. The most finesse I use is heavy use of blocking forces and the occasional diversionary attack.

I am far better at the blunt-force tactics that result in bringing overwhelming force into any given combat...and, indeed, if you go back and read through a typical battle report, you will find that most combats I get involved in see me allocating far more points at any given point than the opponent.

I find that all of us in the group have different strengths and weaknesses. At the risk of angering someone, I will suggest some things of that nature I see;

Liam is the best at avoidance and casualty minimizing. He does this through keen analysis of defensive positions and using mobility. His greatest weakness is the occasional lack of aggression.

Kev is great at spotting the right moment to attack a weak point in the enemy lines. His weakness tends to be rotten timing on lousy dice rolls. Whereas he will make a ridiculous number of 6+ saves, at the key moment his war machines will all blow themselves up, he will fail the re-rollable 10+ leadership test, etc.

Fullur is great at movement and thinking ahead. His weakness is being unwilling to press his advantages.

Fixed Dice is an extremely strong player. I would argue he has the best list-building skills of any of us, His greatest weakness is he occasionally will put a lot of points into a model, then be unwilling to use it for fear of losing those points.

I would say my greatest strength is getting the right troops into the right combat at the right time. My greatest weakness...and there are many...is a fear of losing ANY model, even a little 4 point pointless guy.


I will go out on a limb here and say that those who are used to using finesse tactics will do better at adopting to using better troops than someone used to using high quality, resilient troops will do with good quality, fragile troops.

Someone used to using hordes, on the other hand, might do more poorly with an elite army than someone with an elite army would do with hordes. Empty space can be scary.

The key point, though, is tournaments/games where you switch armies might be a "truer" test of skills...but it is not a true test of skills that have been developed.

I love the thought of the Empire army detachment system. I would love to build an army revolving around a Steam Tank, couple units of knights, block of swordsmen with handgun detachments.

And I am willing to bet the first few games would be disastrous for me. I would commit the wrong troops at the wrong time, probably have the wrong units in the wrong places and could get taken apart by 60% of the points in the hands of someone who knows what they are doing.

Plain and simple, as much as I like the idea of the detachments, I have not developed the skills needed to use them effectively.

I have, however, developed the skills to use the Warriors of Chaos effectively.

Here is an example; There is a lvl 4 Wizard on disc, block of 18 Chaos Warriors with shield, mark of tzeentch, horde of Chaos Marauders with Great Weapons and mark of khorne, 2 5 man units of Chaos Knights, one with mark of tzeentch and banner of rage (always frenzied), the other with mark of khorne and war banner, 3 dragon ogres and a dragon ogre shaggoth. Last but not least, there is an exalted hero on Chaos steed with the banner of chaos, giving him terror and making every troop within 6" stubborn. Where do you place the bsb?

Some people would say there is no right or wrong answer. To me, there is a blatantly correct answer (and one I never use).

The Chaos Warriors have a 3+ armor save, 5+ parry save. They are there to occupy any enemy for a long, long time. They are unlikely to win combats on their own. The Chaos Marauders have no save whatsoever, are T3 and modest weapon skill. However, they will dish out a large number of S5 attacks.

Everything else in the list is fast enough to force the combats it wants to get into...which, theoretically, means they will WIN those combats the vast majority of the time.

Thus the BSB is clearly designed to hang out close to or within one of the infantry blocks which, themselves, are designed to work in concert with each other.

Coming up with that scenario and how each unit should be used took me about a half second. Yet time and again, I have looked through some of the other army books, found absolutely no army I wanted to put together...but when I see some of the lists put together by the Starving Crazed Weasels, I know how it will operate in their hands, know I could not use the list that way, and know they made a good list that works for them.

So when I see "prove it" tournaments, I know before I ever set out I have no interest in doing that. I know how good I am with the type of lists I like to take...and how poorly I would fare with just about any other.

In fact, I am willing to wager that if anybody in the Starving Crazed Weasels ever takes me on in a game where we switch lists, they will wipe the floor with me. I will almost guaranteed get tabled. Every time.  Regardless of scenario, list, etc.

I also know my dog will still love me.


* One exception to this is hordes. I like to think I have quickly and effectively mastered the use of hordes. Properly protected on the flank, they can occupy so much space they can effectively force the opposition to accept battle. And being a horde, I will almost always have the advantage of numbers, and being the Warriors of Chaos, even the Marauders are almost always the equal of if not superior to the opponent's base troops. Smaller blocks of infantry have oft proved to be wastes of points, but hordes have been awesome for me.

Interestingly enough, the very immobility of a horde, considered a weakness by some, are, in my opinion and experience easy to turn into one of their greatest strengths.

Wednesday, May 25, 2011

My new favorite toy

In my game against Kev, I was a little disappointed to not be able to take Galrauch. Since then some tweaking has gotten him glued together....but I may not take him anyway.

Since he checks in at a hefty 616 points (why they did not make it 666 since they did that with his stats I do not know), he is pretty tough to fit in anyway.

With the WoC, your lack of shooting creates a big hole. You need magic to take care of two roles; shooting and magic. So getting an effective magic phase is pretty much vital to making the army work, particularly against the vast percentage of armies which currently do not allow armor saves.

So the investment is not just Galrauch, it is the inevitable back-up wizard with the Infernal Puppet to protect against the inevitable mis-cast(s). Unlike the mis-cast proof Teclis/Slann, one bad roll can really ruin your day, so the Puppet is a necessary level of protection.

With my love of magic, it is hard not to take a wizard. With my love of dragons, it is tough not to take a wizard. Galrauch fulfilling both roles meant he was a great choice.

Until the game this past weekend.

As a general rule, I am not fond of putting a wizard on a dragon, even a wizard in Chaos armor. Too squishy.

But...throw the Talisman of Preservation, give him the tzeentch mark, and suddenly you have a 3+ ward save.

Nice.

He managed to stand up to multiple rounds of combat with the H-pit abomination throwing 13, 14, 15 attacks at him. With the back-up wizard Puppeting his mis-casts to a 7, he is in good shape to survive.

Thing is, he becomes a real power-house in combat. The wizard is weak compared to a Chaos fighter-character...or a Doombull, or Bretonnian fighter-character...but put him up against rank and file, between his efforts, the dragon thunderstomping and hacking, and he can deal out a world of hurt.

So he is mobile to get his magic where it needs to be, tough to kill, and deadly when he gets into combat. He fulfills my desires for both wizard and dragon presence. And he is just fun to play.

So he will be a temptation to use in just about every game. The problem is...he can only be fit into games 2800 points plus...so he will not always be around. But it is a build worth remembering.

Funny thing is, I then started thinking. As fun as this is, what would happen if I put together a build to go warmachine/monster hunting? I do not have a lot of faith in this build to consistently do well.

But put a chaos lord up there...how would it look? So I started toying around with various builds. And I found one that may make an appearance at some point.

The Chaos Lord would have 5 WS8 S7 attacks that will go first against all but a handful of enemies. He will have a 1+ save with 3+ ward. Then the dragon will have 6 WS6 S6 attacks, a thunderstomp, and if played right, will save his breath attack.

If everything hit 100% (unlikely, but possible) that is 5 S7, 12 S6 and 12 S4 attacks. Oh, and for a lark if the game is big enough, I gave him the Word of Agony option, another D6 S4 hits. That is a lot of potential output, and he is pretty rugged.

Sure, some things (Pendant of Kalith (sic) comes to mind) shut it down, but it is a force to be reckoned with. Since nobody in the group is currently playing dwarves and our Empire player has abominable luck (1 shot in 3 games I know of...and that after we made him re-roll a mis-fire because it had gotten too ridiculous) I am not really afraid of the cannonball to the face.

Of course, the other problem with this build is it shafts my magic phase. I can spam a couple low-levels, though. Might be fun.

The other downside is it means I pretty much want to play games 2800 points range whereas there is a certain movement afoot in the group to play smaller games. Hmm...

Monday, May 23, 2011

3500 Warriors of Chaos versus 3500 Lizardmen, Watchtower Scenario

After the experiment with the wizard on the dragon, I wanted to try an actually Chaos fighter lord on dragon. With the Ogre Blade, mark of tzeentch, Enchanted Shield and Talisman of Preservation he ends up having a 1+ armor save, 3+ ward, 7 S5 attacks, 6 strength 6 attacks, dragon breath and thunderstomp. He should do a number on infantry blocks and is quite capable of going after war machines, tough monsters, etc.

I actually like this build so much I am going to name him. Mithridates will make a come-back, and the dragon will be called Phangoria. Look it up. It is funny.

So when we decided to play an all-night game prior to me flying out to Nebraska, I was hoping it would be big enough to try him out.

We ended up rolling for size and 3500 came up. Score! Of course, fitting him him meant I would be susceptible to strong magic. I would have at best a level 2 wizard....

With over 700 points tied up in one character, I put in my normal BSB, a couple of level 2s marked with tzeentch, one with dispel scroll and the other with infernal puppet.

After fiddling around with points I ended up with a block of 20 chaos warriors with shield and tzeentch, a 14 warrior with khorne and great weapons and 2 marauder horsemen with throwing axes. I also had an h-cannon, warshrine, dragon ogre shaggoth, and 5 man and 10 man knight units. Whoops...due to points I had to drop the  10 man down to 5.

I like this build. If it is a straight up fight I just need to push forward and get into the right combats...hold them up with my 3+ save, 5+ ward Warrior block and blast the flanks with my hard hitting units while the Shaggoth and Dragon go after hard targets.

If blood and glory I have 4 units with banners, the BSB and my general. And if the Watchtower, if I get to set up in it, 20 Chaos Warriors with 3+/5+ re-rolling on an 8 are going to be hard to shift. I can use my other units to keep them from getting attacked.

Time to set up the field.

The field ended up being a bit...well, I thought at the time we had kind of blown the set-up. The center of the table was kind of crowded but there was little or nothing affecting the deployment zones. Too much of the terrain was next to each other. After the scenario, though, I think it was quite well set up. Had a nice impact on mobility.

They were taking a dual slann list. One had Life (?), the other metal. They had I think 3 other 10 man saurus blocks, a bik skink/kroxigor block and a couple units of skinks. Also the Engine and another stegadon.

As is typical for me when I see such a list, I immediately start thinking of its strengths. This army is quite well set up to crush my Warriors. I despise the lore of metal. It essentially removes my army wide strength of armor. Wish I had some lore that did not allow enemy armies their specialty....that removed ASF for high elfs, hatred for dark elves, cold blooded for lizardmen, etc. Saving grace is they have to be cast successfully. Downside is...with +2 to cast and the Slann abilities to add a die to every spell...I could be in a world of hurt.

Add to that the Engine allowing no armor saves and they have the potential to do a large amount of unstoppable damage that I can do nothing about. I just have to hope I can minimize that.

It used to be the Saurus would not bother me. I used to argue that they would sub-par and over-cost, that they did not do enough damage against weaker troops (say...empire state troops) and were as weak as state troops against stronger troop choices like Ogres. If there is one thing the Warriors are strong on, it is high quality troops.

Ironically, it was my brothers who convinced me the Saurus are better than I believed and a threat even to the warriors. So I am concerned. The skinks will cause me lots of saves which I tend to fail in large quantities, the Saurus outnumber me and their temple guard seem to be a valid threat to even my Warriors, they will dominate the magic phase and I could be in trouble.

I roll a 5 to snag the tower. I am happy. I already have my plan formed. I am going to throw my tough block into the tower, then tie up his other units and hope the game ends on turn 4 with me having 1 or 2 Warriors left in the tower.

I know that is all that matters. I can lose every guy I have except one. As long as I have one guy left but he is in the tower I will win. So that is the plan.

Then they spoil my plan by rolling a 6. "Fortunately" the only unit they have to put in there is a 10 Saurus block. I figure to be able to kill them...but will I be able to then occupy the tower?

I throw the 2 Marauder Horsemen units on the right as a feint. Everything else I plant right around the tower. My bog block of 20 is directly opposite the tower. The 14 khorne great weapons are to their left, the 5 man knights to their right in front with the 10 behind, the Shaggoth right of that and the cannon out to the side to get a line of sight. I plan to drop it on the Metal Tempe Guard/Slann unit hoping to get lucky.

I get to go first.

Warriors of Chaos Turn 1
I want to soften up the tower and do not want to use my Warriors to do it. I want to keep them protected as long as possible. I think it will take 2 turns to wipe out the Saurus in the tower. I also forget the rules....I start moving other units to block him off from entering the tower after I clear it out. If I can tie up his infantry units in combat then I will have time to occupy it on my turn. Otherwise, I figure I will kill his garrison off on my turn, then he will occupy it with a temple guard unit on his turn and that will be game.

The Knights make it into the tower, the big warrior block moves close hoping to be able to occupy it on turn 3, the khorne warriors move up on the building's left and the dragon flies in that direction.

I roll a whopping 11 dice for magic. I throw 6 at Infernal Gateway at his Metal slann. I want irresistible force. I will take my chances with the mis-cast. That is the most dangerous thing he has on the table to me. I am going to concentrate on it.

I roll a total of about 21, he rolls all his Dispel dice and stuffs it. I have 5 dice left and nothing to do.

Shooting; I center the template on the Metal Slann. It scatters off a couple inches. I then roll a "1" for the guy under the template and a 2 to wound the slann. Even though he loses 5 or 6 Saurus...I am disappointed. So far this turn has not gone well. Both units of Horsemen combine to get zero hits on their respective targets (I had moved them to throw shots at his terradons and a small Saurus block).

The tower battle goes very well, however. My 5 frenzied knights do what 5 frenzied knights do and wipe out all 10 saurus before they even get to attack.

The good news is...the tower is now empty. The bad news is...my knights are in the way of my warrior block getting into the tower.

Lizardman Turn 1


His terradons and saurus charge my marauder horsemen. I flee the terradons...and he overruns them. My other unit stands and shoots at his Saurus, do no damage and die in close combat.

The Metal Slann Temple Guard marches but outside the parameters of the building. The Engine moves up close to the building. The other Slann unit advances on what I call the left side of the building. Unbeknownst to them, they are playing right into the battle plan I formulated.

The old saw is "battle plans never survive contact with the enemy". They had no way of knowing this...but they were actually doing exactly what I would have begged them to do. By those moves they gave me the chance...albeit a slim one...of getting off suicide charges on both units. Clever movement of my BSB would mean I could tie them up with hard to kill, stubborn units.

They then rolled I think a 3 or 4 for the winds of magic. I breath a huge sigh of relief. They first attempt throne of vines. I do not even hesitate, I let it go. I know it protects them from miscast but it does not hurt me. I am saving all my dice to stop anything that lowers my armor save permanently or is damaging with no save.

My plan works as I have enough dispel dice to stop their casting.

Their stegadon bow misses. The skinks they put into the tower next to the watchtower then shoot at my dragon, one poison hit which I duly fail. After all, I only had a 3+...I am bound to fail one of 3 of those, might as well get it out of the way early.

So overall, the first turn was excellent for me. I already think the game comes down to one die roll which I will attempt post haste.

Warriors of Chaos Turn 2
The door is open. If I can get my Knights out of the way I will shove my Warriors block into the tower and then thrown everything I have at keeping him from assaulting it. I will save all my dice to protect the tower in the magic phase.

I declare the key charges. My knights with the zteentch mark and banner of rage charge the temple guard. This will come as a surprise to just about everyone...but I actually would not have done this in any other scenario.

As awesome as my knights are, I think they will severely reduce the Temple Guard unit but will eventually die. I want to combo-charge this unit. However, in the Watchtower scenario, the only thing that matters is occupying the tower. If I fail my swift reform roll, I need to keep him out of the tower.

Meanwhile, Shaggoth charges the terradons who also choose to flee. They go a long, long way.

On the left I advance my khorne warriors toward his other temple guard block.

It is now time for THE most important roll in the game. If I can swift reform the Knights, I will move them out of the way and shove my warrior block in the tower.

The charges succeeds, the swift reform...passes. I get my 3+, 5+ save, 20 man block into the tower. I now have a strong advantage.

Meanwhile, their positioning means I cannot get the dragon out of range of the skinks, but I fly him behind their lines anyway, aiming to charge the Engine next turn. I need to kill that thing off at all costs, because they have it perfectly positioned to kill off a few Warriors every turn.

I roll a 5 or 6 on the winds. After a brief debate,  I dispel Throne with all my dice. Probably should have tried Infernal on his engine.

The h-cannon scatters away, doing no harm.

My knights on the right do a few casualties and lose one of their own.

This next turn will be key. He will charge with his Temple Guard, do a few casualties, I will do a few. I actually figure I am about 85% likely to win the combat, I just need to withstand the attrition because that is what this has become; a war of attrition. I think they will work to wear down my block with repeated suicide charges and the Engine. Will I be able to hold out?


Lizardmen Turn 2
I get a huge shock. They do NOT charge the Temple Guard into the tower. Instead they move up between the tower and the Bane Tower or whatever it is. They move the razordon to block my Dragon charge on the engine and a jungle swarm hoping to also block.  The skink/kroxigor block swings around the tower.

They roll another low number on the Winds. He then fluffs Throne and I dispel his Metal spell. The Burning Alignment rolls a low number, does in one of the knights fighting his temple guard.

In combat I kill his champion again (came back to Throne prior turn I think?) and he kills another knight. I do almost no other casualties as they make every save.


Warriors of Chaos Turn 3
On the left I charge my khorne warriors into his Temple Guard. I believed they had made a mistake by not charging the tower last turn. (We had quite a debate about this post game. They had a different strategy than I would employ that they believed...and still believe in...which has some merit. If I knew then what I know now, I might not have charged...but I doubt it.)

This actually contradicts one of Napoleons dictates; "Never interrupt the enemy in the course of making a mistake." However, it also comes into whether they were making a mistake. And it completely comes down to point of view.

For the strategy they had adopted it was not a mistake. It was only a mistake if they had the same battle plan I would adopt in their place...which they would not. So while for me it would have been a mistake to not charge the tower, for them it was the correct play. Confused? Check out my post-battle meanderings for a more thorough discussion.

Behind his lines I charge Mithridates and Phangoria into his razordon. The stand and shoot is appalling as he rolls 2 hits and a misfire, eating a skink. He does no damage.
On the right Shaggoth charges his terradon who flee. A long way.

On the left he does in a couple of warriors and I then do in 14 of his temple Guard. Wow. that was..unexpected. It is also more what I used to think of Saurus.

He was striking first with I think 13 S5 attacks plus whatever the Slann does (read "nothing"). His S5 reduces my save to a 6+.   The damage done was quite modest. The khorne warriors, however, were devastating. Over 20 attacks needing 3s to hit, 2s to wound with a -3 are going to put a hurt on anyone. Him saving I think zero of them did not hurt.

On the right I do in a couple of his temple guard. I think he did not do any back, but he might have.

Mithridates and Phangoria do their thing, killing the razordon and over-running into the engine.

So this was a stupendous turn for me. I am in position to get some help to my Knight block on the right which is whittling down his temple guard, I am going to kill his life Slann in oneish more turns, I am a turn or two from ending the Engine's burning alignment, and the Shaggoth will stall his 10 Saurus block on the right. Even if he hammers Shaggy, 10 Saurus are not going to win this game for them.

Oh, think this was the turn I gave him a 3+ save with the Warshrine. So he is going to be pretty tough.

Lizardmen Turn 3
He moves some skinks up behind the Saurus on my right. His Terradons fail their rally test and fly off the field.

He again rolls abominably on the Winds...maybe a 3? 4? Their plan to regrow the Temple Guard on my left flies out the window. They do not have enough to Throne AND a metal spell. They cast a metal spell. I would need double 6s to stop it (might have been Dwellers Below, come to think of it...it was either that or Final Transmutation. Either way, all 20 of my Chaos Warriors take a test and die on a 5 or 6. That should drop them to about 12...I had lost a couple to Burning Alignment already).

I burn my Dispel Scroll. Burning does a wound to the dragon, takes down another knight, wounds one of my wizards.

In the shooting phase he hits the shaggoth twice with poison. Needing 3s to save, I take both wounds. Ugh.

I kill his skink priest in a challenge, then put a couple wounds on the Stegadon who wounds the dragon back. I now have 3 wounds on him. Just now occurred to me I forgot to roll on the Eye chart. Irrelevant, but would have been fun.

Warriors of Chaos Turn 4
Shaggy charges his Saurus. The cannon and Shrine move forward. Magic is pointless. I have nothing to dispel, nothing to cast.

Close combat is my specialty of course. The ancient stegadon dies, his Life Slann/Temple Guard block dies, I do a couple wounds to his Saurus with Shaggy (and take one back). The game is really over at this point. He does not have enough juice left to dislodge my essentially untouched tower-holding warrior block and I am devastating him everywhere else.

He does finish off my Knights, though. They did their job, whittling him down to maybe 5 or 6 Temple Guard left. Maybe less.

Lizardmen Turn 4
A little movement, another failed magic turn. His Kroxigor block did get into combat with the tower. I killed his skink champ in a challenge, put 2 or 3 wounds on kroxigor but think he did not get anything through.

I think this is the turn he charged my BSB who was left in the open when my knights died. I had been using him to keep Shaggy and the Knights stubborn. His positioning left him open.

Warriors of Chaos Turn 5
The knights charge in with Shaggy, my cannon and shrine finish off his other Saurus, he kills my BSB on his way out the door. The game is really over at this point so we call it.


Wrapping up
First off, what went right?

I think I came up with a really solid battle plan. The only mistakes I felt like I made were irrelevant. My Marauder Horsemen are in the list to go after Repeater Bolt Throwers, Stone Throwers, Jezzail Teams, Cannons. He had none. I threw them away going after irrelevant targets. They were not speed bumping units.

But it was at worst a minor mistake. I am not sure I want them in front of his tempe guard anyway as they would occupy space I would rather have for other units.

I had superior fortune in killing off his Saurus in turn one and then being able to occupy it myself with the block I wanted in there. There was very little chance I would fail my swift reform. I was trying on a re-rollable 9 due to Mithridates and the BSB. Had he kept just one Saurus alive, the game might have gone much different. As it was, I accomplished my goal in turn two and was able to put my plan into effect.

From this point on, my battle plan worked to perfection. I was able to occupy every unit he had that could assault the building and whittle them down to where they would be no threat to my warriors. I threw everything I had into stopping anything that could really hurt me. I got rid of his Engine's burning alignment, seldom had to stop metal magic and had plenty of dice to do so.

In the last couple of turns I made up for early bad fortune. The first couple of turns I was failing every save, he was making a lot of saves, my attacks other than the first tower assault were poor. I think it was 4 times I hit with 5 attacks, needed 2s to wound and did 2 wounds.

But most important of all, they rolled abominably for the winds of magic every turn. I think 6 was the most dice they ever got. They had based their strategy around crushing me with metal magic and regrowing their units. They never got enough dice to do both and spent their dice on Throne, leaving no dice for Magic.

Late in the game my dice were much better. They more than made up for the earlier pathetic rolls.

What went wrong?
Well...these are nothing but nit-picking. My shooting was horrific. The cannon scattered every turn, it never hit the Slann that was its target and was again ineffectual....though it was pretty awesome in close combat.

I did not know the correct rules or might have played slightly different. For whatever reason I was thinking you could not occupy the tower if you killed everyone in it. Otherwise I might have assaulted the building with my Warriors early on.

As mentioned above, early in the game I was failing every save. The shaggoth failed the first 2 3+ saves, the dragon failed all 3 3+ saves he attempted, my 5+ ward never saved anyone from the Burning Alignment.

All in all, it was a highly entertaining game against my brothers.

Now, on to the big controversy. Strategy.

Let me preface this by saying this; one of the things that makes Warhammer go is that different people make different strategies work. My take on this is not "right" or "wrong", it is MINE. By the same toke, their strategy is not "right", it is not "wrong", it is THEIRS.

Their strategy would not work for me. My strategy would not work for them. Whatever else you take away from the following, THAT is the key principle.

In the Tower scenario, only one thing matters. Who has a model in the tower when the game ends. Nothing else matters. Who killed what? Does not matter. How many saves did I make? Irrelevant. Did I get off an epic charge? Who cares. Do I have a model in the tower and is the game over? Button made of win.

If the roles are reversed, I am going to throw everything I have at the tower. I know going in that if I have Skinks, Saurus Warriors, or even Temple Guard and am facing Chaos Warriors...with or without the 3+ armor save, 5+ ward save...that I am going to lose the vast majority of combats. I am going to lose many more models in EVERY combat.

Math-hammer time.
10 Temple Guard with Halberds v. 10 Chaos Warriors with hand weapon/shield and tzeentch.
Chaos attacks first; 21 attacks hitting on 3s, 14 hits. 7 wounds with a -1. He saves, I want to save base 3+ save, 4+ net, he takes 3.5 - 4 wounds per turn.

21 attacks back (assuming champions are alive). 10.5 hits. 3 - 4 wounds, I save 2 -3 with armor alone. So he may or may not do a wound in any given assault (by the way, after this game I am back to believing what I used to believe; Saurus cost too much for what they are).

So honestly, I am going to win over 90% of the times this combat takes place.

At the same time, take the Knights versus Temple Guard grind. I wore him down over the course of several turns and he wiped out my unit (with the assistance of the burning alignment).  There was one turn where I think I failed 3 saves (only to make my only ward save with that unit in the game).

THAT is the turn my strategy revolves around. I want the charge where I have the statistical outlier. 18 of my attacks hit, 12 of them wound, my opponent saves 2.

Is it likely to happen? No. But I think it is my BEST CHANCE. Burning alignment is still taking off one or 2 models a turn. Reinforcements are theoretically available to me. My opponent has to hope to hold on. I can do this with multiple units. My first one dies horribly after 2 or 3 assaults? I send in the next unit.

This strategy requires me to protect the units I plan to tag-team the tower. I sacrifice the Terradons, small Saurus blocks, and skink blocks to keep my Temple Guard units available to charge the building every turn until the game is over or my guys are all dead.

Conversely, if I take the strategy they adopted and plan to kill everything in the building with magic and the burning alignment, I am going to fire everything I have at it.

When they rolled low on magic, I thought they got distracted. Throne of Vines is nice...but it does nothing to whittle down the numbers in the tower. If I were trying their strategy, instead of casting throne I would have been max dice at Final Transmutation or Dwellers below every turn. (Or Comet of Cassandora if they had it). If I lose my Slann to a mis-cast it is bad...but not as bad as going a turn without attacking the unit in the building.

Every shot I can muster, no matter how unlikely, is going to be aimed at the building. The 10 skinks in the building next door are going to be pot-shotting the building, even knowing I need 7s or more and am unlikely to do a casualty. But every casualty I do is just one small nick of attrition that is irreplaceable.

As it was, from my standpoint they got distracted. Burning alignment was taking 1 or at most 2 warriors per turn. Since I had 20 of them, that meant they needed 10 - 18 turns to get the job done with burning alignment.

I never had a Metal spell affect that unit. Each turn they had other things they attempted. We disagreed after the game on whether that was the right move. They believe they made the correct move, I was far more worried about the metal spells that could quickly and seriously reduce the number of Warriors I had available to defend the tower.

So it felt like I I was not facing a concentrated assault against the building. To me things like the Throne, shooting at my Dragon/khorne warriors were distracting them from the most important point of contact.

The thing is...I am in complete agreement with them on one point. Regardless of whether you go the magic/burning alignment route or the assault/assault/assault route, once I got that block into the building they were very, very unlikely to ever move them out. I suspect I win that game 98% of the time.

The question before us is what is more likely to win those 2% of the games. So for your amusement, I present the two strategies we discussed and let you choose for yourself.

Their strategy was to do a couple wounds with burning alignment and try to get a few more each turn with either Final Transmutation or Dwellers Below.

This has the probability to do several wounds a turn. I think it has an excellent chance of being successful and, in my belief, is best supported by throwing as many shots as possible in support. The hope is to use Burning Alignment, shooting, and magic to do 4 - 5 wounds a turn, then assault with the Skink/Kroxigor unit when it has been whittled down to a handful of warriors.

Weaknesses are if you roll low for Burning Aligment, Winds of Magic, or cannot get a spell through or cannot get your shooting into position.

Conversely, the strategy I would probably adopt would be combining Burning Alignment with assaults. This would also rely on having a secondary target; killing the BSB.

The goal here is to win that one combat and have them fail the Leadership roll. It is unlikely to work. As we saw above, neither Saurus nor Temple Guard are going to do very many casualties in an average combat.

However, if you have played Warhammer for long, you have seen the untouchable unit of doom fluff their attacks and the sub-par unit roll unbelievably well. I have seen night goblins take out iron-breakers, for example.

I have also seen LD 9 Dwarves with a re-roll have 3 units run in one turn.

And that is what I am shooting for. I want to wear down the Chaos Warriors,  hoping that Burning Alignment and my Temple Guard will take down 2 to 3 Warriors per turn and, if I am lucky, win a combat and have them fluff the roll.

Once the Chaos Warriors get into the building, the game is going to be won by Chaos the vast majority of the time.

The question is what someone believes gives them the best chance to climb the mountain.

Both plans have merit. The magic approach will almost assuredly do more damage over the course of the game if allowed to happen. It then requires assaults that rely on finishing off a weakened unit or getting that failed Leadership test.

The assault plan wants to do more casualties in one turn and get more chances at failed Leadership tests. It requires getting lucky and winning assaults you are unlikely to win.

Again...neither is likely to happen. Both are long-shots. It just depends on the mind-set of the person playing it which works better for them.

Run the numbers and you will find what all three of us already know; no matter which way you go, once the Warriors take the building, it is all but game over. So the moral of the story is this; if you engage in the Tower scenario with the Warriors of Chaos, do everything you can to keep them from getting into the tower.

Send squads to stand between their units that can occupy it. You will die, but they will not be in the building. If they get in the building, throw absolutely everything you have at them every turn as soon as possible, as often as possible.

And if those things fail, distract them while you move the tower into your deployment zone and hope he does not notice....

Wednesday, May 18, 2011

Tavern Talk: Tournament play, comp, and what should be


Warhammer is first and foremost designed for a couple of friends to get together and have almost a co-operative experience rather than play a game. This basic concept is often poorly understood and that leads to a huge misunderstanding of what Games Workshop does with their rules sets.

This basic truth is easy to see if you simply read their material as it pervades every aspect of their printed material.  This is easy to see when in the main rule book it states, "You can simply use all the models in your collection, but most players...." (Island of Blood rulebook p. 2)

It is demonstrated by "the most important rule". It is demonstrated by the way battle report after battle report in their flagship magazine points out blatant changes/abuses of the rules in order to play a specific scenario they invent.

This truth also leads to problems when it comes to setting up tournaments. Since the books are designed almost more in terms of a co-operative endeavor than a true test of strategic and tactical skills, the rule set and various army books are full of exploitable holes.

One fine example would be the Dark Elf book. It has long been derided for its "over powered, under priced Pendant of Kaelith, Ring of Hotek, and Hydra" while others blast the Warriors of Chaos book for its "broken Infernal Puppet and H-cannon". Still other hate the Lizardman book for the talents granted a tricked out Slann while for others it is the trebuchets of the brettonians, war machines of the Dwarfs, Book of Hoeth of the High Elf army and so forth.


Virtually every army has exploitable options. This makes forming a balanced army difficult.

Consider the Wood Elf player who brings an army of Dryads, Glade Guard and Treekin, only to see them melt to the guy who brings 2 Hydras at the same point level. The Wood Elf player will be at a sever disadvantage and likely lose.

Many tournaments seek to proactively prevent this by making broad limitations such as "no double rares".

Fair enough. For many gamers, that is a preferred approach. They should have a right to game as they wish. So, however, should those who prefer to bring good units instead of poor units.

These limitations tend to have numerous and unfortunate side effects. For example, one tournament I attended in 7th edition had the "no special character, no dragons, max 6 levels of magic" rule. yet a local Lizardman player showed up with dual Engine of the Gods and a Slann who stole the opponents dice and stored them. Pity the poor Warriors of Chaos player who could not muster enough high strength attacks to deal with all that. And the Wood Elf player was completely hamstrung.

The set of restrictions created a problem.

8th edition tournament restrictions tend to have the same result. Some vocal players dislike magic so eliminate entirely the 6th spell from every lore along with making it so you can never use more than 12 power dice in an entire magic phase nor use the power scroll. Then they complain because death stars are too difficult to deal with.

The irony that the 6th lore spells are a powerful deterrent to death stars escapes them. So does the point that building a variety of army styles leads to minimizing the power of the big spell. Instead they remove a powerful strategy and thus create a powerful new archetype that fundamentally shifts the tournament metagame.

There is room for such modification but there should be more tournaments that actually follow the rules of the game.

I actually have looked at going to a large number of local tournaments but typically choose not to, and it is almost always because the comp restrictions remove my interest in playing.

I happen to like using Wulfrik, as just one example. Unfortunately, he is a 'special character' which almost every tournament specifically disallows. As soon as I see special characters are disallowed, my interest level plummets. The irony is I take him in maybe a quarter of the games I play.

By the same token, when I see "maximum 12 power dice in a magic phase" I am done with that tournament as well. If I am creative enough to build an army that finds ways to build my power dice that high it means I have sacrificed my capabilities in other departments to have a powerful magic phase. Having that strategy pre-emptively removed is something I simply do not find interesting.

As a result, I seldom play in tournaments. I would much rather have a game with my local group where I can take the models I want in the quantities I want and have a good game.

The funny thing is I often build armies that would benefit greatly from playing in a comped environment. With the High Elf army I have yet to take Teclis. With the beastmen I take an army that uses almost all core and no special characters. With the Dwarfs I do not take the Anvil of Doom or set up a gunline.

But I would rather play where my fellow players can take "all their toys" than play in an environment where I could not bring, say...two h-cannons for the Warriors of Chaos if the mood struck me.

I do understand where people are coming from who demand comp. Many people want to build armies susceptible to the 6th spells without needing to fear them, for example. Others want to build armies incapable of dealing with a double Abomination list. They want to build these armies and still have a chance to win. They believe copmp provides them with such a field. They have every right to play in that environment.

However, with few exceptions the existence of comp that I do not care for means my Warhammer playing will continue to be in the comfort of home. Or, more accurately, in my brother's garage.

Saturday, May 14, 2011

4k Warriors of Chaos versus 4k Skaven

As always, click on the pictures to expand them (and also let you see the stuff cut off by being to the right of what shows)

Lately I have been doing a lot of experimenting. After dozens of games with the Warriors of Chaos, I pretty much know their ins and outs. I like the way they play. I like playing with that army. But I also like to switch it up so I have had a couple games using dwarfs, a couple using High Elfs and even my debut appearance with the Beastmen.

Kev and I wanted to play a big game, and the only army I could do that large without proxying was back to the one I love best, the WoC. I do not mind proxying within reason...frankly, with our groups financial resources and time commitments, it is pretty much a must to keep the game going. But if I can play with or without it, I will go the one route almost every time.

This is mostly for me...so I can keep straight in my own mind which models are where as that determines my tactical options.I tend to forget stuff sometimes and it becomes problematic when I make key mistakes because I forgot which of my units I meant to do something with.

Well, the first time I put the list together, I centered it around Galrauch. I love dragons, but seldom used them in 7th edition as they tended to be pretty over powered. In 8th, I feel fine about using them as they are not nearly as strong (?).

Unfortunately, one of my old bugaboos came back to strike that plan down; modeling. I hate metal models with a passion. Almost impossible to glue together without pinning...which I have yet to successfully do. So I tried to magnetize the wing...and it fell off this morning. So I had to retool the list.

Changing it around to keep a dragon in cost me my beloved Dragon Ogres. On the other hand, I think it came up with a build much stronger than the one with Galrauch.

I knew kev would bring either the Ogres or Skaven. If the Ogres, then I would basically just keep everything within 6" of my BSB and try to keep him from getting impact hits on the charge. If he brought Skaven I would try to get my unit of Chaos Warriors into his H-pit Abomination along with the Shaggoth and hope, and try to stay away from the Doomwheel and Plague Furnace.

He brought the Skaven. then we rolled a classic; the Battle line. I have not played this set-up in 8th yet, so even though it is "old", it is kind of new, too...

I feinted with my set-up, planting some Marauder Horsemen on my extreme right flank. With their Vanguard move and their role as Fast Cavalry, they could get where I needed them when I needed them. Their entire job was to go after anything he had like the Warp Lightning Cannon (present), Jezzails (present), or miscellaneous weapon teams I did not want hitting my knight (present, present, present, present).


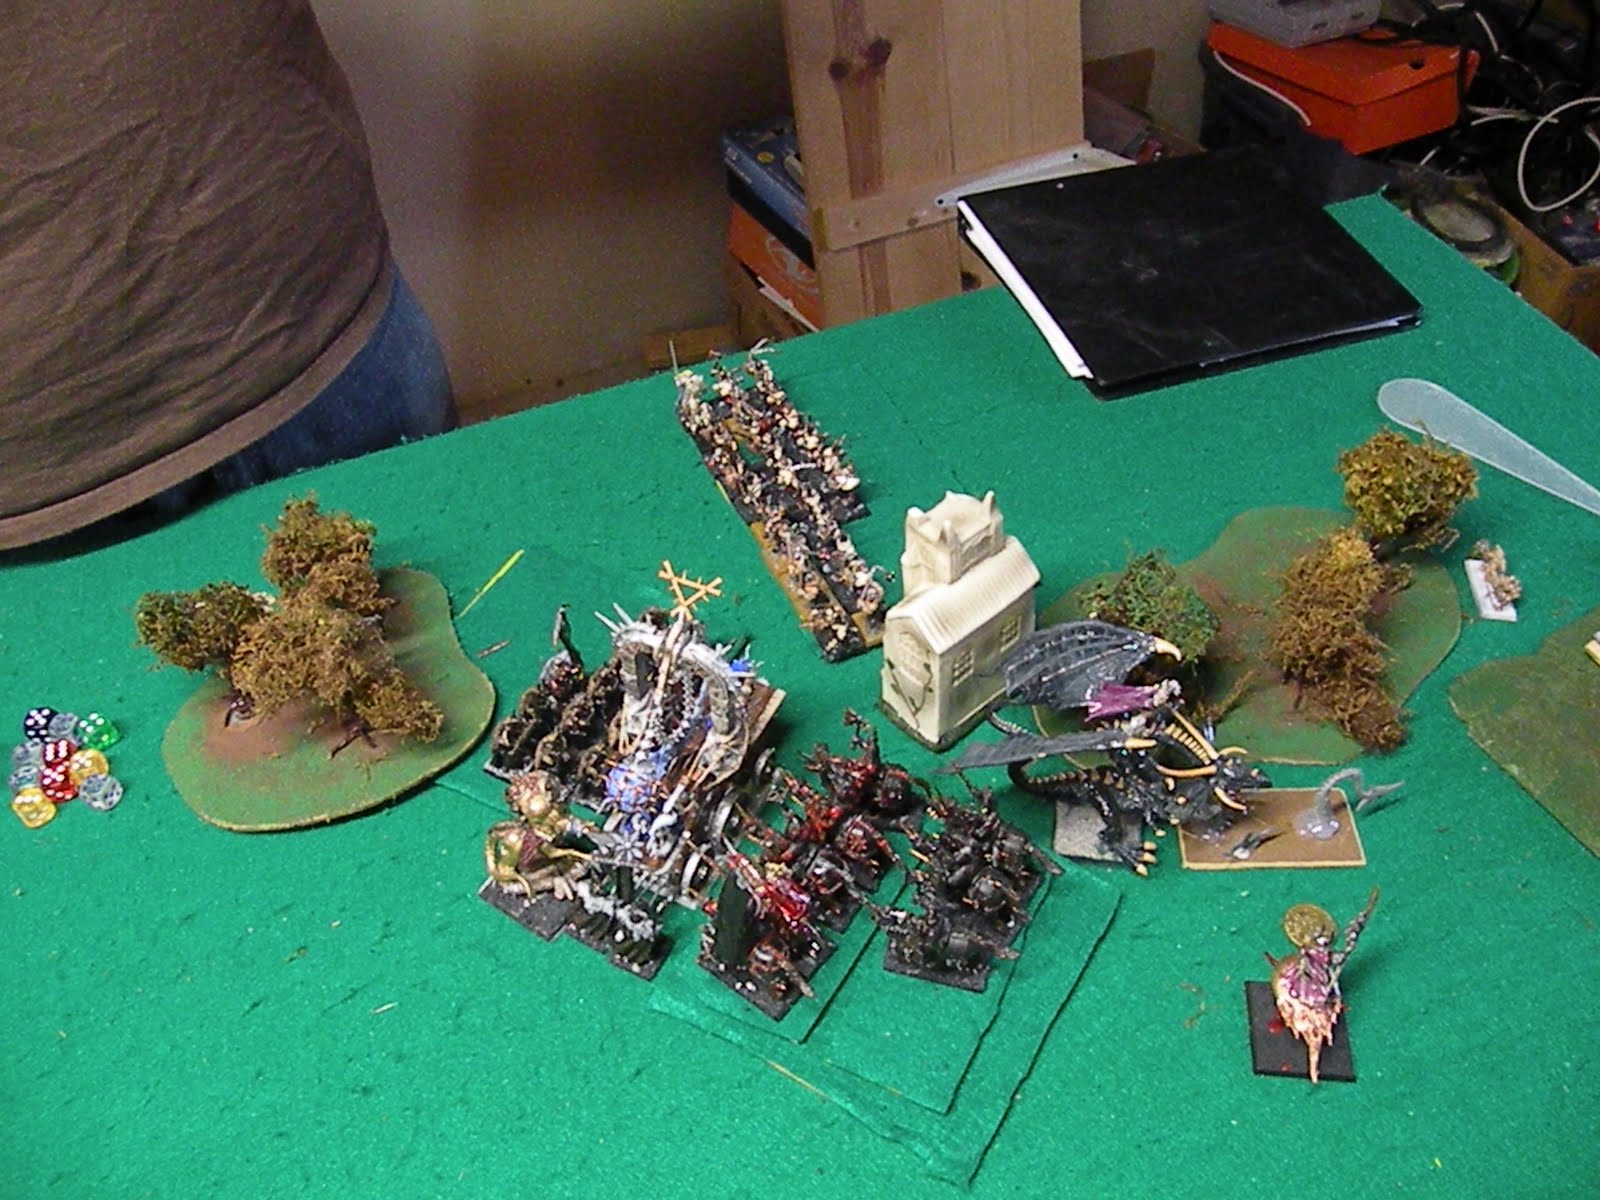
By the time we were done setting up he had the Doom Wheel on my extreme left, Jezzails on the right, and kind of spread across the field. I packed in the center. The plan was drive up the middle and, depending on how the battle was going, use a block of tzeentch-marked, hand weapon and shield Chaos Warriors to hold him up while my Knights did the heavy lifting.

Warriors of Chaos....ASSEMBLE
I won the role for first turn. This made me happy.

Warriors of Chaos Turn 1
Perception matters when playing Warhammer. For example, in my various games I have;
1) thrown everything I had at the Abomination, had it kill my character designed specifically to kill the HPA, finally killed it by focusing over 1k points on it...only to have it come back and kill my Shaggoth and a few other things. I fear the HPA
2) Had weapon team after weapon team remove my armor saves. I fear them.
3) Had Queek single-handed wreck a 10-man unit of Knights. I fear him,
4) Had the plague furnace wipe out everything it touches. I fear it.
5) Had the Doomwheel  do mass carnage and only be stopped by a lucky charge with my Knights. I fear it.

So my perception of the Skaven is their specials are unkillable, they do not let me have armor saves, and they are good at putting down the WoC.

So my goals were to keep him from shooting as much as possible, take every shot I could at his tough stuff with magic, and keep as much as possible stubborn.

My Marauder Horsemen thundered forward, one unit planting itself in front of the Jezzails, the other in front of his Warpfire Cannon. I then rolled 12 for power dice.

Usually first turn magic is not so helpful. In this case I had flown my dragon riding General/Lord Wizard up close to him hoping to get lucky and Infernal Gateway his Plague Furnace away. But then I remember the damage Queek has done...Infernal on his Storm Vermin.

I roll 6 dice, do not get irresistible, and he chooses to feedback scroll it. I get 11 hits,  strength 7. Oh, I wish those were reversed...anyhow, I put down 9 Storm Vermin. This is already one of the 2 or 3 best magic phases I have ever had. 

I then get off Pandemonium, his attempt to Dispel fails. I then use my last dice for Flickering Fire at the Warp Lightning Cannon, he again rolls low and I wound it 3 times. Wow. I got everything off. That is the best magic phase I have ever had. And it will only get better.

Time for shooting. I often forget about my throwing axes. I prefer them to javelins because, though their range is shorter, their strength is higher. When I hit I want to wound. And hit I do. All 5 hit the Warp Lightning cannon. Only 1 wound sticks....but that, combined with the Flickering Fire, is enough to get rid of the Warp Lightning Cannon. I do a happy dance.

On the right my shooting is equally good as I hit the Jezzails 4 times, do 2 wounds and he flees. Lots of shooting I will NOT be facing in turn one. I do not even care when the H-cannon scatters wide of anyone.

We both agree this was a tremendously successful turn for me.

Skaven Turn 1
His doom wheel careens towards me a whopping 14". Feeling jealous, the HPA manages a 13" move which crashes into my Marauder Horsemen. Some Storm Vermin come along for fun.

Queek charges my Marauder Horsemen. I am about 4" from him. I can flee, be within range of my BSB, recover and shoot next turn. For one of the few times I can recall, instead of standing, I flee. And my plan falls apart when I flee 7", he charges 11". Oops.

Oh, well, they cost 71 points, they got rid of his deadly 90 point Warp Fire Cannon. I will take that trade. And now Queek is where I want him...not charging me.

His Weapon team with the giant propeller tries to charge the Shaggoth. I am not familiar with that weapon...I thought it was another shooter, but I guess it would have done massive damage. Failed charge is good for me. the jezzails rally. He makes a general advance, time for magic.

He tries wither. I dither about it for a while, counting and recounting his power dice and my dispel dice. With a Dispel Scroll in my back pocket, I stop it.

He attempts Cracks Call...doubles! Miscast! I use Infernal Puppet to modify it to a dimensional cascade, his level 4 disappears, and to add insult to injury...I dispel the spell.

His doomwheel then mis-fires and rolls 15". That takes it off the table. We cannot find rule and decide to make it same as pursuing off table. He is having horrific luck so far...though the 14", 13" and 15" moves on 3d6 kind of tell you he is rolling high...just at the wrong times.

So as you can tell, we were uncertain about one rule. I was dead wrong about another. I had in the back of my head you could not shoot on the turn you garrison a building. You can. His Globadiers unleashed on my Dragon-riding Wizard. Fortunately, of his 13 globes, only 1 wound got through, and that to my Dragon. But it was an unexpected, terrifying wound.

My T6 meant nothing, the ward on my rider was pointless. His globes could put me down with ease.

In close combat, his HPA impact kills 1 Marauder Horsemen, his Assassin another, then he rolls Avalanche of fists, gets 12 hits, 9 actually hit (needing 4s), 6 wound, bye-bye all my fast cavalry in one turn. He is actually winning at this point, 142 points to 90.

Warriors of Chaos Turn 2
I have lots of choices. I am the Warriors of Chaos...there is really only one answer. Charge! This turn I remember to test leadership for my cannon. He fails. And rampages....3". Triple ones. I roll an unbelievable number of those.

I also manage just 3 power dice.I channel another.

As I charge, he chooses to flee with his weapon teams. My Knights fly through and redirect onto his storm vermin. I combo-charge his Queek unit and am uncertain what to do with the dragon. I had declared a charge on that unit, but by choosing a different order kept him out of the combat, I should have flown him away from the globes. I erred.

I get Infernal off with irresistible on the Globadiers. I again roll 11 hits, this time at S8.; 9 Globadiers are no longer with us. I feel better.

My knights in his clan rats on the left do what Knights do, he dies in droves, though he does kill one Knight. He flees, I chase. He runs 6", I chase....5". Grr.

My other Knights and Chaos Warriors also do well. I challenge with my unit champ; Queek fails to kill him when I parry save, everyone else dies, Queek flees, I pursue, and a feared model is no longer with us.

At this point I am feeling pretty good. He is down his general, his BSB, rats are fleeing, and I control the center of the field.

Then again, he still has the Plague Furnace, Doom Wheel, and HPA...all of which I struggle to wound.

Skaven turn 2
I knew I had given my flank with the Chaos Warriors. I hoped to run further. Then again...with a 3+ armors, 5+ ward, I should last a while. I just want to keep his Furnace busy while I wipe out everything else.

His fleeing rats leave the table, the Furnace charges into the Warriors, slaves combo charge me, the Doomwheel moves a more modest amount.

He gets a big number for Withering on the Warriors. I do not dare chance it, I burn my scroll. He then mis-casts with the seer thanks to Pandemonium, I modify it to reduce levels, he is now a level 0. Magic is ruling for me.

The Doomwheel fires and I lose a Chaos Warrior. Well, that is not a terrible outcome. It could have been much worse. For two turns I have lost just one Chaos Warrior total to his Doomwheel.


Well, he gets 6 Impact hits, 5 wound, and my vaunted armor save/ward save combo saves....zero. Zip. Nada.

*Sigh*. I finally get saves...good saves...and whiff on them all. Then his shroud attack wounds 6 more, this time I save....1. 10 Warriors down before I have lifted a weapon.

But the Warriors step up to the plate. I kill 8 of his slaves. None of his plague monks. His slaves get 1 wound through, but this time I save it. then his wrecker ball of doom gets 10 S5 hits off, 7 of them wound, and I save just 3.

Well now. I had 21 Warriors about 30 seconds ago. Now I have 3. That 3+/5+ combo is not so good, is it then?

My BSB being right there lets me stay, being stubborn and all. So, uh...some good news, I guess.

Meanwhile, he had also charged my knights with his rats. I allocate one attack to his unit champ, kill it. Then I do 8 more wounds. The horses kill 4 more. His 20 attacks hit 13 times, wound 7, and I save 5. So yeah...3 knights dead already. Out of 5. He flees, I overrun.

Warriors of Chaos Turn 3
I had about as good of turn one as could be believed, beginning to end. Then his plague furnace and clan rats turned it around. I have a badly damaged unit of knights, an all but dead unit of warriors...who I had counted on holding him up for three or four turns...I was reeling.

It gets even worse when the H-cannon fails his test again and pounds forward about 6". I just have not had good success with that thing.

My Knights, being frenzied, and my Warriors, being dead, combined to now give me a path to attack his Plague Furnace. I had really mixed emotions about this. The furnace is unbreakable, does massive casualties throughout combat, and I have no faith in my ability to take it down no matter how much I throw at it.

Ah, smurf...charge. In go the knights. Shaggoth flanks the slaves. Chaos Warriors flank the slaves. They are going down. The dragon rider charges his last globadier. Might as well.

I remember to roll Wulfrik and his 47 marauders on, they come behind his recovered jezzails.


I roll 3 for power dice again. I whiff on Infernal. I cast Purple Sun towards his Doomwheel but it falls short by 24". Well...it was a long shot, but I had little else to do.

My Sorcerer lord takes care of business and the Globadier heads for the bone pile.

His shroud attack does what it does...kills 2 knights, a chaos warrior and a slave. My BSB kills the Seer on the bell. I am happy.

The knights do 7 wounds. The Chaos Warriors, with little left to attack, swing at the Furnace and manage a wound. Those facing the slaves then kill 4. His Plague monks manage 7 wounds and this time my armor works great, saving 6 of them and my ward the 7th.

The furnace then whacks the warriors thrice, I save none, many more dead.

His slaves explode, killing one of the fresh block of warriors and 2 plague monks.

Skaven turn 3
He charges the Shaggoth with some warlord guy. His clan rats charge the H-cannon. His HPA slams into my general on a dragon.  And then his feared shooting phase opens up.

His doomwheel is out of range, but the jezzails kill a Chaos Warrior. then his weapons teams with the templates each kill 9 Marauders. 18 guys killed in a heartbeat. *GULP*

I am really not liking this right now. His bell could kill my knights, warriors, and other warriors on its own. A 2 or 300 point model is tying up well over 1000. His 230ish point A-bomb is something I expect to kill my 700 point Dragon/Wizard in a couple of turns. I am unsure how the rats/cannon combat will go. And I have nothing left to deal with his doomwheel. I cannot withstand another turn of that lethal shooting with my Marauders.

On the other hand, I have a clear lead at this point. I have the situations I try to set up; I have vastly more force involved in 2 of the 3 combats from a points standpoint. I have an unbreakable unit hopefully holding up another unit for a while. And I have a clear magic advantage.

Close combat is a little better. His assassin and clan rats cannot wound the h-cannon. The cannon kills a couple rats.

His HPA only gets 2 impact hits, 1 wounds, and I ward save that. The Talisman of Preservation/mark of tzeentch combination to give me a 3+ ward is going to be HUGE. I get a wound through with my wizard, even though I get just 1 hit. Wow.

He then gets the flailing fist result, and rolls a whopping 13 attacks. 5 wound....and I ward save all of them. The Dragon hits all 6 times, 4 of them wound, he regenerates two. In just one turn I put 3 wounds on him. I start to feel hope.

The plague furnace kills another knight and warrior with its shroud attack. His Warlord wounds the Shaggoth 3 times, but I somehow save 2. Saves aplenty.

My BSB then wounds the Furnace 2 more times, the knights kill 11 plague monks, my Chaos Warriors kill the last 4 0plague monks, the Shaggoth wounds the Bell, and then I thunderstomp his warlord, but he saves one of the two wounds. The Furnace then hits the big block of warriors 8 times, I take 6 wounds and save just 3.

Warriors of Chaos Turn 4

I move my Sorcerer on disc towards the HPA. I have a vague idea of using the flaming attack on the HPA to stop the regeneration.

My Marauders charge the jezzails who flee but are over-run and I hit his rat ogre thing which dies easily.

I then get Infernal off with irresistible. I do 10 S10 hits. I wound him 9 times. This will be it for the HPA...until he regens 7 of them! He still has 1 wound left. I just...can...not...kill...that...stupid...thing.

The great part is I modify the mis-cast to a 7. He is hit by the template. He is wounded by the template. Do I even need to mention he regenerates it? Stupid unbreakable, unkillable beast.

Meanwhile, the H-cannon decides to get rid of his annoying assassin but can only wound it once, losing a crewman in return.

The Sorcerer then wounds the HPA twice and...wonder of wonders...IT DIES! YES! Victory is mine! There is n stopping me now. It is gone and...what? He rolled a 6? It comes back...with 2 wounds...an inch away and ready to get more impact hits since he gets next turn...NOOOOOOOOOOOOOOOOOOOOOO

There is no stopping that stupid thing.

The bell wounds my Shaggoth. He has no plague monks left. My BSB wounds the Bell twice and the Knights finish it off. Shaggy kills his warlord.

Take that, Skaven rats!

Skaven turn 4
Skaven turn 4
The HPA charges back at my wizard on the dragon. His Doomwheel kills the last Chaos Warrior of my big block with its shooting.

I save his only impact hit. I which at him. He gets the "Avalanche of flesh" attack. Does the HPA ever do a reasonable number of attacks? I fail the I roll but ward it. He hits 7 more times, 6 of which wound, 5 of which I save. The Dragon then puts him down again, doing the 2 necessary wounds.

And he...comes back. As Rat Swarms, this time. Much better.

His Assassin kills another crewman. The Cannon kills the assassin.


Warriors of Chaos Turn 5

Okay,  at this point I am feeling pretty good. His doom wheel is not as tough as the Furnace, which I took down. Sure, I had to use 10 knights, an exalted hero, a shaggoth, some magic, and 31 Chaos Warriors...but I took it down.

I mean, sure, I was throwing as many as 23 S5, 49 S4, and 5 S8 attacks at it for multiple turns...but I took it down. Sure, I lost over 20 chaos warriors and a handful of knights...but I took it down. Sure, I....ah, smurf, who am I kidding. I am not confident in my ability to take down the Doomwheel in the next 2 turns.

At the same time...he cannot do near enough damage. I have wiped out almost his entire army.

The Dragon decided to leave the swarms for the knights, flew over them at his weapon team...which fled. I redirected onto his clan rats. The Knights charge the swarm.

And here comes the whiff factor. The BSB puts 4 wounds on the swarms...but the knights under perform. Completely. Four wounds. Wow, really? Fortunately, the horses do just as much, 4 more wounds, the swarm melts.

The cannon kills another storm vermin after he saves half the wounds.

Now we will see what a Chaos Sorcerer on a Chaos Dragon can do against ranked up Clan Rats. This is the type of situation I typically avoid...I like to combo charge and bring overwhelming force. I do not like things that might be close combats or risking 695 point models without being pretty sure I have the advantage.

However, the game kind of got out of hand a bit. He has done a lot of damage, but it has been spread out. So he has very few points at this juncture. So even if I get hammered, it makes it arguably a better game...and if not, it does not really matter a lot.

Well, all three of the Wizards attacks kill. He strikes before the dragon, but only wounds 1 time, which I duly save. Then the Dragon kills 5 with his breath, 3 with base attacks and 4 with his thunderstomp.

Totally epic. I did a whopping 14 casualties in one round...he cannot stand, I pursue off table, his non-fleeing weapon team breaks. I am duly impressed by the power of the dragon.

Skaven Turn 5
He fails to rally anything, his weapon teams flee off the field.

Shooting will be bad; Shaggy is the closest to his doomwheel, and is immune to the effects,. He tries to restrain. Fails. He fires...or rather, mis-fires. He takes 6 S6 hits. His doomwheel blows itself up.

His last weapon team mis-fires...blows up.

He does manage to put a wound on the H-cannon, though, so at least that went right.

Warriors of Chaos Turn 6
My Knights, being frenzied, must charge. The Scree slope forces dangerous terrain tests. My BSB duly rolls a 1, I do not ward save it. The others all pass.

He kills a Storm Vermin, in a challenge my champ kills his, my other knights kill 2 more, he kill the last Chaos Dwarf, then the cannon kills 4 more. He breaks, runs, flees table.

Skaven Turn 6


Conclusion
Well then. On the one hand, I am really not fond of tabling my opponent. On the other hand, I think Kev takes it better than anyone. And he thought it was an enjoyable game, so I am not going to dwell on that aspect too much.

What went right?

 Well, first off, my plan worked beautifully. His force ended up being split into distinct elements whereas mine was almost all centered and working in concert. As a result, I had 2-1/2 - 1 points advantages at almost every point of contact. This spread my casualties out very well to where I lost just three units despite taking dozens of casualties. Meanwhile, I got rid of some dangerous guys without taking much damage. Queek, I am looking at you here.

Second, I played very well. I can count on one hand the number of mistakes I made: forgot to use the warshrine on turn 1 (minor, not really relevant), forgot to roll LD test for the Cannon on turn one and to roll for Wulfrik on turn 3. I was able to minimize his shooting which let me get into hand to hand before he could whittle me down to manageable sizes.

Third, I had a fair amount of good fortune with lots of irresistible without being harmed by mis-casts, whereas his mis-casts cost him his level 4 and level 2 wizards. I also made a pretty fair number of saves. Of course, that meant he had a lot of attempts to wound me...but that is kind of the point of playing an army based around good saves. To make them. I am often disappointed when I either do not get to attempt saves or fail abnormally large amounts. This game I made a lot of saves and I enjoy that.

Fourth, he had some timely very bad fortune...like his low impact hits, his weapons teams mis-firing on command and his being struck repeatedly by miscasts that were devastating.

Regardless, this was an extremely entertaining game. In retrospect, it was a demolition beginning to end...but for about 4 turns it felt like I was fighting uphill. We had epic, grinding combats that lasted multiple turns. We had crushing charges and stellar defenses.

One great moment was when I smurf-slapped his HPA with 10 S10 hits and laughingly said, "You only need to regen 7 to survive" only to see him do just that. What a great, memorable moment.

Or seeing said A-bomb come back with wounds once and then again as a swarm. It began to feel like I would never be rid of that thing. I just did not know how weak swarms are.

Which leads me to another point. I often point out that person x or y is a better player than I am. Part of that has to do with research.

I don't.

I cannot tell you how many times in the game I had to ask wounds, strength, abilities, etc. of the various Skaven rats. I had no idea they even had a close combat weapon team. As he pointed out, the team had a giant propeller blade...I just thought it was another gun of some sort.

I also had no comprehension of the sheer destructive power of the template guys who nearly wrecked my Marauder horde.

Yet some guys in the group know the 'enemy army" nearly as well as they know their own. This is a valuable skill as it allows you to dictate who you want to fight against who, and when you want them to do so.

Looking back, I should have had everyone attacking the Bell, not the Monks (or Furnace...I actually think it was a screaming bell, not a plague furnace...) from turn one. But thinking I could not touch it, I let it live much too long. Once I got around to attacking it, I killed it in relatively short order. Not knowing the Skaven book very well altered in-game decisions.

So studying the opponent is a valuable tool for improving play. Not knowing them is a handicap. Though not necessarily a game-breaking one. It just makes it a bit tougher.


Overall, this was a very, very entertaining game. I was on pins and needles for 4+ turns....which in a 4k game means for about 5 hours. Great game, great time, thanks for the match, Kev.

Only one thing left to do; Survivor group photo